Corona Arch Time Lapse

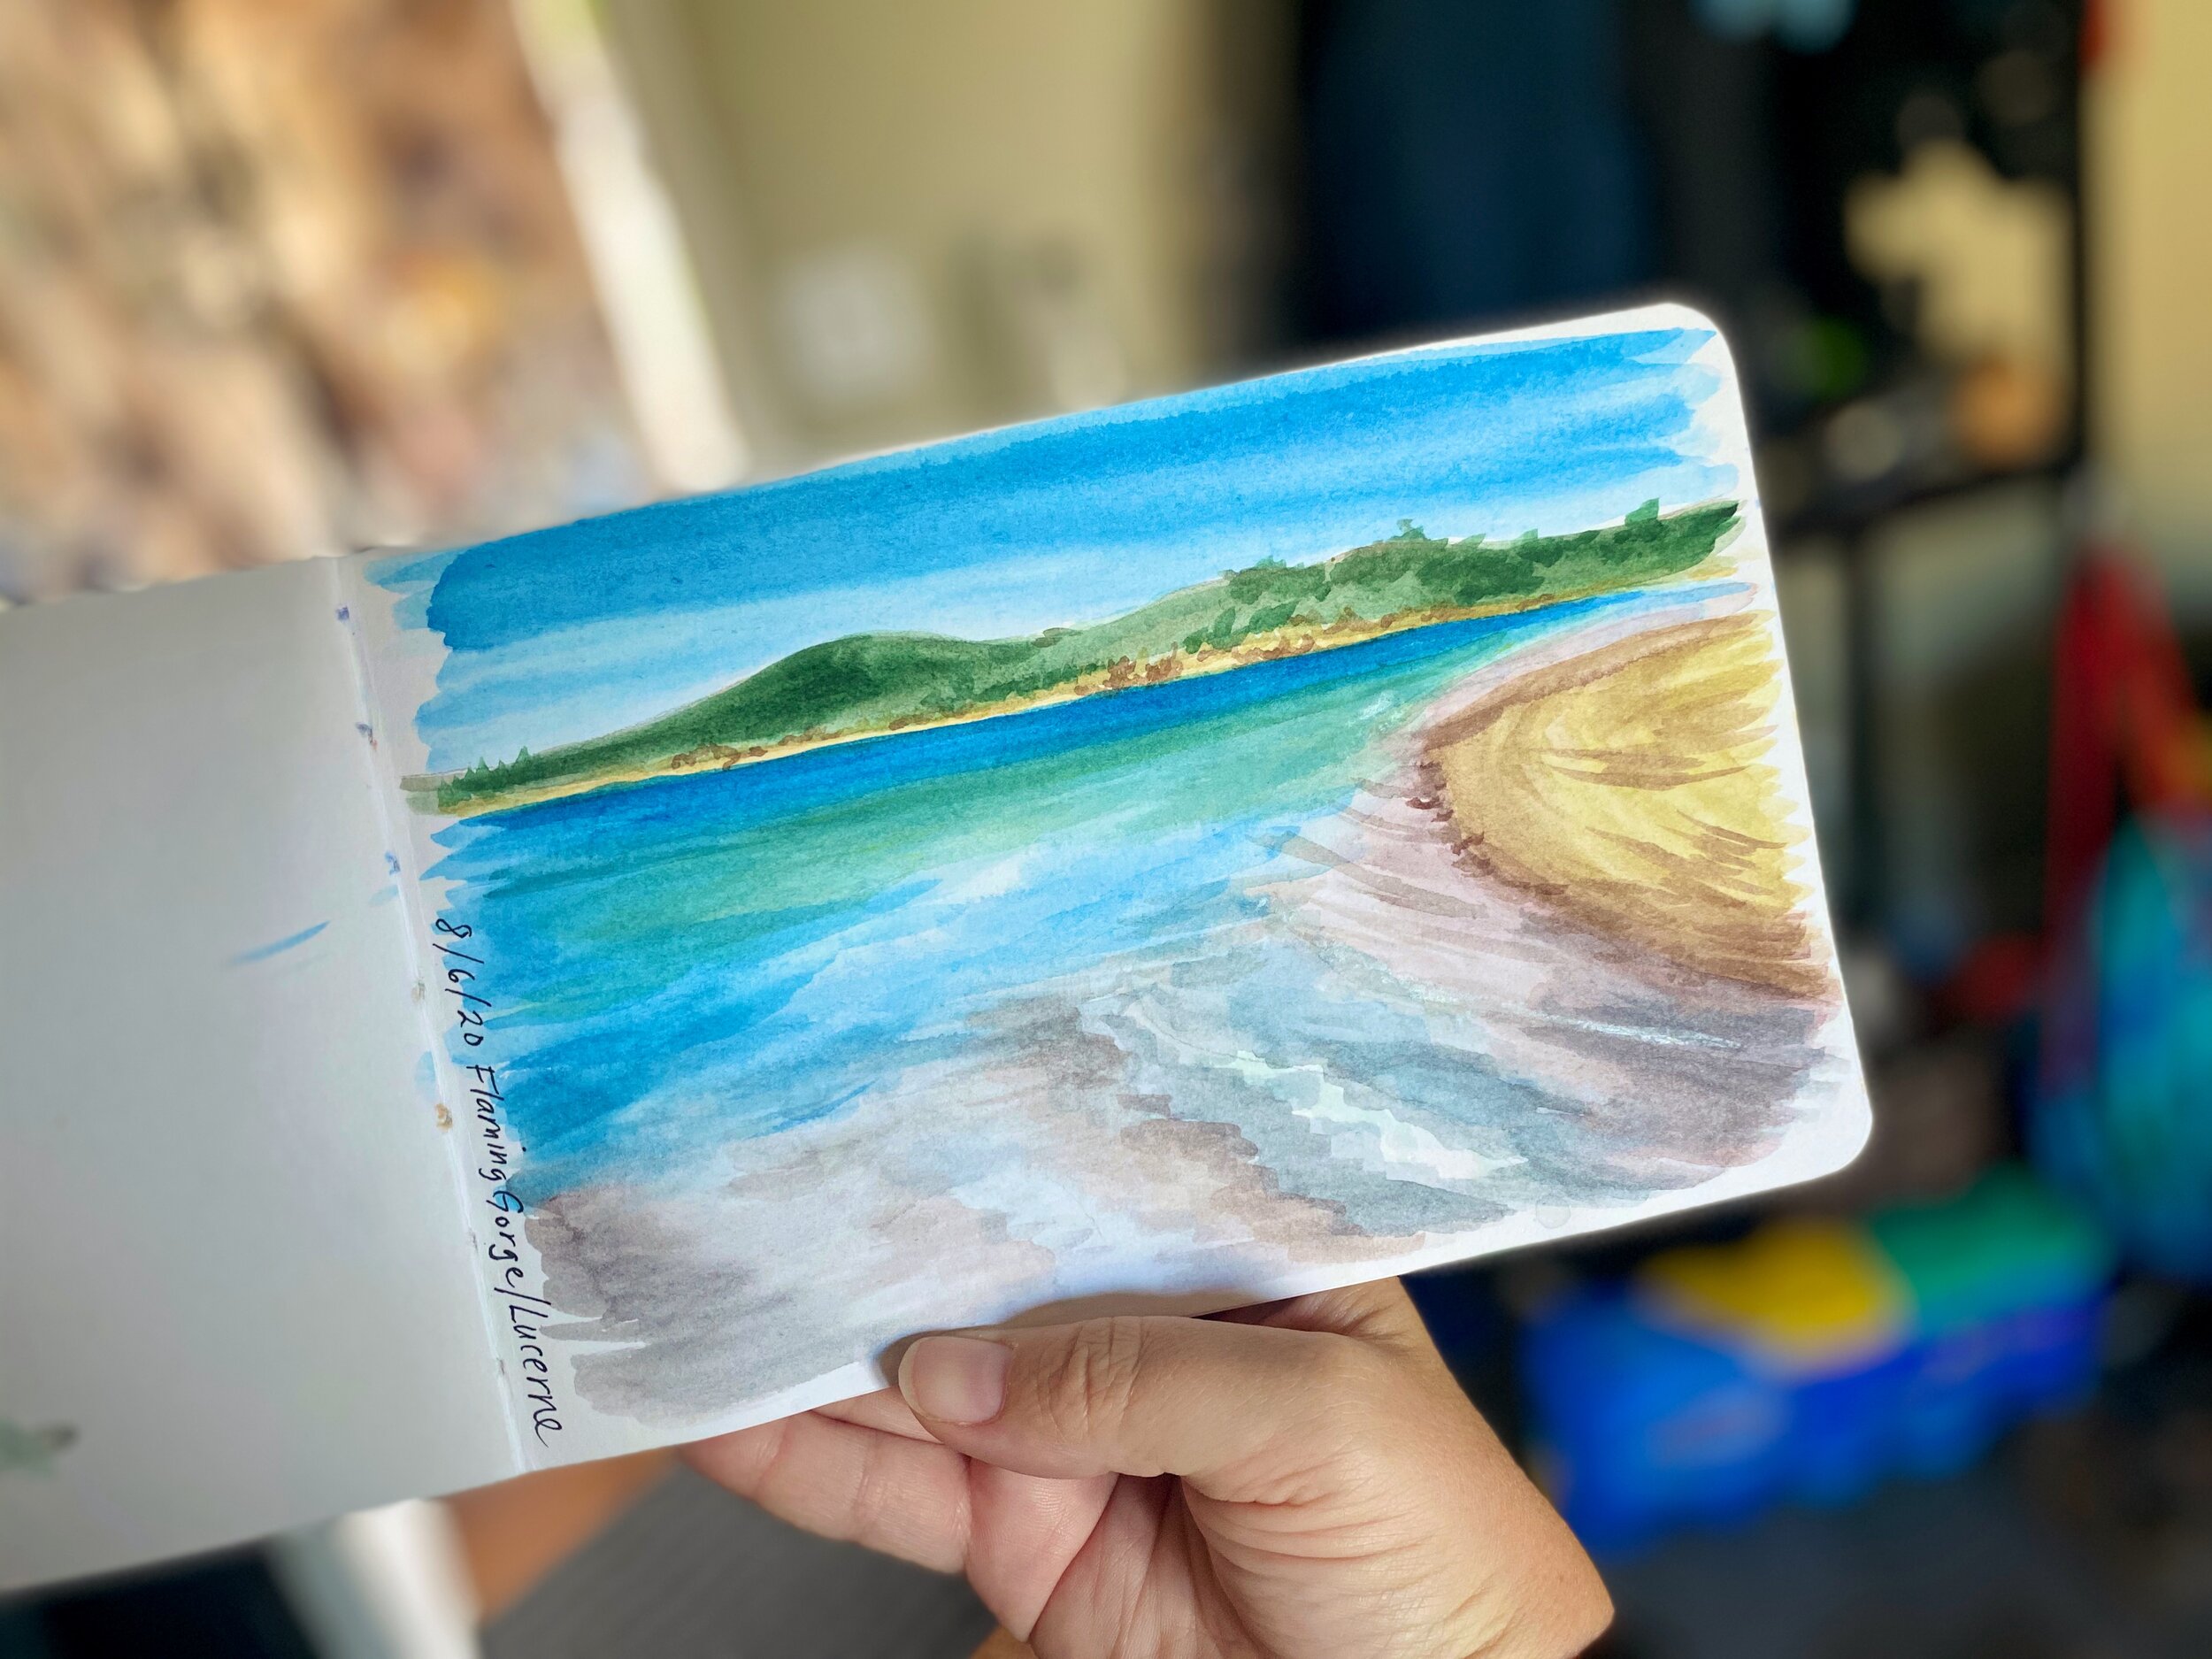
I had a scrap piece of watercolor paper staring at me yesterday and my fingers were itching to paint a starry sky. I have been to Arches National park twice and neither time was I able to explore Corona Arch, which is just outside the park. Maybe next spring??

Alex Tebow Designs - Watercolor Corona Arch

Time lapse video of a watercolor of Corona Arch near Moab, UT. Materials: Daniel Smith Watercolor Paints Pocket Palette: https://art-toolkit.com/products/pal...

I was really happy with how it turned out and I realized I was totally channeling another artist I follow; Nikki Frumkin. She paints beautiful landscapes in the PNW. Go check her out: Drawn to High Places. Nikki, you really need to come and explore southern Utah. The contrast of the red and orange rocks is so amazing against a starry sky with blues and purples.

Alex Tebow Designs - Corona Arch Watercolor

I’m hoping to have a handful of stickers available of my paintings of beautiful spots in Utah’s public lands, so say tuned!!

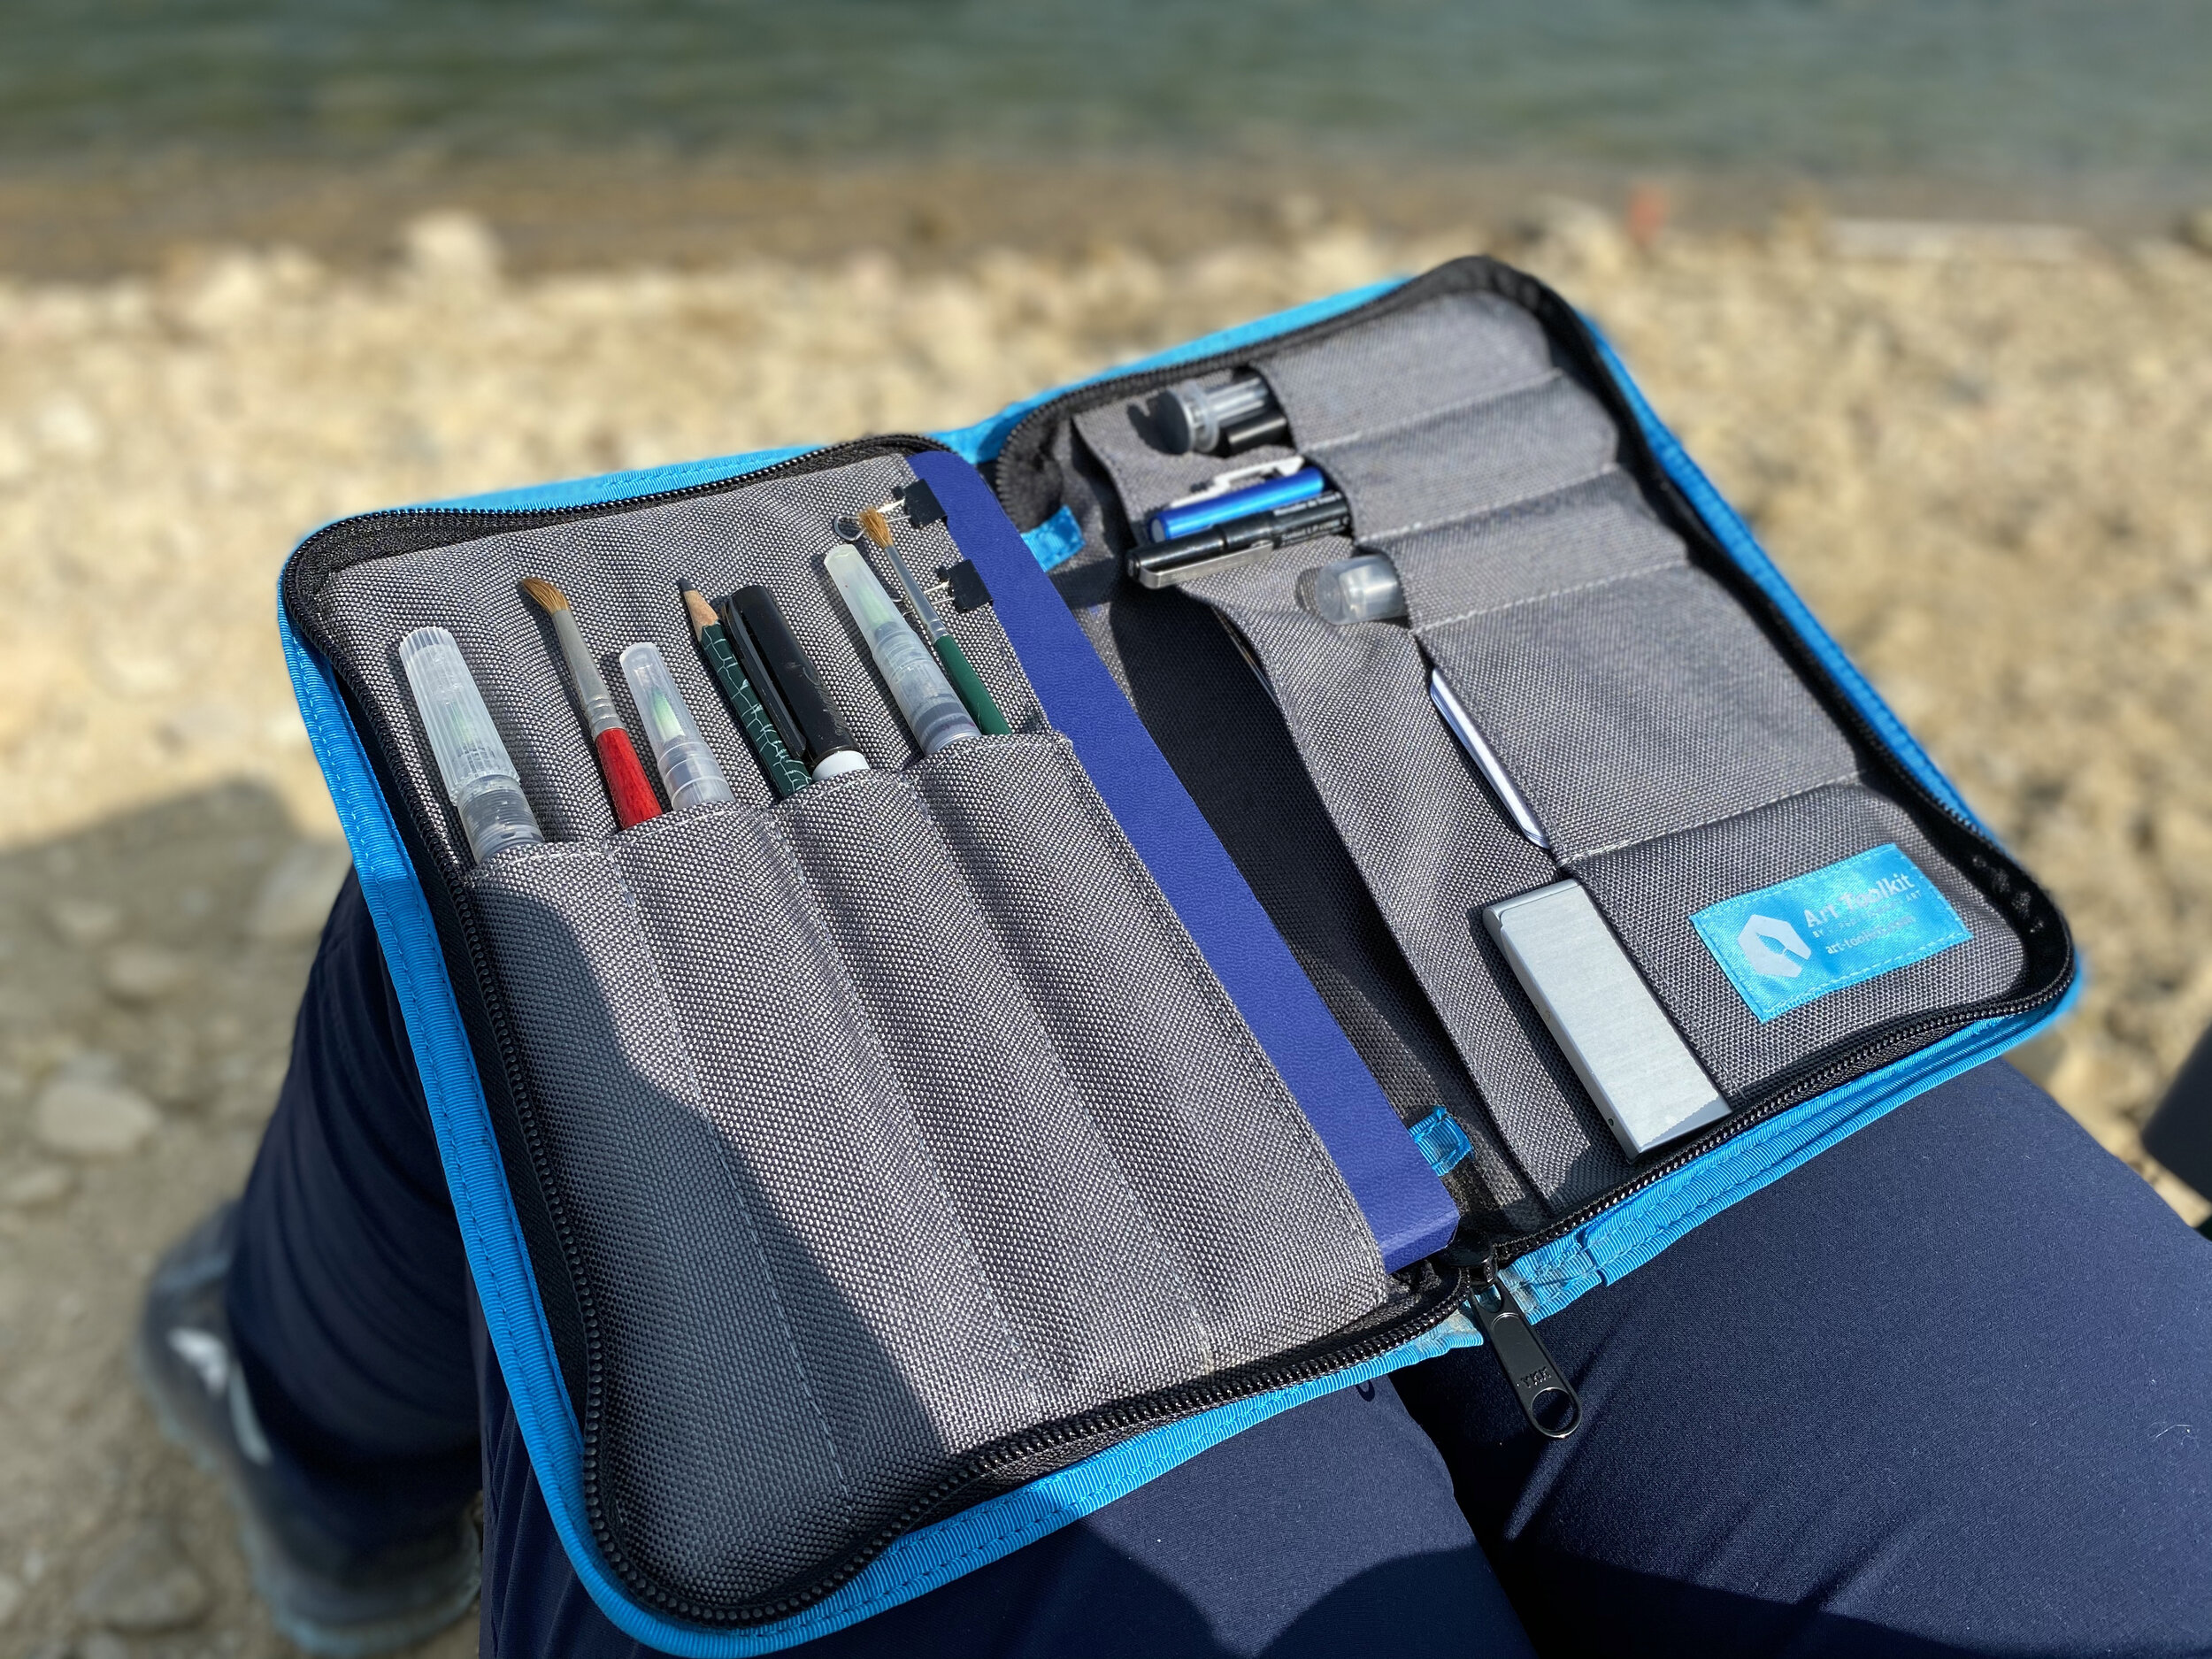
For anyone interested, here are the materials I used (most of these are affiliate links):

Daniel Smith Watercolor Paints
Pocket Palette from Expeditionary Art
Trekell Watercolor Brushes
daVinci Travel Watercolor Brushes
Grumbacher Masking Fluid
Fluid Cold Press Watercolor Paper
Faber-Castell Pitt Brush Pens

Plein Air Painting

More than a year ago I bought myself an Art Toolkit and this summer I was finally able to use it. In mid-July we hit up one of our favorite fishing spots in the high Uinta Mountains and the reflection in the water was just beautiful, so I gave it a go. It turned out much better than I expected. The Uintas are a place we go to escape the heat of the Salt Lake Valley in the summer. We’ll bring a lunch and spend a whole day out there; lounging, fishing, painting, and enjoying the quiet with no cell service.

Pass Lake, Uinta Mountains, UT

Pass Lake, Uinta Mountains, UT

Alex Tebow Designs - Pass Lake, Uinta Mountains Painting

Since then I’ve used my Art Toolkit a few times on some of our summer travels and even in my friend’s backyard.

Split Mountain Campground, Green River, Dinosaur National Monument, UT

Split Mountain Campground, Green River, Dinosaur National Monument, UT

This was such a wonderful little spot to spend an afternoon. We explored some of the Utah side of Dinosaur National Monument, but we had no idea what there was to see other than a museum about dinosaurs. We found some day-use parking at the Split Mountain Campground and we thoroughly enjoyed this beautiful spot. My husband and my oldest son did some fly fishing while my youngest and I chilled in the shade painting and building a sand castle. I cannot wait to get back there someday.

Alex Tebow Designs - Flaming Gorge
Lucerne Valley Beach, Flaming Gorge National Recreation Area, UT

Lucerne Valley Beach, Flaming Gorge National Recreation Area, UT

Fishing with my son at a local pond

Fishing with my son at a local pond

I was reluctant to share this painting when I took my son fishing one early morning before it got hot. I’m actually not happy with it. I had a plan for the water and then a bunch of ducks kept swimming by and made me change it and before I knew it, the water was a mess. Oh well. It was a learning experience. I did go back over the trees with black ink to flush out some of the shapes and I was a little happier with it. But still not happy about the water.

Lone Peak, Wasatch Mountains, UT, view from my friend’s backyard

Lone Peak, Wasatch Mountains, UT, view from my friend’s backyard

The Art Toolkit is really thought-out and obviously curated by an artist. It comes decked out with all of the little essentials you’d need for some plein air watercolor painting. It comes with a water brush, pencil, waterproof pen, a tiny squirt bottle, a syringe for refilling the water brush, a little, plastic ruler, two tiny binder clips, and a notebook of watercolor paper that fits perfectly in the big pocket. Lastly, you can choose from a variety of options for the Pocket Pallete

Alex Tebow Designs - Art ToolKit

I have since replaced the pen with a couple new ones since I wore out the one that came with it. I have added a second Pocket Palette to my kit; one with warm colors, the other with cool colors. I added a couple more water brushes and I keep a few business cards in one of the pockets. Sometimes I can bring a cup of water with me, so I keep a couple of my favorite regular brushes in there. I never would’ve thought of the little binder clips that come with it, but I use them each and every time I paint.

I really hope to fill up the book that came with the kit. It brings me so much joy to be able to capture a little moment when I see a beautiful landscape.

Strawberry Reservoir, UT

Strawberry Reservoir, UT

Backpacking: American Fork Canyon, Silver Lake

I backpacked for the first time when I was about 18 in northern California and I didn’t go backpacking again until last month; so 24 years later. My oldest son was quite literally hooked on fishing a few years ago thanks to YouTube and he wanted to add backpacking to his repertoire and try some fishing in more remote lakes. He really wanted to hit up the Uinta Mountain Wilderness, but I didn’t want to go quite that far from home for his first trip. There are a few affiliate links in this post. Shopping through them earns me a few cents and it helps me pay for this outdoor stuff with my kids, thanks!

If you would have asked me to go backpacking about 10 years ago, I would have told you I was too old for it… seriously. Why is it different in my 40s? Maybe because I have a kid who shows enthusiasm for it and I want to share it with him? Maybe because I’m in better shape physically now than I was in my 30s? I dunno yet. I’ll go on a few more trips and see if I can figure it out.

I did a little research on fun places to backpack along the Wasatch Front and reached out to a few friends who are frequent backpackers and got a good list of recommendations. We settled on a one-night trek up to Silver Lake in American Fork Canyon, which was a little less than an hour from home.

On the off chance that we did this one trip and we both HATED backpacking, I tried to buy gear as cheaply as possible. I bought a used REI Tarn 65L kid’s pack from a friend and I bought myself a Kelty Redwing 50L pack on clearance. My mom gifted me a 2-person backpacking tent for my birthday and we started to figure out what else we were going to need.

My son watched a bunch of backpacking videos on YouTube and declared that we needed a $180 backpacking stove, so I bought the MSR Pocket Rocket for $45 from Scheels. He wanted $200 trekking poles too, so he got a broken pair from Cascade Mountain Tech that we got at Costco a few years ago. They are duct taped to his perfect length. Through a discount from a friend, I ordered two Klymit insulated sleeping pads because I’m an utter wimp if I have to sleep in cold weather. Through that same discount, I splurged on a men’s Nemo down sleeping bag for myself because I’m a side-sleeper and larger then your average hiker. I hate mummy bags and most women’s sleeping bags are too small for me. I found a kid’s backpacking sleeping bag for my son from the REI Garage. We already had good hiking boots and trekking poles for me. We did some research on a recommended water filter and settled on the Sawyer Mini along with a couple of Camelbak Chute water bottles that we already had.

We went midweek to avoids crowds and wanted to leave in the morning, but we didn’t get there until lunchtime. It was hot too. AllTrails said it was 4.7 miles roundtrip, but my Apple Watch clocked us at a smidge under 3 miles one-way. The first half of the hike was in the shade in a beautiful aspen forest. Then the trail opened up to a few switchbacks and panoramic views of the canyon and Mt Timpanogos in the distance. Thankfully, we were warned that the last half-mile to the lake would very steep and rocky; kinda like a stair climber. That was definitely the hardest part, but overall, it was a really beautiful hike.

Hiking with a heavy pack isn’t all that different than hiking with a toddler on my back, so for me, it wasn’t a difficult thing for my body to remember. My son had never hiked with a heavy pack before, and with my pack only holding 50L, it was a challenge to fit everything we wanted to bring and not have his pack be too heavy for his skinny frame. I knew the “rule” was to make sure your pack wasn’t more than 20% of your body weight. That was only about 15 pounds for my son. UGH!

We made it up there and it was beautiful. We found a campsite right away and my son immediately broke out his fly rod and went fishing while I set up our tent.

Our campsite. We were under a fire ban at the time, so we dismantled the rock fire ring that some previous visitors created. Those trees would’ve easily held a hammock, gotta consider bringing one next time.

Our campsite. We were under a fire ban at the time, so we dismantled the rock fire ring that some previous visitors created. Those trees would’ve easily held a hammock, gotta consider bringing one next time.

We had Heather’s Choice Sockeye Salmon Chowder for dinner. We followed the instructions exactly and it was terrible. The flavor was good, but it had a gritty texture that was awful and neither of us could manage more than a few bites. Instead we cooked the lasagne from Mountain House and it was delicious.

After dinner my kiddo did some more fishing, but the wind picked up a little bit and there were no bites. The sun set on the high mountains and there was a gentle breeze. We packed away all of our food and toiletries that have a smell and put them in a waterproof bag and strung them high up in a tree. It only took us like six or seven tries to get it up there, hahahahah!

I never sleep well on the first night of a camping trip, so I tossed and turned, even though I was physically tired. We were close enough to the creek to hear it’s trickling, but I end up wide awake any time I hear what might be an animal. I do really well in a noisy forest with great ambient noise. My son crashed hard and slept through the night. I wonder if it would be worth it to bring a battery-powered white noise machine for me?

In the morning it was a little chilly, but not freezing. My son cooked our breakfast on his own; I was so proud of him wanting to learn how to use the backpacking stove by himself. We had the Breakfast Skillet from Mountain House; which we’ve had before. It’s fantastic.

He fished for a little while and I packed up our tent. We hit the trail just before lunchtime and started to make our way back down the mountain.

I was booking it pretty well, but my son really struggled heading downhill. His pack rubbed on his bony hips and he took a lot more breaks than I expected.

We stopped at a McDonald’s in Lehi for some lunch (his choice) and discussed backpacking overall and whether he wanted to do it again. I was happy to hear him excited to go on more trips.

Lessons Learned:

  • I need a larger pack, at least 60 or 70 liters. Maybe I’ll sell my Kelty and get something else, but to be able to fit everything we wanted to bring, I needed more space. I will never be a UL backpacker, and I’m okay with that.

  • The Sawyer Mini water filter worked well, but the flow was pretty slow. The pouch was also tough to fill up unless we filled it at some kind of waterfall or fast creek. It would have been really tough to fill if we’d only had the lake. Research other options.

  • Research different options for keeping our site bear-safe. Maybe a bear canister instead of hanging our food? It was kind of a pain in the butt.

  • I brought a little 3-legged stool and I’m SO glad I did. I really loved being able to sit down on something that wasn’t the ground. Research more lightweight chair options.

  • Bring a larger portable battery so I can keep my iPhone and watch charged. I liked being able to clock our distance on my watch. The little battery pack I had didn’t last long enough.

  • Figure out some padding or something to help prevent rubbing on my son’s hips with his backpack.

  • Pack more snacks and get different ones that we usually bring camping. We had a whole bag of snacks that neither of us felt like eating.

  • Pack Ibuprofen. I had a headache at bedtime, blech!

Flairly Social

My dear friend Cari started a social media consulting business, along with two friends, Britt and Monica, and I was honored to create a logo for them with this new venture. Flairly Social helps small businesses and direct sellers build a social media presence and a brand. Each of the colors on the three, intertwined circles represents one of the members of the business. It’s a simple logo, but I love how it turned out.

Here’s their business cards:

Flairly Social Business Cards

I created a custom, printable calendar that they can give away to clients and fans.

Flairly Social Branded Printable Calendar

Lastly (for now), I created a handful of backgrounds that they can use on their website and when creating social media posts. Here’s a sampling of what I made for them:

Flairly Social Social Media Backgrounds

Tommy's Lemonade Stand

My oldest son had a school project to create a business plan for a lemonade stand. As a 4th grade class, they read The Lemonade War together; it’s about two 4th graders who battle each other with their own lemonade stands. After it was finished they had to learn what it would take to start a business. They researched what supplies would be needed and price the cost of lemons, sugar, and whatever else they wanted to sell at their stand. They researched the cost differences between making lemonade from scratch versus buying a powdered mix and had to figure out what to charge. They had to compare pricing of those supplies between different stores. They researched different ways to advertise and include those costs. They had to make some examples of advertising too (flyers, business cards, social media ads, etc.).

Because this project was assigned while distance learning, his teacher made it optional for kids to actually have a lemonade stand. Quarantine restrictions were loosened a lot last month for us, so my son asked if we could actually do it. Knowing I would be doing a lot of the work, I begrudgingly agreed.

Tommy's Lemonade Stand - Alex Tebow Designs

Tommy, foodie that he is, wanted to do scratch-made lemonade, and we used a recipe from Chef Freyka; the chef who taught a cooking class he attended last year at Harmon’s. He wanted to offer add-ons like iced tea to make Arnold Palmers and strawberries for strawberry lemonade.

Chef Freyka's Lemonade - Alex Tebow Designs

Lastly, he REALLY wanted to make Brazilian Limeade; a drink that we all love. You can usually order it from Brazilian Steakhouses like Fogo de Chão or Rodizio Grill. This is a link to the recipe we followed. Essentially, 3 whole limes quartered, 1 cup of sugar, 1 can of sweetened condensed milk, 1 quart of water. Pulse in a blender for about 10 seconds and then immediately pour through a fine sieve. Pour over ice and enjoy. It’s very refreshing. At some point this summer I’m going to have to see how tasty it is with a shot of rum. Blendtec FTW!

Brazilian Limeade - Alex Tebow Designs

From Costco we bought ten pounds each of lemons and limes, plus a 4lb package of strawberries and 20lbs of ice. From Sam’s Club we bought two 2-gallon beverage containers with a spigot (something I had wanted to buy already). We bought four cans of sweetened condensed milk and a 4lb bag of sugar from Walmart.

The last thing we needed to figure out was a juicer. We had a small, manual citrus juicer, but that was going to be exhausting to juice 20 pounds of fruit. KitchenAid makes a citrus juicer attachment that fits their mixers, but I really didn’t want to spend $30-$35 on one not knowing how often we’d use it. It’s great for when you need to juice 50 lemons, but not needed when you only need to juice a few.

Then we got lucky. While looking through small appliances at a Walmart, Tommy spotted the KitchenAid juicer on a high shelf. He scanned it and discovered it was only $5. I thought for sure it would be a mistake, but it wasn’t. Score!

Tommy's Lemonade Stand - Alex Tebow Designs

We already had a 10’ canopy, a folding table, a table cloth, and chairs, and we already had a Costco-sized package of Solo cups. I graciously contributed my graphic design skills to help create a couple of signs, which we shared on social media. I forgot to get a photo, but Tommy drew on a large piece of foam board and it was staked into the ground at the end of our street.

Tommy's Lemonade Stand - Alex Tebow Designs

It turned out to be a really fun day. Tommy sold out of lemonade after about three hours and we almost sold out of Brazilian limeade too. Neighbors and friends stopped by, even Tommy’s teacher was able come for a quick visit. A few friends and family who don’t live local sent money through Venmo too.

After we figured the cost of fruit, ice, the juicer, sugar, and cups, he still ended up making a profit. I included the juicer and cups because he wants to do this lemonade stand a few more times this summer and those are items he won’t have to buy again and I wouldn’t have purchased them otherwise. So the next time he does this, his expenses should be less.

Tommy's Lemonade Stand - Alex Tebow Designs

Of course, we also talked about expenses that he didn’t have to pay for this time like furniture, insurance, federal and state taxes, rental fees for the space, actually paying Mom her graphic design fees and he learned a little bit about what it takes to build a business.