travel

Our Holiday Card - 2022

Our Holiday Card - 2022

Catching up on a post that I never finished a few years ago. Our holiday card from 2022 perfectly summarized the biggest milestones from our year; whether they were travel, taekwondo or track. I was even able to forego doing a typed blurb on the back of the card.

A Mom’s Superpower to Combat Busy Life

A Mom’s Superpower to Combat Busy Life

You ever have times in your life where there is just so much going on, you don’t feel like you can catch your breath? Life has been busy for us these months; pretty much from April-on. It’s the kind of busy where I’ve done plenty of Instagram-worthy things, but haven’t managed the time to post about them. And then when I do have a minute to breathe, I don’t want to do anything at all.

10 Signs Your Child Might be a Foodie

10 Signs Your Child Might be a Foodie

My husband and I are both big foodies. We try to make a variety of different foods at home and now that our kids are well passed the toddler stages, we usually include them in meal planning. When we travel, what we can eat plays a big role in deciding where we go and we make a point to not eat at restaurants that we have at home. Here are my 10 signs that your kid might be a foodie.

Product of the Month - July 2021 - Thermarest Compressible Travel Pillow

Earlier this year, I decided to start featuring favorite tools that I use in my work or even just in my adventures. I have featured art supplies and backpacks and tools. This month’s featured product is a pillow. Yup, you read that right; I’m sharing about a pillow. There are affiliate links in this post, in case you want to buy one of these products and Amazon will send me a few cents in appreciation.

Last summer, my son wanted to get into backpacking. Not wanting to drop $1000 on backpacking gear only to have us quit after just one short trip, I research the crap out of our options; especially on items that could make sleeping more comfortable for my 40-something-year-old body that hadn’t backpacked in more than 20 years.

There are lots of inflatable pillows out there that weigh next-to-nothing, but that very first trip taught me that I don’t like sleeping on an inflatable pillow. I need something more substantial than that.

Enter the Thermarest Compressible Travel Pillow. It comes in sizes from Small (12x16 in) to X-Large (16.5x27 in) and they weigh less than a pound. It’s a pillow filled with chunks of memory foam that can be rolled up and compressed down to a little less than half of its size. It definitely takes up more space in my pack than the cheap inflatable pillow that I got before, but this one is SO much more comfortable. It feels like I’m sleeping on a regular pillow.

My Thermarest Pillow strapped to my pack with a bungee kept it fluffy for my 3-night trip.

My Thermarest Pillow strapped to my pack with a bungee kept it fluffy for my 3-night trip.

I ended up finding a size Small pillow on Sierra.com for $14.99 and then I bought a Large one from my local Scheels at full price. I just liked it that much.

When they’ve been compressed and rolled up, they do take a little time to puff up again. Depending on how long they were stored rolled up, it may take quite a while. When I went backpacking back in May, rather than roll up my pillow each night, I just strapped it to the outside of my pack so it would stay as fluffed as possible.

Little did I know that these two pillows would turn out to be wonderful and incredibly useful for much more than just backpacking. We take them with us camping and they are fantastic to have in the car on road trips. I’m a side sleeper and I like to sleep with a pillow hugged to my chest. When I’m camping, I can easily use the Small pillow and still fit in my sleeping bag. I have been trying to justify getting one or two more pillows for future trips.

I also take the small pillow for when we spend a whole day out at a lake. My husband and my kids will spend the day fishing and I paint, read a book, or take a nap in my hammock and the pillow is super comfortable to sleep on and easy to pack into my backpack or even just a tote bag.

Since we had that pesky pandemic last year, I haven’t tried these pillows on an airplane yet, but I’m willing to bet they would work wonderfully to help my kids or me get a little sleep on the flight; whether it’s leaned against a bulkhead or a loved one’s shoulder.

Once my pillows get out of the dryer, I’ll add side by side images of them open and fluffed and then rolled up next to a standard Nalgene bottle so the sizing can be compared.

The BEST part of all: these pillows are machine washable and go in the dryer. Nothing fluffs up the pillow more than throwing it in the dryer. Obviously that’s not helpful when I’m backpacking, but knowing these can get dusty, dirty, or fall into a lake (I know that from experience!) or…. you know… drooled on… and then they can easily be washed when I get home gives me so much peace of mind. Huzzah!!

Traveling: Asian Vacation with Our 3-Year-Old

I wrote this in the spring of 2013 when I ran a parenting blog. My kids are much older now, but when the blog went away, I wanted to save a handful of the posts I’d written. This is one of them:

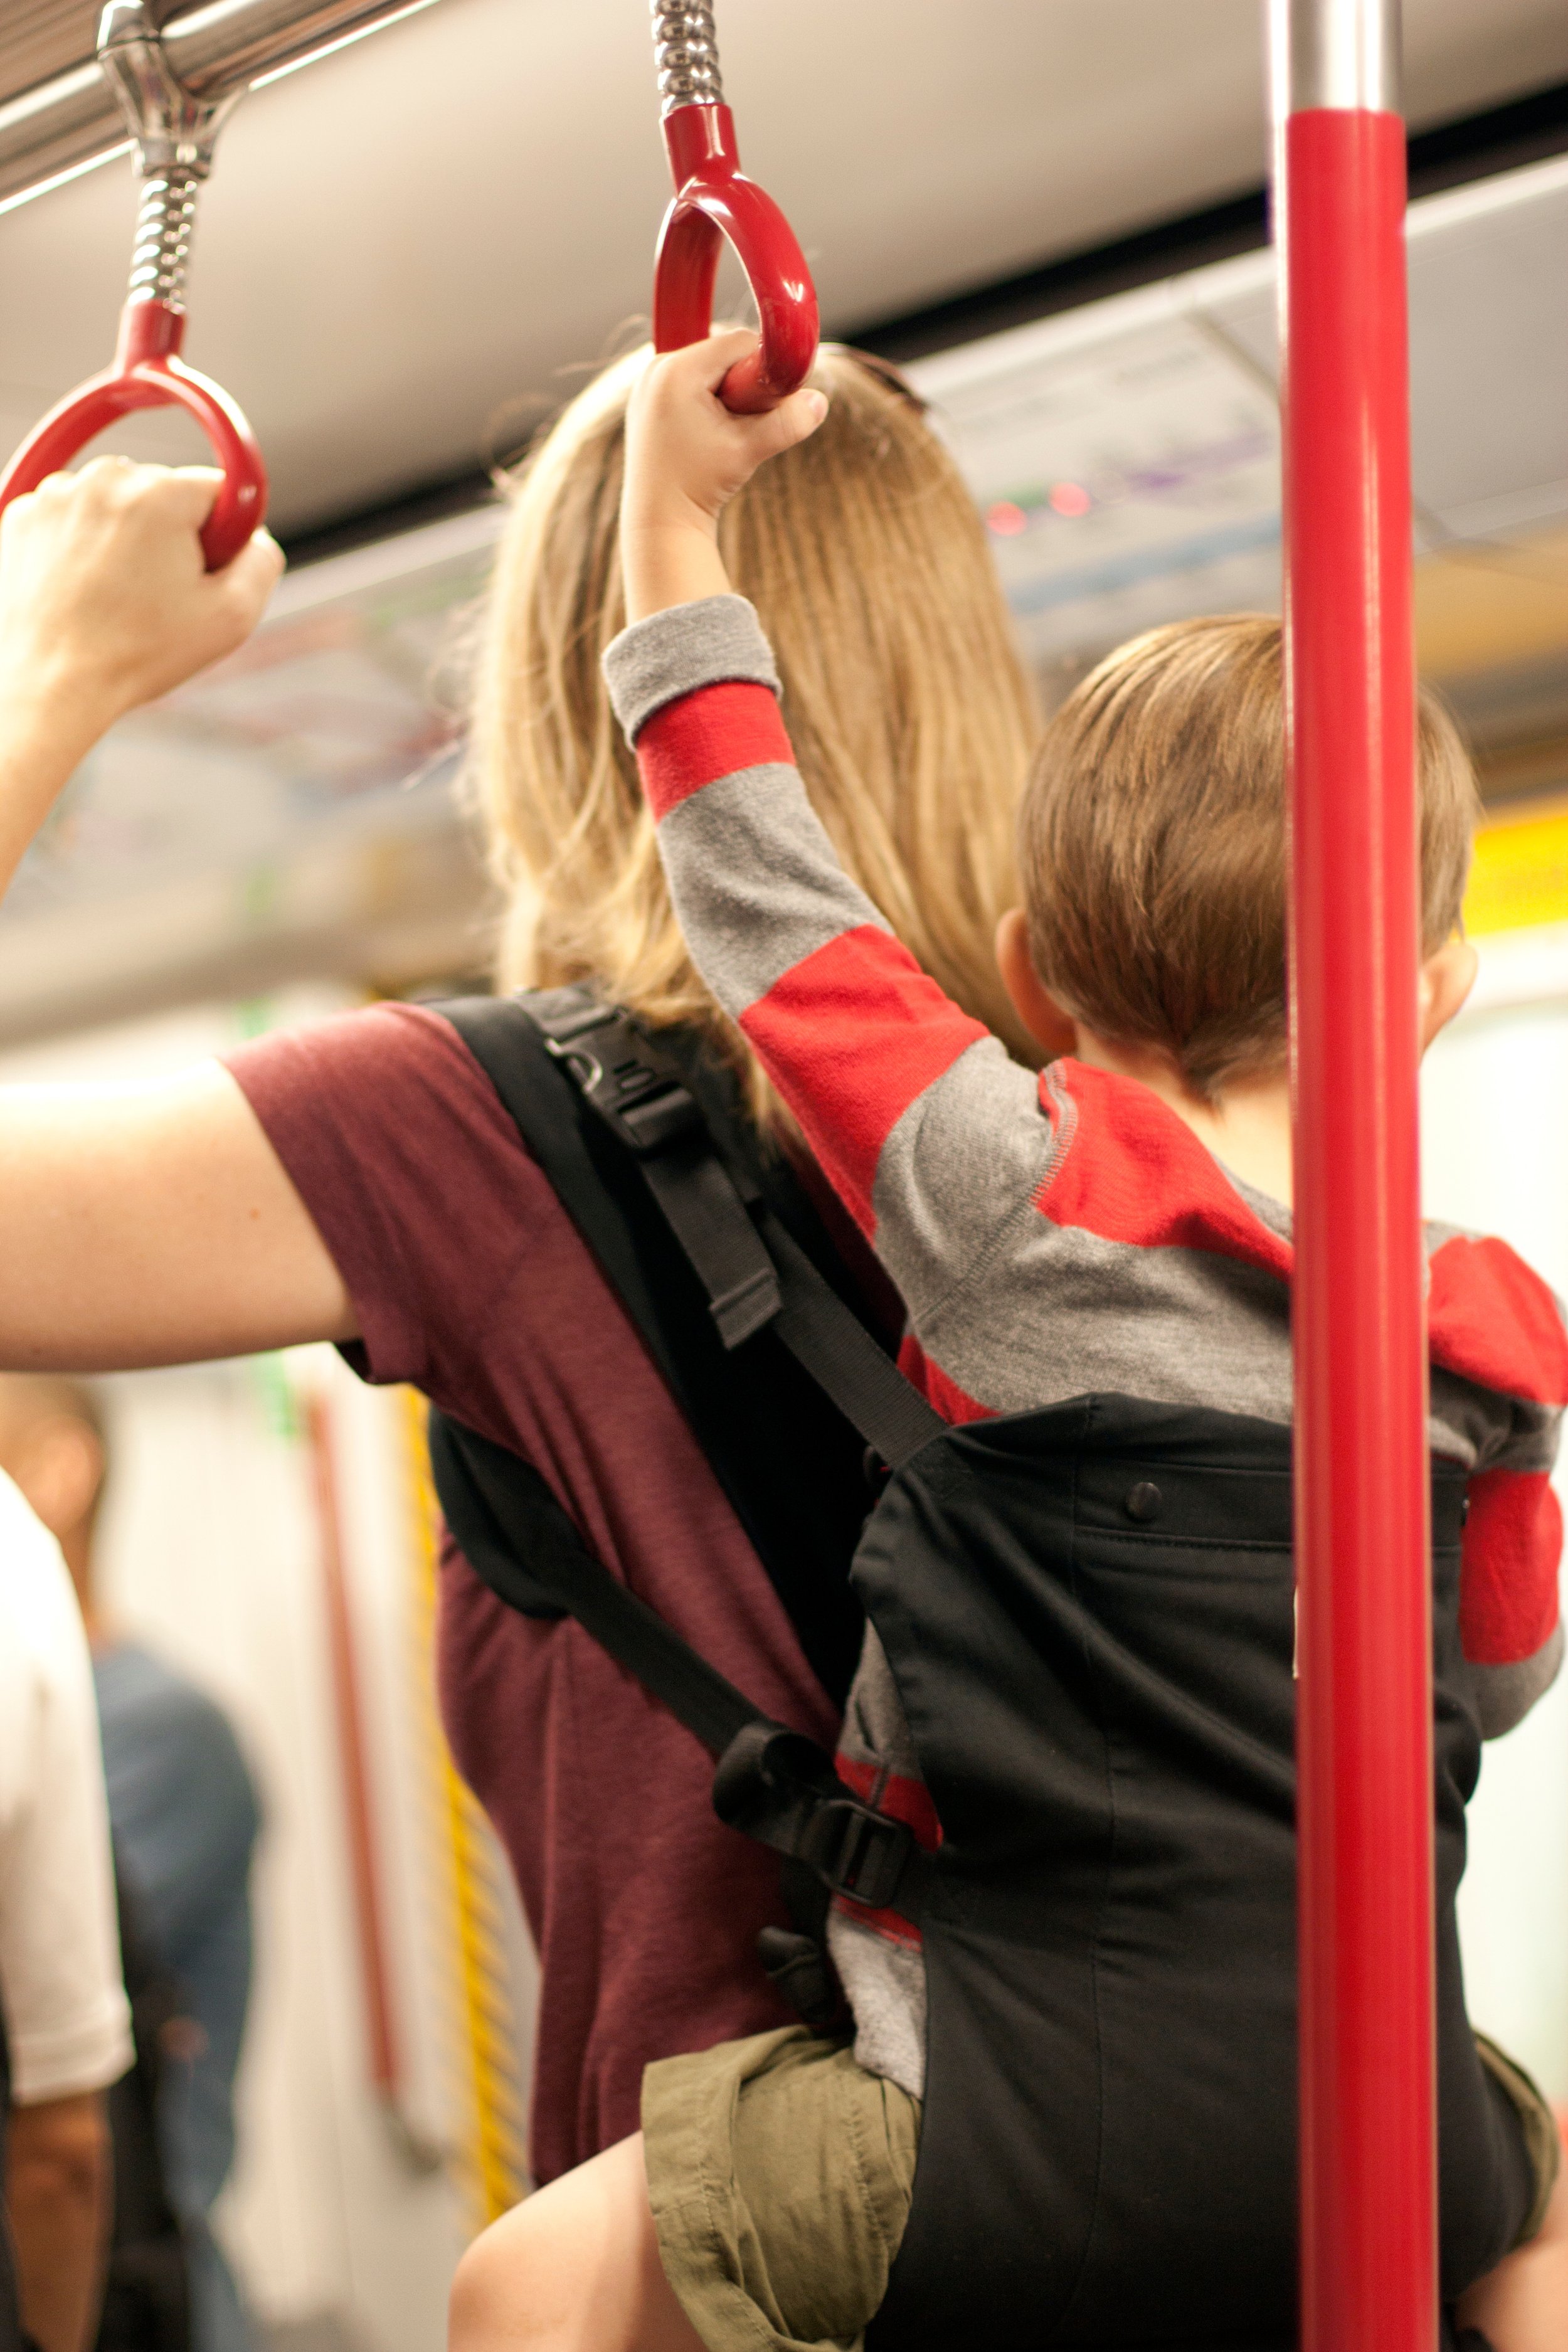
Who says that once you have kids, you can’t travel anymore? In October of 2012, my husband and I spent two and a half weeks in Hong Kong, Macau and Hainan, China with our three year old son, TJ.

Even though we were experienced travelers at the time, I was still a little worried about how our 3 year-old would handle the lengthy flights. Up until this trip, the longest flight he’d ever been on was only six hours.

Just getting to Asia was an adventure in itself as we flew on employee benefits, so that meant flying standby:

  • Salt Lake City to San Francisco

  • Overnight in San Francisco with family

  • San Francisco to Seattle

  • Seattle to Narita, Japan

  • Overnight in Narita

  • Narita to Hong Kong

  • Hydrofoil ferry to Macau

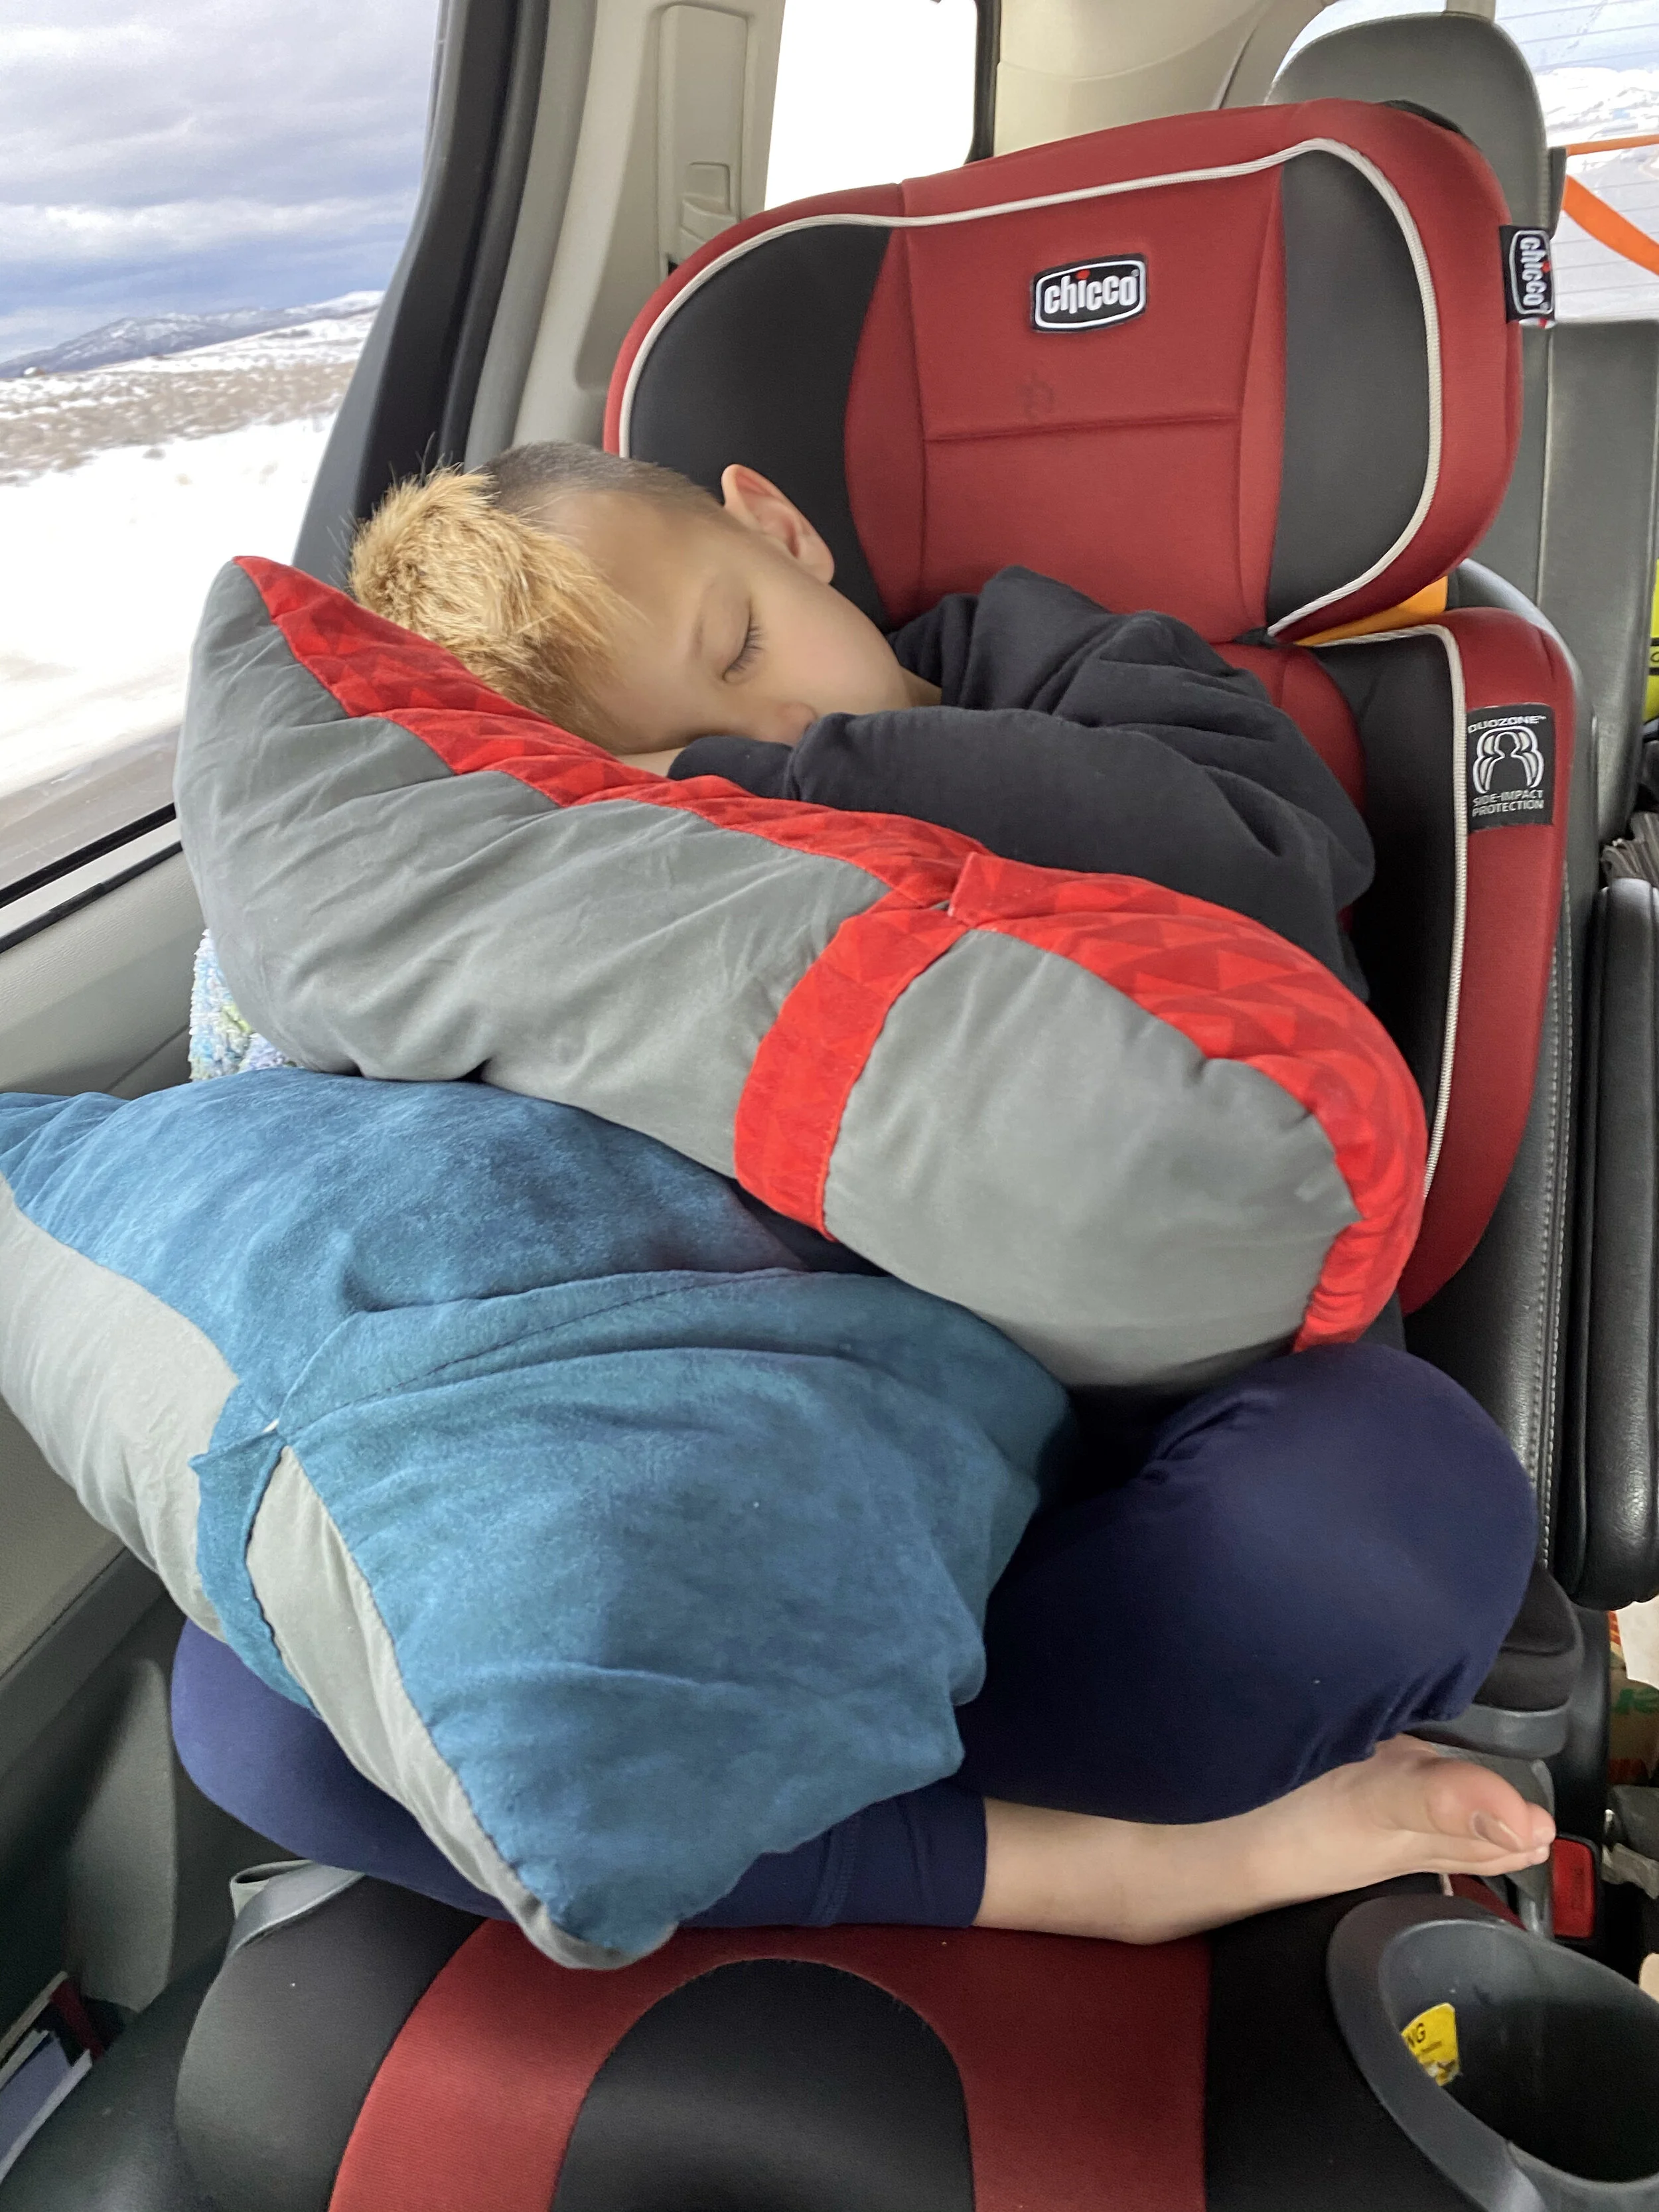
TJ took the multiple flights in stride playing with his toys, taking naps when needed, playing an occasional game of Angry Birds on the iPad, and enjoying the in-flight entertainment. This trip got him hooked on the show Mickey Mouse Clubhouse.

In between flights, we made sure to find a place in the airport or ferry terminal where TJ could run around and my husband and I took turns playing and chasing after him. Both of us made a point to let him get his wiggles out whenever possible. We taught him how to say thank you in both Japanese and Cantonese and he often said the wrong one, which was adorable to everyone.

If we were in a very crowded space, my husband and I took turns wearing TJ on our backs in our Beco Carrier. It gave us a tremendous sense of security in a foreign place.

We also tried to encourage some excitement about each of the flights explaining to TJ that we were flying on a Boeing 777 or an Airbus A330; his first times flying on those “grown-up airplanes.”

Once it was time to head home, we flew non-stop from Hong Kong to San Francisco. That was the longest flight TJ had ever been on at twelve hours long (me too!), and it wasn’t easy as we were stuck in middle seats with my husband sitting in front of us.

TJ managed to take a two and a half hour nap and then a second nap near the end that was about an hour long. When we wanted to get up and walk around, turbulence would pick up and we had to stay in our seats. Since I can’t sleep sitting up, I didn’t get any sleep and managed to watch four movies. In all honesty, I think that flight was harder on me than it was on TJ.

One thing that really helped with the long flight was that TJ got a new toy or a treat every couple of hours. We bought a couple of very small toys at a gift shop in Hong Kong and he got to open a new toy if he had been behaving for a few hours. He got a new garbage truck, a construction vehicle and a fire truck along with a couple of chocolate coins from See’s Candies that we had brought with us. TJ didn’t know how many toys we had bought, only that if he started getting really bored and fidgety or cranky, Daddy would pop his head over the seat and say, “Are you ready for a surprise?”

Overall, it was an amazing trip. I adored watching TJ play with his cousins even though they couldn’t speak each other’s languages. Both my husband and I enjoyed tasting and eating some amazing food with TJ. My boy adores fish, and it’s quite abundant in southern China. The three of us swam in the warm waters of the South China Sea, we got to pick out our dinner from a fisherman’s catch of the day, we hiked through a tropical rainforest, we walked around Victoria Peak, we rode the ferry across Hong Kong Harbor at night and saw an amazing skyline and we got to meet countless aunts, uncles, cousins and relatives whom I still haven’t figured out their relation to TJ. Everyone was warm, friendly and they really made our trip the best it could be.

Playing in the South China Sea in Hainan

This trip occurred just after TJ turned three, and I know that many of us can remember some bits of our lives when we were that young. I know I do. It is my sincere hope that TJ remembers at least some of this trip.

To end here are some additional tips that worked, and lessons we learned from this trip that can hopefully help parents with the notion that once you have a child, international travel is still possible… contrary to what you may have believed or been told.

  • Bring whatever lovey, blanket, beloved stuffed animal, or pacifier if necessary to help your child sleep. We had been working on weaning TJ from his paci at bedtime and naptime, but we totally relaxed the rules while on this trip. He was still only allowed to have his paci if he was going to sleep, but we were a little more lax about it on the airplanes.

  • Bring some snacks for your child that you know he or she will eat. Because of the disruption and confusion with meal times and nap times, TJ wasn’t all that interested in any of the in-flight meals that were provided. He was more interested in playing with the spoon and fork like drumsticks when it was dinnertime on the plane. Luckily we brought some fruit strips, fruit and veggie pouches, crackers, granola bars, and some fresh fruit with us so he could eat when he was hungry.

  • If you are sightseeing, be conscious of your child and their need to have some plain old playtime. A couple of days into our trip, TJ was cranky, whiny and easily frustrated despite having a great night’s sleep. We realized that we had been shuttling him from house to house and attraction to attraction, he hadn’t had more than a few minutes each day to simply play. Once we were able to let him have an hour or two at a local playground, it let his mind and body reset and he was a happy boy again. Because there was so much we wanted to do, and so many people we wanted to visit, we made sure to schedule some play time every day or every other day depending on how TJ was doing.

Backpacking: Coyote Gulch

Today is about backpacking. Although, I did paint en plein air during this trip, so there was some art as well. I have lots of photos too for future painting reference! There will be future paintings from this trip, promise! There are a bunch of affiliate links in this post in case you want to know what gear and food I used and I am always appreciative if you shop through these links.

Image by Michelle Craig

Image by Michelle Craig

I don't have lots of experience backpacking. I did a couple of short trips when I was 18 and then nothing until I took my oldest son backpacking last August for the first time. If you'd asked me 10 years ago if I wanted to give backpacking a go again, I'm sure I would have said I'm too old. My 11yo asked me about backpacking last year after he watched YouTube videos of folks who backpacked to secluded fishing spots and I figured we could give it a try and see if he liked it. We did a one-night trip in American Fork Canyon and he had a blast. I've done a lot of reading about backpacking, and I plan to take my son a few times this summer, so I don't really feel unprepared; I'm just still a newbie.

IMG_8667.jpg

My friend, Michelle shared her desire to backpack in the Escalante region of Utah last month and asked if I wanted to join. I jumped at the chance. I already had 99% of the gear I would need, so I just needed to commit and go for it. Michelle’s friend, Sumitra decided to join at the last minute and flew to SLC from Indianapolis and we all drove down to Escalante together.

IMG_2875.jpg

Coyote Gulch is a meandering, zig-zaggy canyon, carved by the Escalante River, that has massive arches, towering caverns, and waterfalls. There's usually water flowing year-round so it's ideal for backpacking because it has reliable water. It resides inside Glen Canyon National Recreation Area where the Escalante River flows into Lake Powell. There are a handful of access points that can make your trip shorter or longer depending on how long you plan to be there. A few routes can easily make it a day hike, but I HIGHLY recommend backpacking to explore more.

Coyote Gulch Backpacking

We opted to hike into the Gulch via Hurricane Wash. It's one of the longer routes, but it's also very easy to follow, which is what we were going for. Also, to get to the other access points, we would've needed a vehicle with 4WD and possibly some climbing rope; which we didn't have this trip.

In all honesty, one of the hardest parts of this trip for me was driving on Hole in the Rock Road. It's a dirt and gravel road that's grated like a washboard and it's painfully slow going in a car like my Toyota minivan; like between 10 and 15 MPH most of the way. There are lots of wonderful places to visit along this road, but driving 35 miles one-way took almost 2.5 hours the first day and just over 3 hours the last day. When we do this trip again, I really, really want to have a vehicle that will allow us to get there faster.

IMG_2949.jpg

Hiking with a heavy pack isn't all that different from hiking with a toddler on my back, so while it's been a while since I hiked carrying a kid, my body remembered how pretty quickly.

We hiked into the canyon late in the afternoon on Tuesday and made good time reaching the confluence of Hurricane Wash and the Escalante River right around headlamp-o-clock. There were at least half a dozen tents camped at the confluence, so we hiked on for another mile before stopping for the night at an empty, sandy beach that stuck out from a bend in the river. As the full moon rose, it cast bright light on the sandstone cliffs and made it look like there was a spotlight. There was no way our cameras could capture it, but it was pretty amazing. It was beautiful watching the stars and bats come out.

In writing this post and sorting through the photos that all three of us took, one thing that stands out to me is that photos really don’t do this canyon justice; especially when it comes to the sheer size of the sandstone cliffs. There are a few shots that have people in them and you can barely see them because the cliffs are so huge. I’ll try to point them out in the captions.

They are so tiny compared to the cliffs!

They are so tiny compared to the cliffs!

The next morning we packed up and headed further into the Gulch intending to explore Jacob Hamblin Arch and to get closer to Coyote Natural Bridge or Cliff Arch, depending on how we were feeling. There was some cloud cover that morning, so we were spared having the hot sun beating down on us.

Image by Michelle Craig

Image by Michelle Craig

Jacob Hamblin Arch was freaking epic!! Cameras really can’t capture the scale. My iPhone struggled with the light, but Michelle’s Galaxy did a great job. I had brought a few stickers with me and made sure to get a photo of my sticker at Jacob Hamblin Arch.

Click on this photo if you’d like to buy one of these stickers.

Click on this photo if you’d like to buy one of these stickers.

We hiked further into the canyon and physically in the creek for a little bit, and then set up camp. For lunch I had the vegetarian Pad Thai from Backpacker's Pantry and it was delicious, but it was also a really massive portion; even for two people. I felt bad that I was barely able to eat half of it. Michelle and Sumitra shared the vegan Thai Curry from Good To-Go and it was delicious too… almost shockingly so. I need to find more food options that are just one serving.

Backpacking Lunch - Alex Tebow Designs

After lunch we stocked up on water and snacks with our day packs and headed further into the canyon to see if we could get to the confluence of the Escalante River and one of the northern arms of Lake Powell and also find Stevens Arch; another massive arch in the area. We were also on the lookout for a spot called the Black Lagoon. It's a somewhat-hidden swimming hole that was supposedly easy to find, but also easy to miss if you didn't know where to look. We used satellite and topographic maps that Michelle had downloaded from AllTrails to see if they could help, but alas, we couldn't find it. No hikers we passed seemed to know either.

IMG_2959.jpg
Coyote Natural Bridge

Coyote Natural Bridge

IMG_2972.jpg

We didn't see another soul for the hours we were there, soaking up the last of the day's sunlight and watching the bats come out. It was pretty magical.

Coyote Gulch Backpacking

We headed back to camp and called it a night and fell asleep to a much noisier section of the canyon. The trickle of the river was drowned out by crickets and another creature we assumed was like a cicada, but it sounded like a monkey. I think we ended up hiking about 10 miles total that day.

Cliff Arch. You can see a tiny tent at the bottom of the frame. Helps with scale a little bit.

Cliff Arch. You can see a tiny tent at the bottom of the frame. Helps with scale a little bit.

The next morning we headed out with daypacks on the hunt for the Black Lagoon again. After looking at the maps again, we thought we had a better idea where it might be. We explored for a little bit and "thought" we might have found it, but the water was quite low and didn't look great for swimming. Utah is in a severe drought this year too. We snapped some photos with plans to look online again to see if we had been in the right spot. I have looked at a few blog posts and I still don't think we were in the right spot.

We headed back to our camp, packed everything up, and started heading back toward Jacob Hamblin Arch with plans to camp and then head back to my car the following morning. We stopped for a couple of hours at Swiss Cheese Falls to have lunch and play in the water. Michelle took some photos of the Lily Trotters compression socks she had and we enjoyed the water and the shade. We didn’t see any other hikers for the time we were there either.

IMG_3009.jpg
IMG_3012.jpg

We only hiked a little bit further before stopping in what I've seen others call the Great Alcove just before Jacob Hamblin Arch and we decided to set up camp. It was quite an epic place to camp and we chilled for the rest of the afternoon.

We’re so tiny!

We’re so tiny!

Seriously one of the best campsites ever!

Seriously one of the best campsites ever!

I broke out my Art Toolkit and I did a quick painting of the Great Alcove while Sumitra and Michelle went on short, solo hikes. I’ve painted a lot of desert landscapes and I’m used to painting the muted, silvery-greens of sagebrush and yucca. But in this lush canyon, the cottonwood trees are a bright and surreal shade of green that contrasts incredibly with the oranges and red of the sandstone. It almost looks artificial!

Images by Michelle Craig

Images by Michelle Craig

For dinner I had Peak Refuel's Chicken Pesto Pasta. It was tasty, but a little rough on my stomach. Michelle and Sumitra had the Forever Young Mac n Cheese from AlpineAire. It was really delicious too and we all agreed that it would be great with some tuna thrown in.

We chilled that evening watching the stars come out. It was a pretty perfect evening after a short amount of hiking that let us rest up for what would be a tough hike back out to the trailhead the following day.

IMG_8708.jpg

The last morning we set out before 8am for the last slog back to the trailhead. We knew we would be pushing 7.5 miles on what was supposed to be the hottest day of the week, and in the middle of the day. We stocked up on water, energy drinks, salt tablets, and hit the trail. The first half was really pleasant with lots of shade.

IMG_3050.jpg

Once it was all exposed, I really struggled and the last 2 miles were really hard for me. I ran out of water close to the end, but the others were happy to share. It was hot, I was really, really tired, and I was feeling a little nauseated because I should have eaten more at breakfast. But I knew there was a 6-pack of Cokes waiting for me in the cooler of my car and it helped push me to the end.

IMG_8771.jpg

Overall, we hiked about 27 miles between 4 days. A lot of it was in loose sand.

Would I do it again?? YES!

Coyote Gulch Backpacking

I know that my 11yo would have a blast, but I don’t know if my 7yo would be up for it quite yet; especially hiking in so much sand. He’d need some seriously motivating factors. Michelle, Sumitra, and I agreed that it would be really fun to bring our kids and I think we’ll talk again and consider trying next spring. They would likely have the most fun if we set up a basecamp in one spot and just explored the canyon with day hikes rather than pack up every day. We also want to learn more info on the alternate routes into Coyote Gulch. Hurricane Wash is the flattest and easiest to navigate, but it’s also the longest with a stretch of about 5 miles with no water. The Sneaker Route is one we’re going to see about because it’s only about 2 miles and places you really close to Jacob Hamblin Arch.

We also would want to have a vehicle that’s an SUV or a truck that can handle going a little faster than 10MPH on Hole in the Rock Road. Hell, we will rent a damned truck if we have to next time!

Image by Michelle Craig

Image by Michelle Craig

Lessons to Myself for Future Trips:

  • Double check that my sunscreen is functioning! Literally right when we got started at the trailhead, I noticed that the nozzle on my sunscreen bottle was broken, rendering it useless. I had sunscreen for my face, but not enough to also use on my arms and shoulders. Thankfully, I had a lightweight, long-sleeved shirt from Columbia that worked for when I needed it. My shoulders still got a little burnt and that shirt was sooooo smelly!

  • Get some supportive water sandals like Chacos or Keens. I really would have liked to be able to hike through the water without worrying about my socks getting wet. My hiking boots did amazing, but some sturdy and supportive sandals would have been nice too.

  • When the weather is warm, rely more on snacks and less on meals. At mealtimes, if I was tired or really hot, I didn’t feel like making and eating a full meal. I ended up eating all of my snacks, but only a couple of the meals.

  • Research more about food options. Michelle taught me about bringing vacuumed-sealed packs of tuna or salmon to add to dehydrated food like Mac n Cheese or to mix with preprepared mayo and spices for a quick sandwich. Payday candy bars don’t melt like chocolate would and are great for when you’re tired of granola bars or energy bars. Tortillas are kinda heavy, but awesome for nut butter sandwiches. They’re also handy for making a breakfast burrito with a breakfast skillet like the one from Mountain House.

  • Add arch supports to my hiking boots to keep my feet from pronating when I hike (or consider getting custom insoles). I ended up with blisters inside my heels because of this misalignment. It wasn’t the boots but rather my ankles.

  • Bring a swimsuit or quick-drying clothes so I can swim when there’s a place to swim.

Swiss Cheese Falls, my kids would LOVE to play in the water here.

Swiss Cheese Falls, my kids would LOVE to play in the water here.

My Gear: (lots of affiliate links here!)

I am sure there are plenty of lighter-weight options for most of my gear. I’m never going to be a UL backpacker, and I’m perfectly alright with that.

Image by Michelle Craig

Image by Michelle Craig

Worth Bringing: (even when it adds weight)

  • A CHAIR! On a whim, I bought the lightweight chair that Costco was selling this year. It’s from Cascade Mountain Tech and it’s about 3.5 pounds and has a 250 pound weight limit. It was SO nice to be able to rest my legs and back every afternoon and evening. I almost didn’t bring the chair because my pack was full, but I was able to strap it to the outside of my pack and it was super easy to bring. I will never NOT bring a chair with me from now on and I’m looking at investing in one that’s lighter weight like the ones from Klymit or Helinox.

  • A pillow. To make backpacking and camping more enjoyable on my body, I have been working hard on figuring out the best way to get a good night’s sleep. I learned years ago that I can’t sleep on an inflatable pillow. Then I found that Thermarest makes collapsible pillows filled with memory foam. They come in a bunch of sizes and roll down to less than half their size. They truly feel like I’m sleeping on a real pillow at night and have been really amazing. I actually have two in Small and Large and they come with us on every camping trip and every road trip. The best part: they are machine washable and can go in the dryer.

  • Wet wipes. Having some simple wet wipes to scrub down my face, neck, hands, and feet every night really helps me feel cleaner and refreshed. I may or may not use them for a quick PTA bath too. Totally worth bringing.

  • A measuring cup. When rehydrating backpacking meals, it’s important to use exactly the right amount of water. Too little and you end up with crunchy chunks of meat or noodles. Too much water and you have mush. A few makers of backpacking food are starting to give us a fill line rather than a measured amount, but a few still list 2/3 of a cup or whatever measured amount. Having a small, plastic measuring cup is really helpful to have; especially if you can store it somewhere out of the way. Mine fits in my cooking pot along with some soap, matches, and my MSR stove.

Image by Michelle Craig

Image by Michelle Craig

To end, this trip was a truly memorable experience and it has really lit a fire in me that makes me want to delve into backpacking more. While it was physically exhausting and really pushed me outside of my comfort zone, I would totally do it again and it makes me really appreciate how stunningly beautiful Utah is and just how little of it’s gems we’ve seen. And I feel like we’ve seen a lot!

What are some other amazing places to backpack in Utah? Got any suggestions?


Product of the Month - May 2021 - daVinci CosmoTop Spin Travel Brushes

It’s time for another Product of the Month. I’m mostly sharing art supplies at this point, but I know for sure that next month will be something different. I find so many random products useful in my line of work and in my life, and I really love to share about them when I can. Any time I’m traveling with others, we end up shopping among everyone’s gear and supplies.

There are a few affiliate links in this post. Using them is up to you, but when you do, know that I say “thank you” out loud from my office and my kids wonder if I’m talking to myself.

I love to travel, and when there isn’t a pandemic, I love to travel with my Art Toolkit, which I wrote about here; in case I have the time to paint en plein air. While the kit came with a great water brush, I still prefer to use a traditional brush with a cup of water. I have a plastic cup I usually stuff in my backpack and I’m sure I’ll buy myself a collapsable cups when my son and I start backpacking again this year.

A few years ago I bought a size 3, synthetic travel brush from daVinci to give it a try and I was surprised how often I use it; even when I’m at home. It’s really perfect for travel and to fit in small spaces. The synthetic bristles hold their shape really well and a great amount of water for the smaller surfaces I work on. I bought a couple more sizes earlier this year and I have loved using them.

daVinci makes kolinsky sable and red sable versions of their travel brushes, but they are more expensive and I wasn’t willing to spend that much more on brushes that would potentially get beat up.

When I’m not using my travel brushes, I do love my kolinsky sable brushes from Trekell and I am always on the lookout for new brushes to fall in love with. I know that the manufacturers of synthetic brushes are making them better and better so we don’t have to rely on animal hair for high quality anymore. I have my eye on a few, but I’m waiting for them to go on sale.

What are your favorite brushes for watercolor??

Product of the Month - January 2021 - Pocket Palette

I use and love a wide variety of products with my job; from paintbrushes, watercolor paper, and pens to backpacks, computer equipment, and hiking boots. My work has me almost constantly searching for tools to make it easier, more efficient… or sometimes just more fun. I’m going to start featuring a different product each month and see if I can remember to keep it up for a while. Sometimes the products will be art supplies, sometimes not. We shall see.

Pocket Palette - Alex Tebow Desgins

These posts will often include affiliate links if the product is available on Amazon. Shopping through these links earns me a few cents and it’s very much appreciated.

On to the POTM!

Pocket Palette - Alex Tebow Designs

This month’s favorite product is the Pocket Palette from Art Toolkit. Not available on Amazon, but it can be purchased through their website. This little palette is a smidge larger than a business card and holds a variety of different-sized paint pans. Different-sized pans can be purchased on their website to fully customize your palette. There’s even a smaller palette available.

**Edit: in the summer of 2021, they added the new Folio Palette, which is bigger than the pocket palette; about 5.5x3.25 inches. Trying to justify getting one.

The bottom of the palette is a magnet that keeps the pans in place and makes them easy to remove, wash, refill, and organize any way you’d like. The lid works as a little palette to mix colors too.

Pocket Palette - Alex Tebow Designs

I got my first one a while back when I bought the Art Tool Kit for myself. I have absolutely fallen in love with it and you can read about it here. A few months back, I bought a second Pocket Palette so I could separate my warm and cool colors (read more about it here). They both fit in my Art Tool Kit and the size of these palettes makes them ideal for plein air painting (that’s French for painting outside).

Pocket Palette - Alex Tebow Designs

I even use them at home when I’m just painting in my office. I’m pretty particular when it comes to how my colors are laid out and in what order, so I love being able to reorganize from time to time; especially when I add new paint colors to my palettes.

What’s a great product you’d recommend??