
My kids and I visited Land Beyond Zion for a few days over winter break. It was a perfect way to chill before getting back to school, even in chilly temps and rain.

Earlier this year, I decided to start featuring favorite tools that I use in my work or even just in my adventures. I have featured art supplies and backpacks and tools. This month’s featured product is a pillow. Yup, you read that right; I’m sharing about a pillow. There are affiliate links in this post, in case you want to buy one of these products and Amazon will send me a few cents in appreciation.
Last summer, my son wanted to get into backpacking. Not wanting to drop $1000 on backpacking gear only to have us quit after just one short trip, I research the crap out of our options; especially on items that could make sleeping more comfortable for my 40-something-year-old body that hadn’t backpacked in more than 20 years.
There are lots of inflatable pillows out there that weigh next-to-nothing, but that very first trip taught me that I don’t like sleeping on an inflatable pillow. I need something more substantial than that.
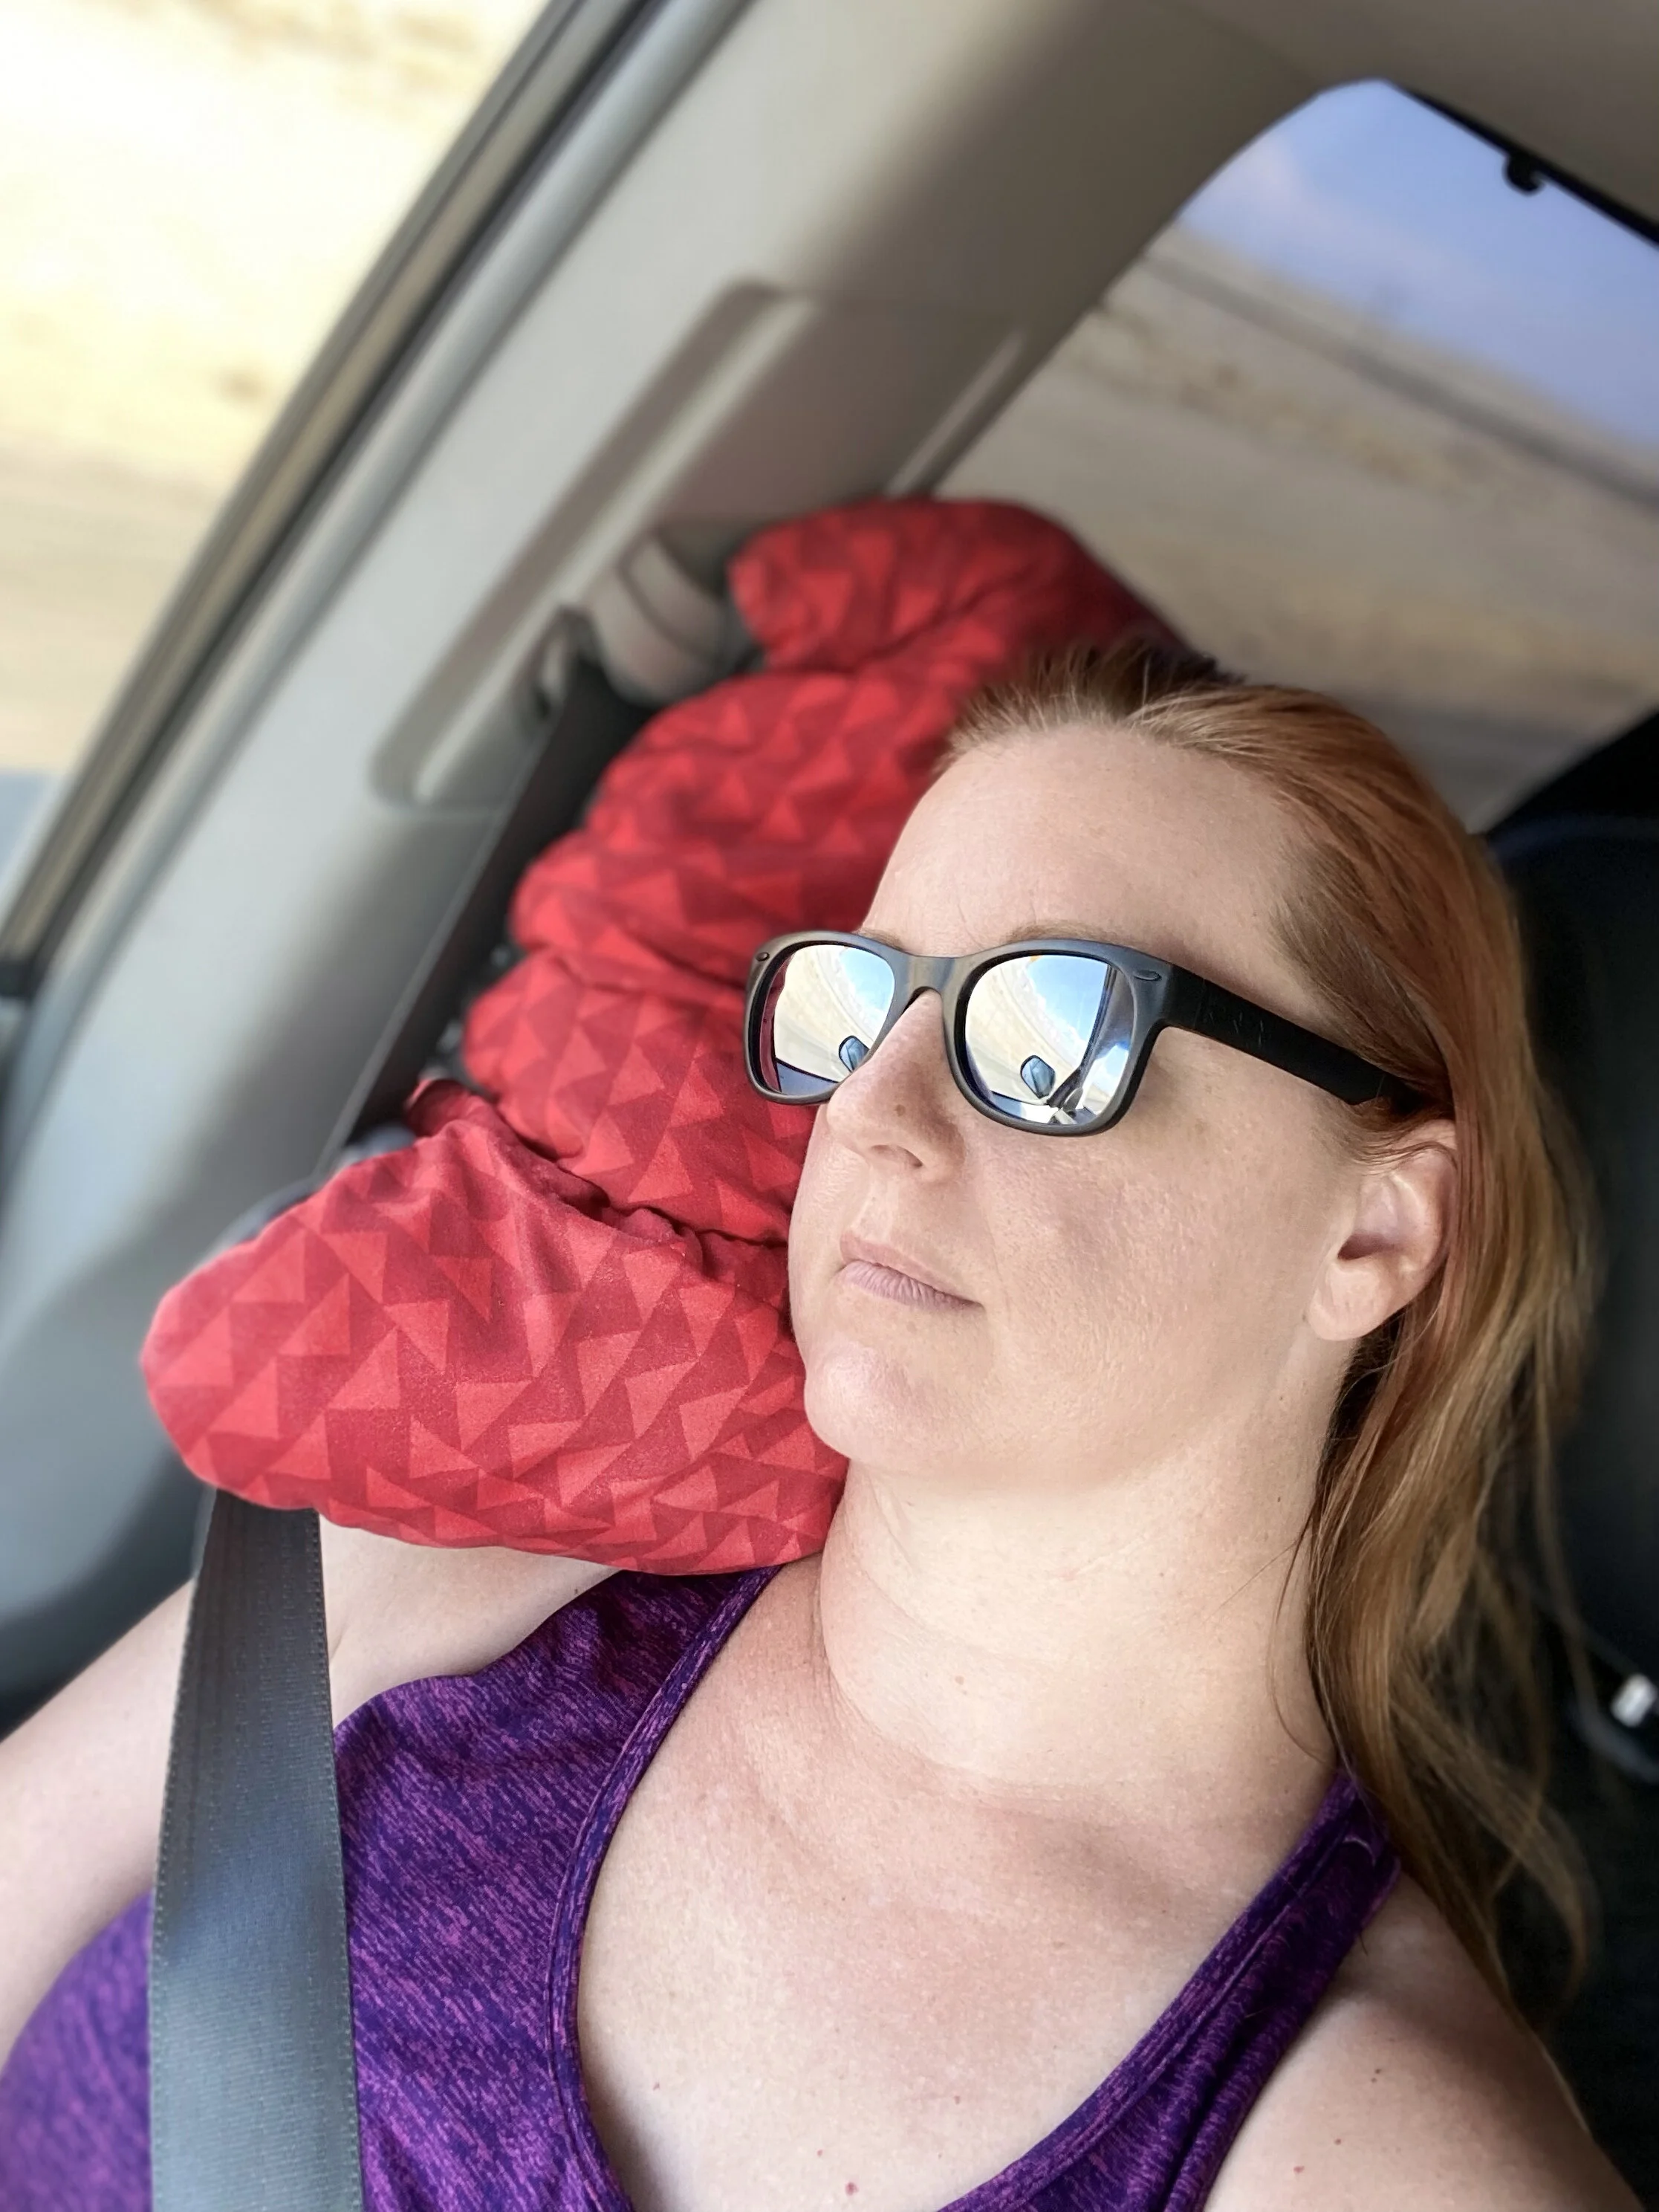
Enter the Thermarest Compressible Travel Pillow. It comes in sizes from Small (12x16 in) to X-Large (16.5x27 in) and they weigh less than a pound. It’s a pillow filled with chunks of memory foam that can be rolled up and compressed down to a little less than half of its size. It definitely takes up more space in my pack than the cheap inflatable pillow that I got before, but this one is SO much more comfortable. It feels like I’m sleeping on a regular pillow.
My Thermarest Pillow strapped to my pack with a bungee kept it fluffy for my 3-night trip.
I ended up finding a size Small pillow on Sierra.com for $14.99 and then I bought a Large one from my local Scheels at full price. I just liked it that much.
When they’ve been compressed and rolled up, they do take a little time to puff up again. Depending on how long they were stored rolled up, it may take quite a while. When I went backpacking back in May, rather than roll up my pillow each night, I just strapped it to the outside of my pack so it would stay as fluffed as possible.
Little did I know that these two pillows would turn out to be wonderful and incredibly useful for much more than just backpacking. We take them with us camping and they are fantastic to have in the car on road trips. I’m a side sleeper and I like to sleep with a pillow hugged to my chest. When I’m camping, I can easily use the Small pillow and still fit in my sleeping bag. I have been trying to justify getting one or two more pillows for future trips.
I also take the small pillow for when we spend a whole day out at a lake. My husband and my kids will spend the day fishing and I paint, read a book, or take a nap in my hammock and the pillow is super comfortable to sleep on and easy to pack into my backpack or even just a tote bag.
Since we had that pesky pandemic last year, I haven’t tried these pillows on an airplane yet, but I’m willing to bet they would work wonderfully to help my kids or me get a little sleep on the flight; whether it’s leaned against a bulkhead or a loved one’s shoulder.
Once my pillows get out of the dryer, I’ll add side by side images of them open and fluffed and then rolled up next to a standard Nalgene bottle so the sizing can be compared.
The BEST part of all: these pillows are machine washable and go in the dryer. Nothing fluffs up the pillow more than throwing it in the dryer. Obviously that’s not helpful when I’m backpacking, but knowing these can get dusty, dirty, or fall into a lake (I know that from experience!) or…. you know… drooled on… and then they can easily be washed when I get home gives me so much peace of mind. Huzzah!!
Today is about backpacking. Although, I did paint en plein air during this trip, so there was some art as well. I have lots of photos too for future painting reference! There will be future paintings from this trip, promise! There are a bunch of affiliate links in this post in case you want to know what gear and food I used and I am always appreciative if you shop through these links.
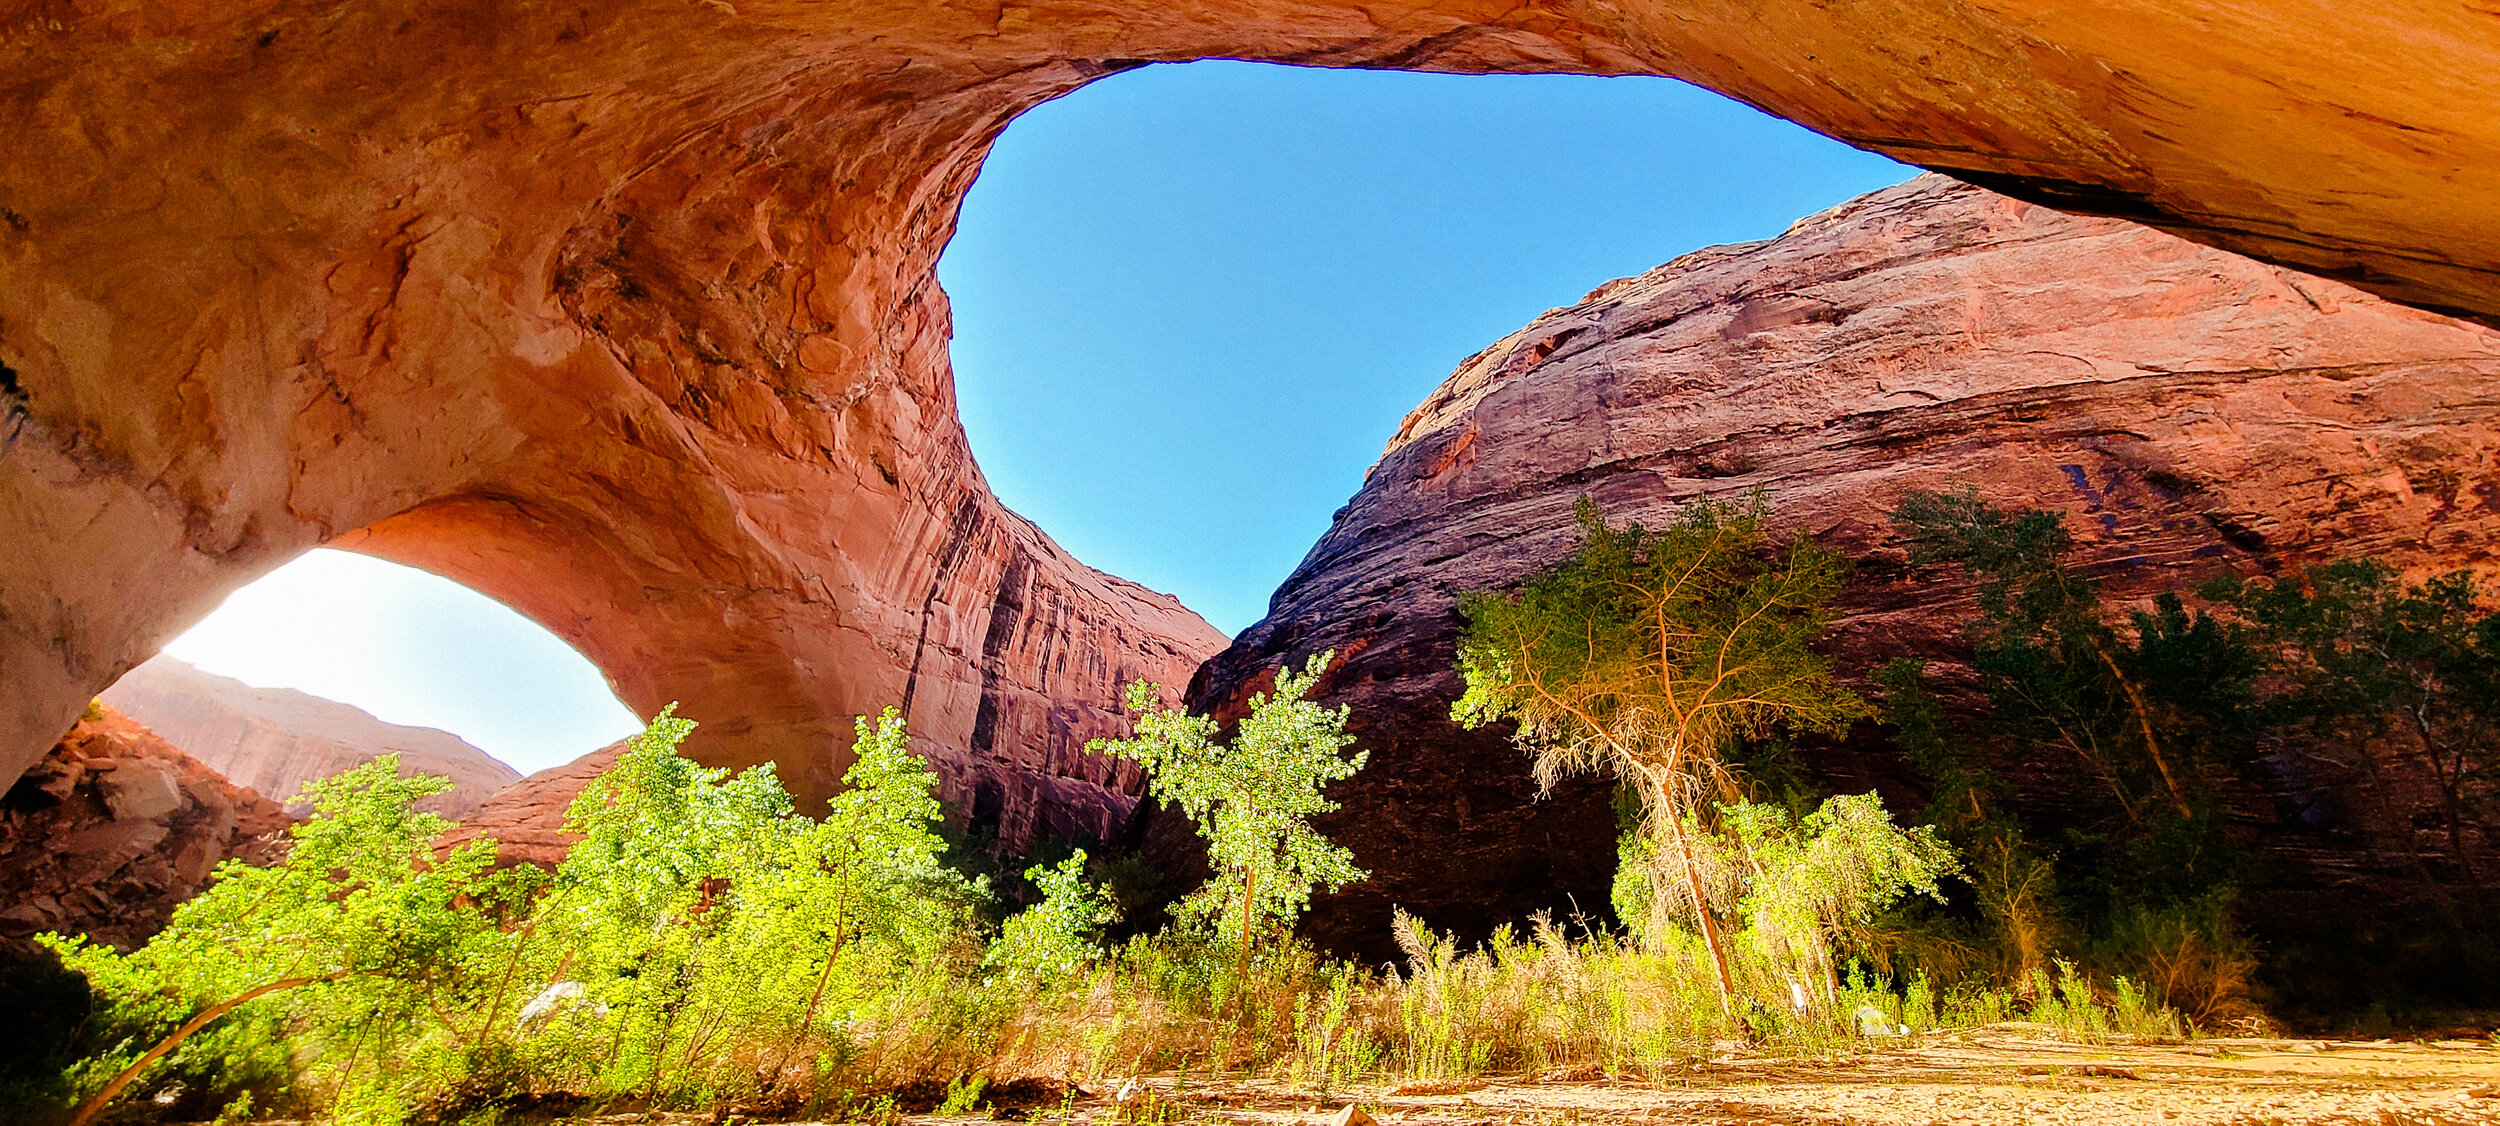
Image by Michelle Craig
I don't have lots of experience backpacking. I did a couple of short trips when I was 18 and then nothing until I took my oldest son backpacking last August for the first time. If you'd asked me 10 years ago if I wanted to give backpacking a go again, I'm sure I would have said I'm too old. My 11yo asked me about backpacking last year after he watched YouTube videos of folks who backpacked to secluded fishing spots and I figured we could give it a try and see if he liked it. We did a one-night trip in American Fork Canyon and he had a blast. I've done a lot of reading about backpacking, and I plan to take my son a few times this summer, so I don't really feel unprepared; I'm just still a newbie.
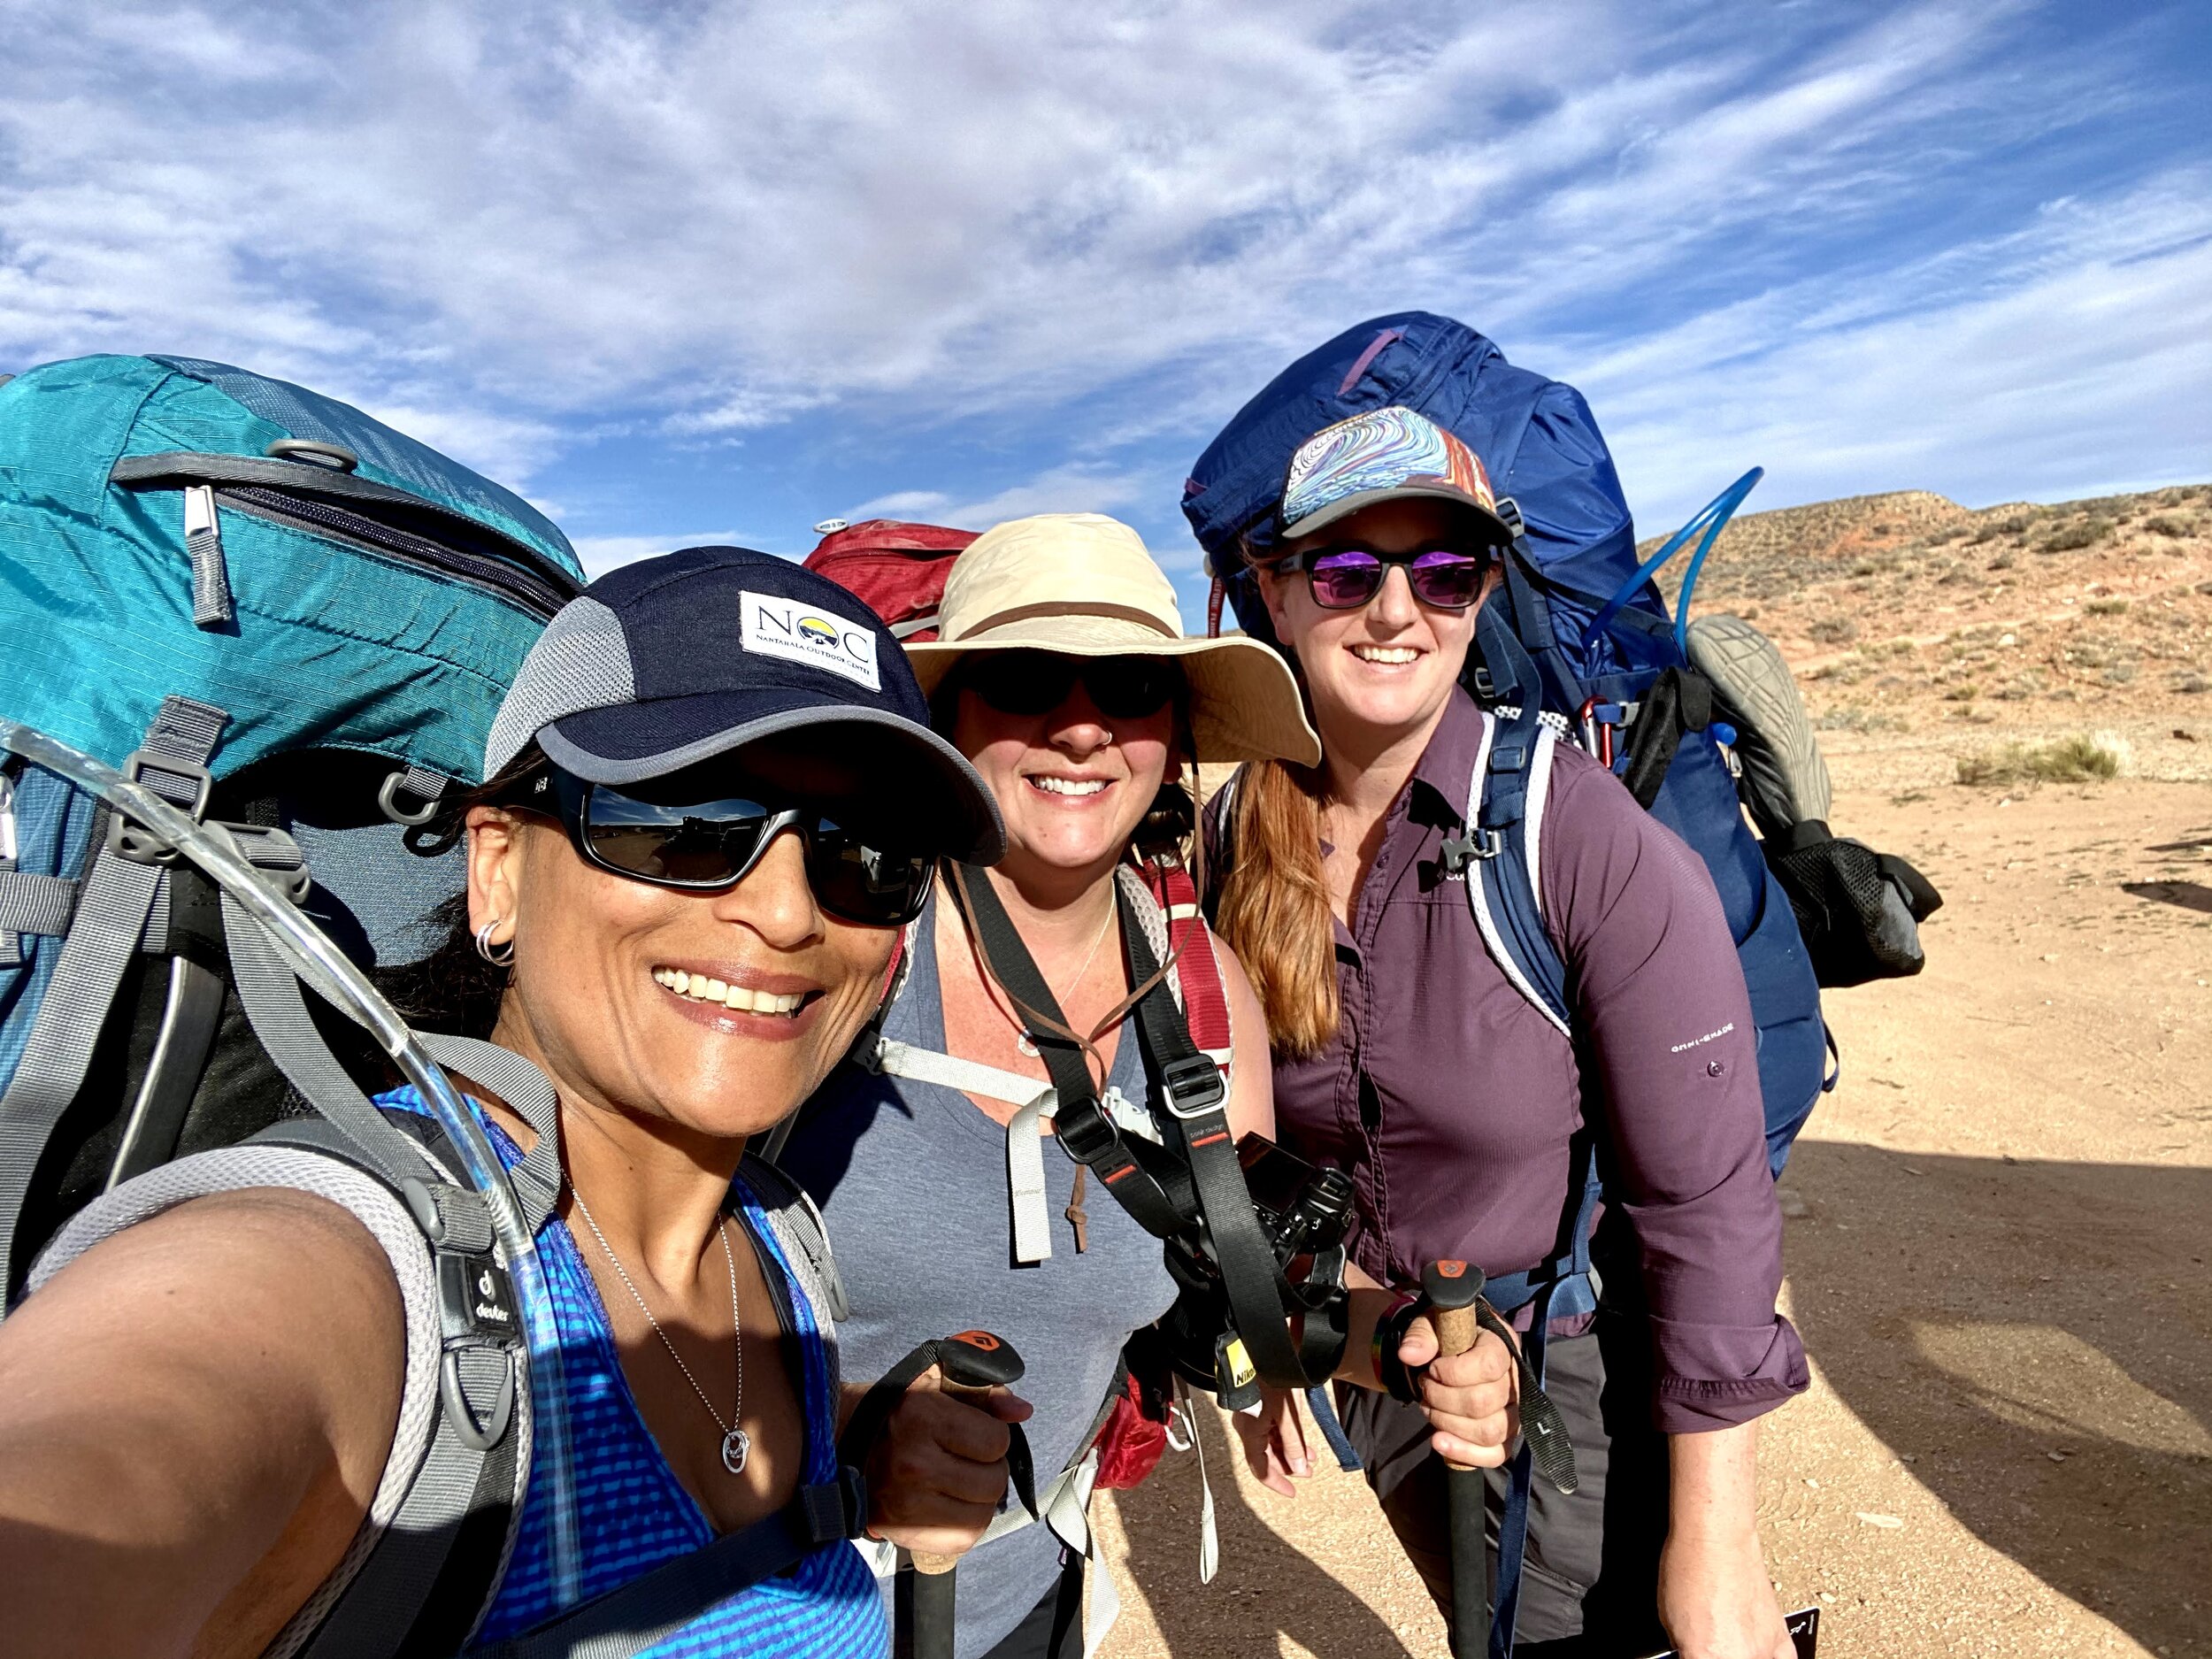
My friend, Michelle shared her desire to backpack in the Escalante region of Utah last month and asked if I wanted to join. I jumped at the chance. I already had 99% of the gear I would need, so I just needed to commit and go for it. Michelle’s friend, Sumitra decided to join at the last minute and flew to SLC from Indianapolis and we all drove down to Escalante together.

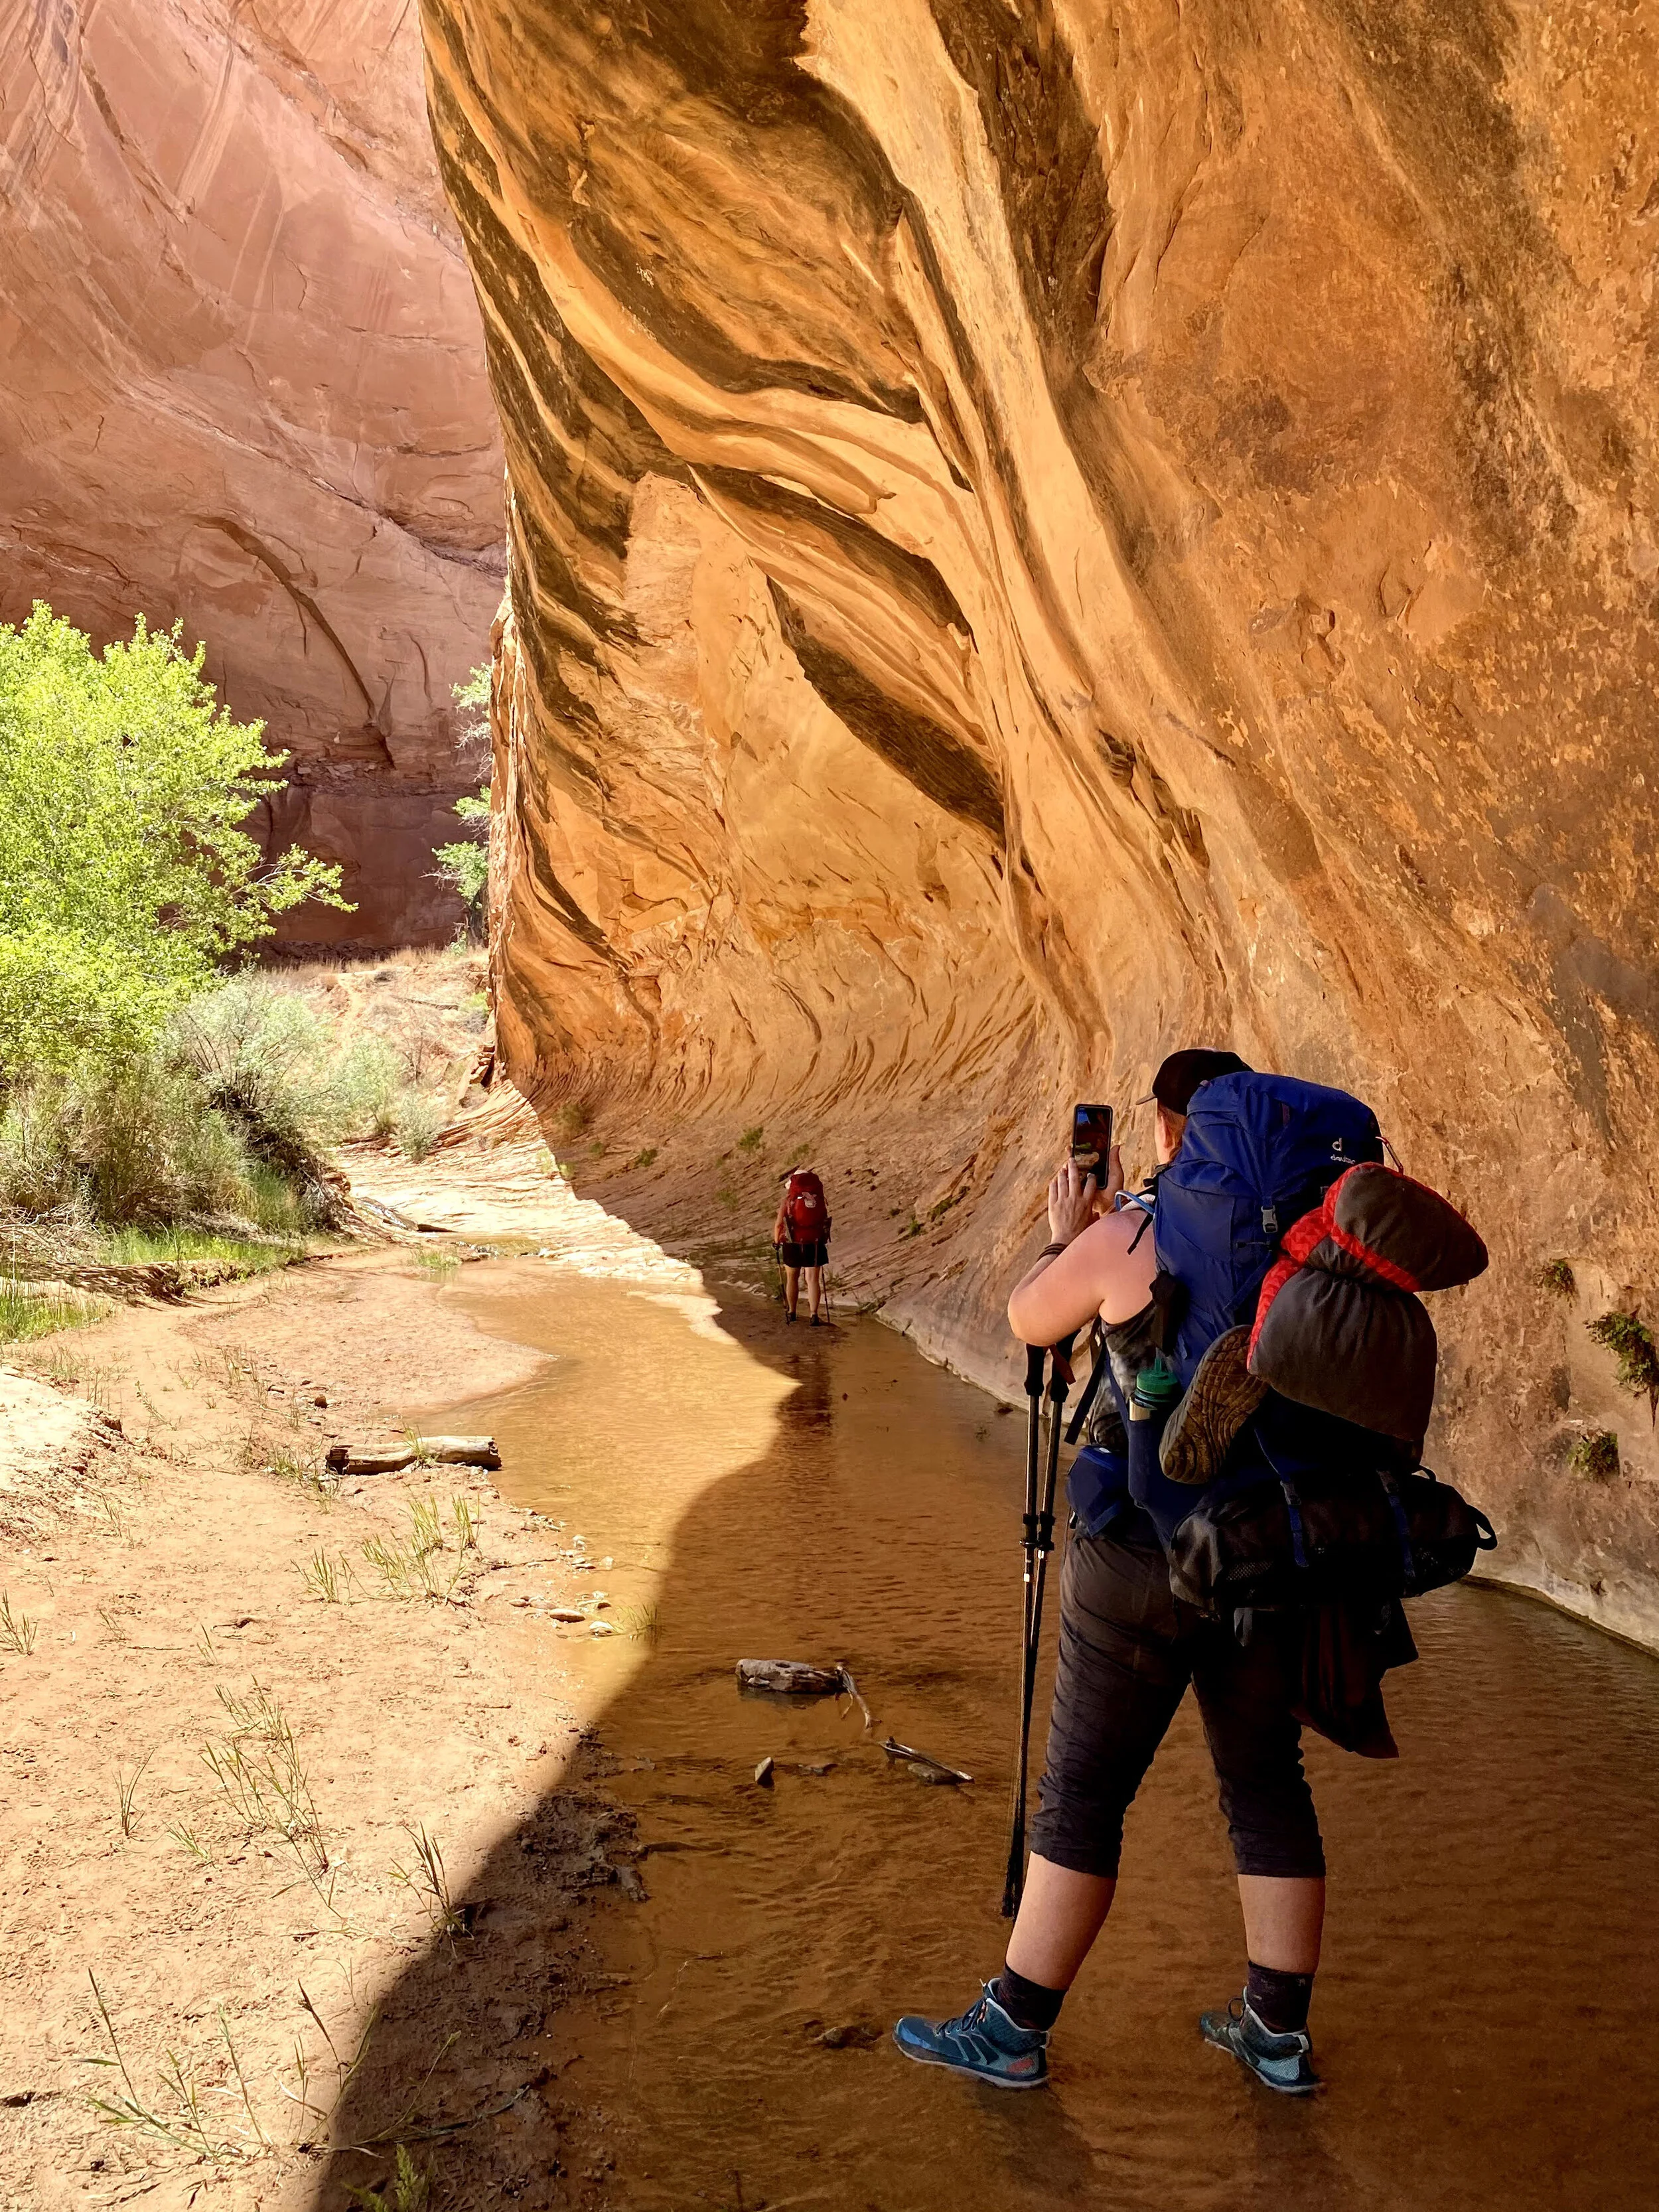
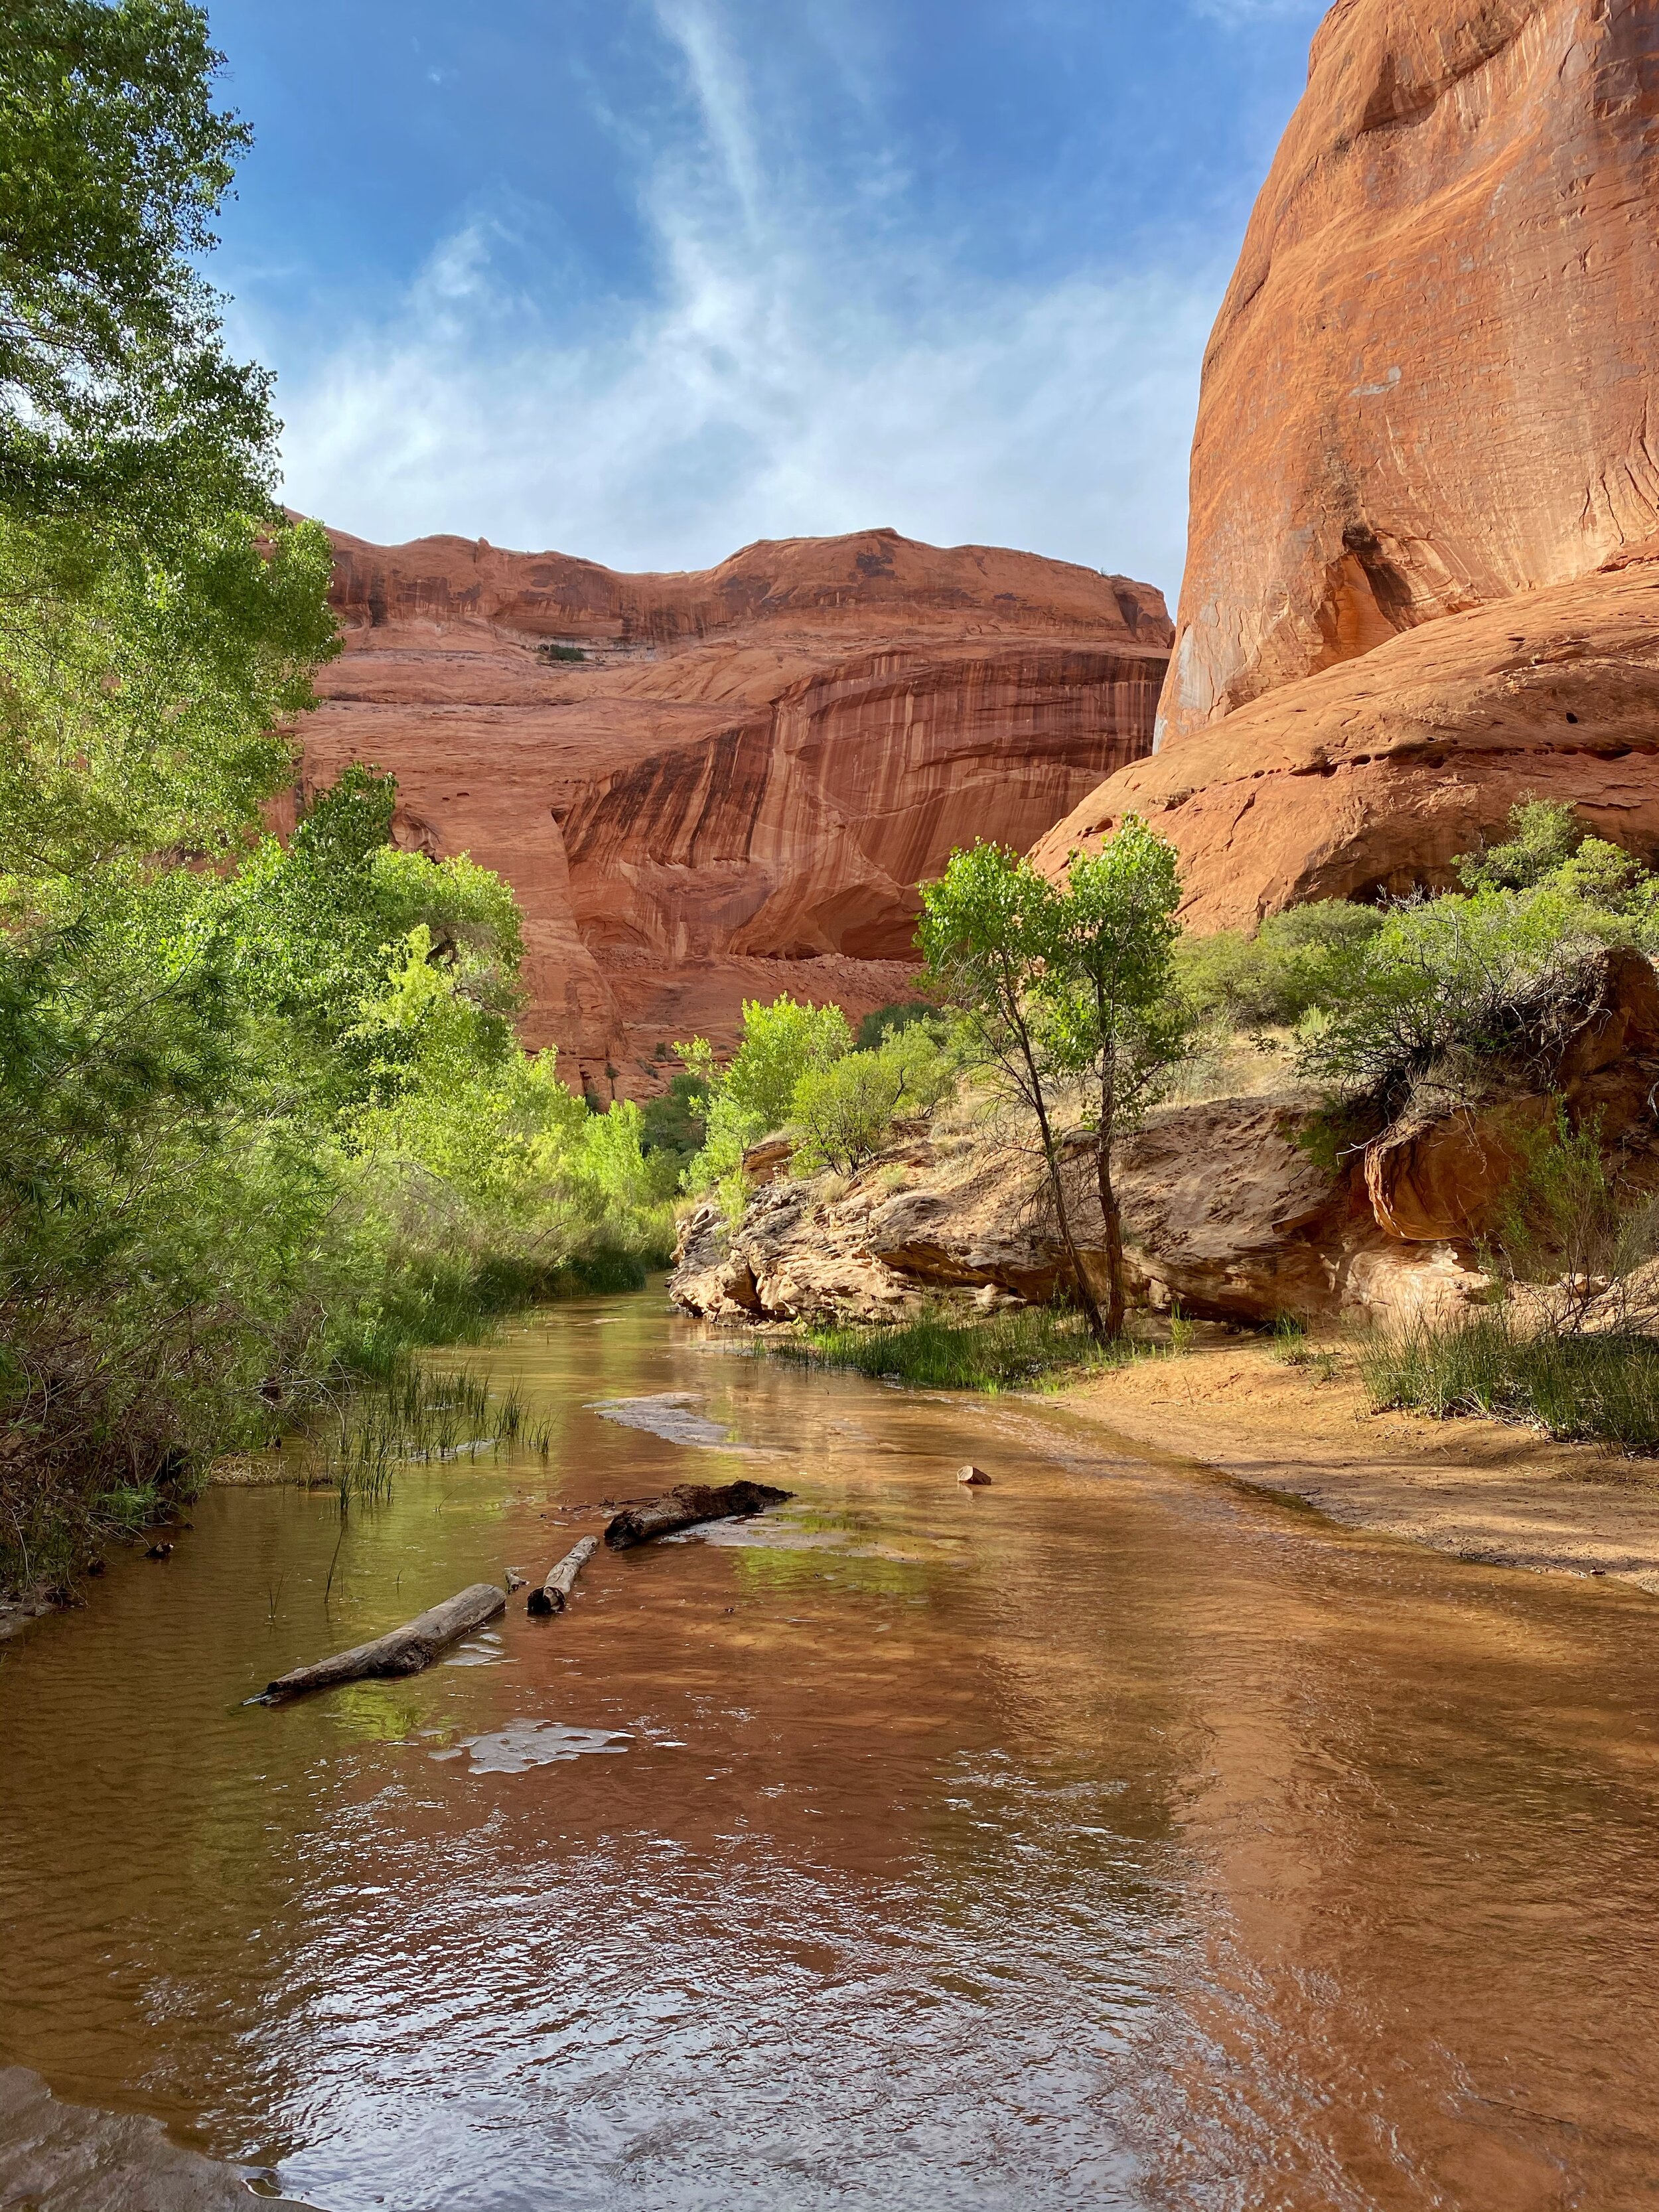
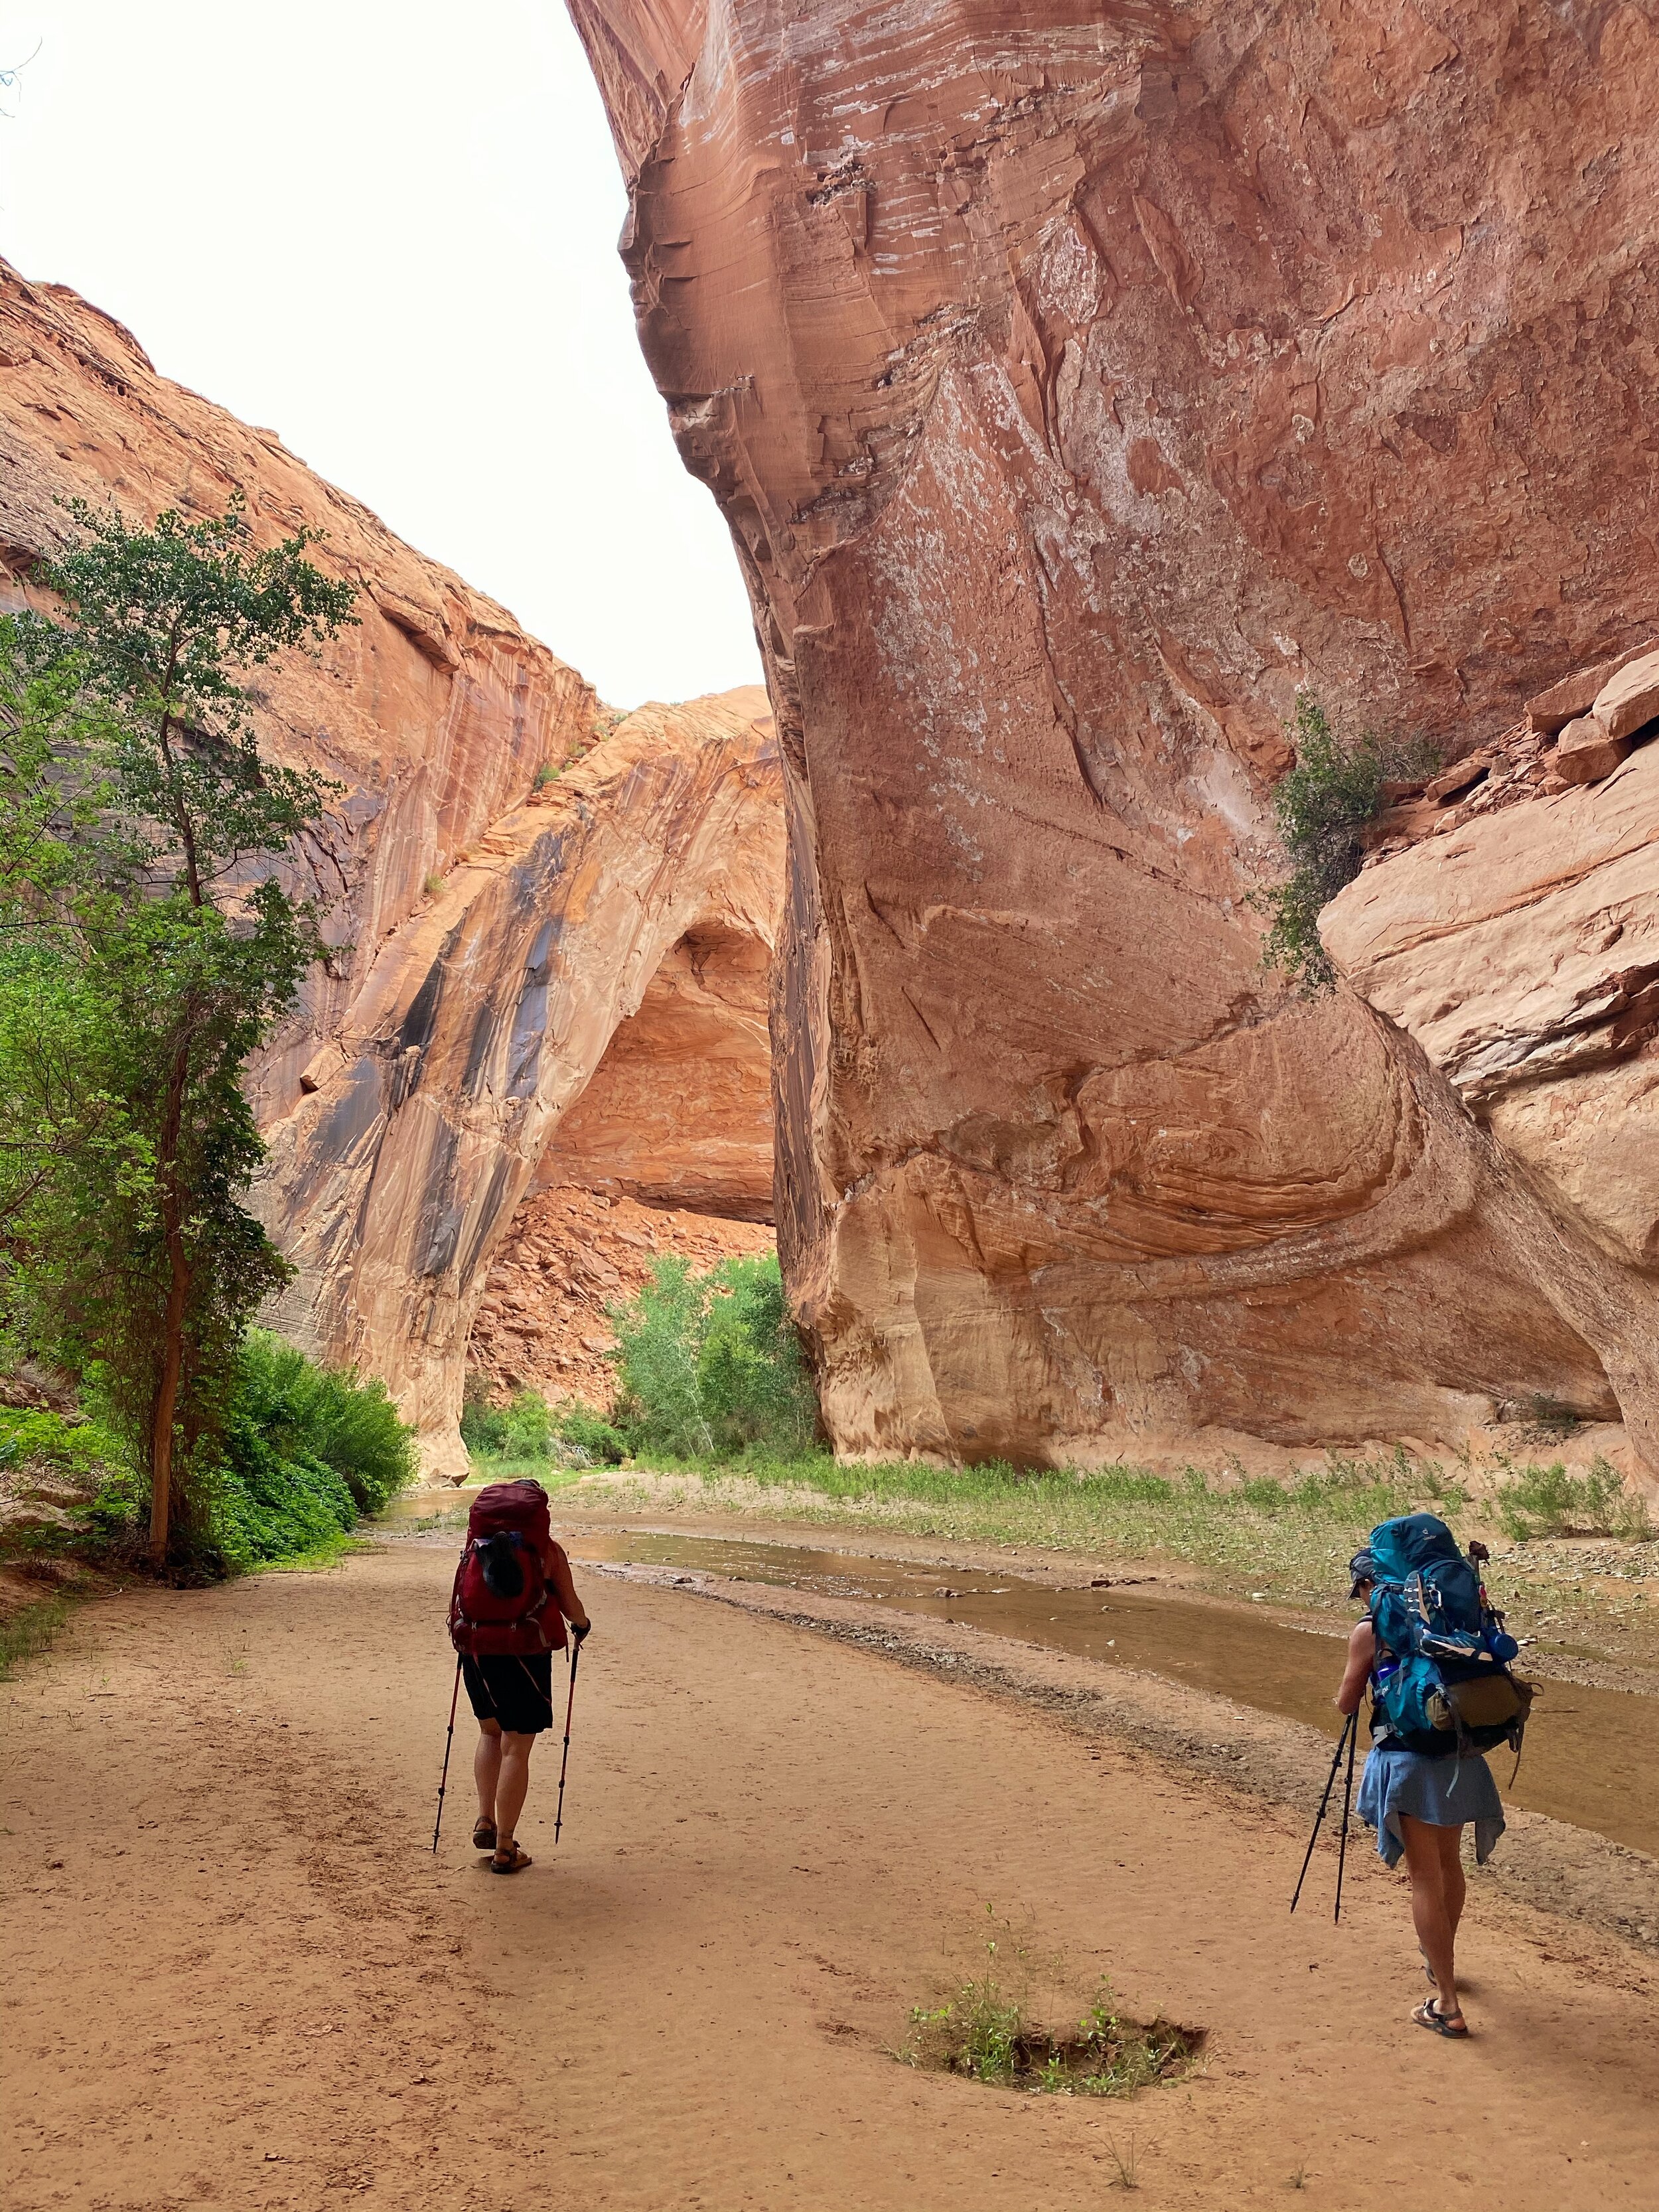
Coyote Gulch is a meandering, zig-zaggy canyon, carved by the Escalante River, that has massive arches, towering caverns, and waterfalls. There's usually water flowing year-round so it's ideal for backpacking because it has reliable water. It resides inside Glen Canyon National Recreation Area where the Escalante River flows into Lake Powell. There are a handful of access points that can make your trip shorter or longer depending on how long you plan to be there. A few routes can easily make it a day hike, but I HIGHLY recommend backpacking to explore more.

We opted to hike into the Gulch via Hurricane Wash. It's one of the longer routes, but it's also very easy to follow, which is what we were going for. Also, to get to the other access points, we would've needed a vehicle with 4WD and possibly some climbing rope; which we didn't have this trip.
In all honesty, one of the hardest parts of this trip for me was driving on Hole in the Rock Road. It's a dirt and gravel road that's grated like a washboard and it's painfully slow going in a car like my Toyota minivan; like between 10 and 15 MPH most of the way. There are lots of wonderful places to visit along this road, but driving 35 miles one-way took almost 2.5 hours the first day and just over 3 hours the last day. When we do this trip again, I really, really want to have a vehicle that will allow us to get there faster.
Hiking with a heavy pack isn't all that different from hiking with a toddler on my back, so while it's been a while since I hiked carrying a kid, my body remembered how pretty quickly.
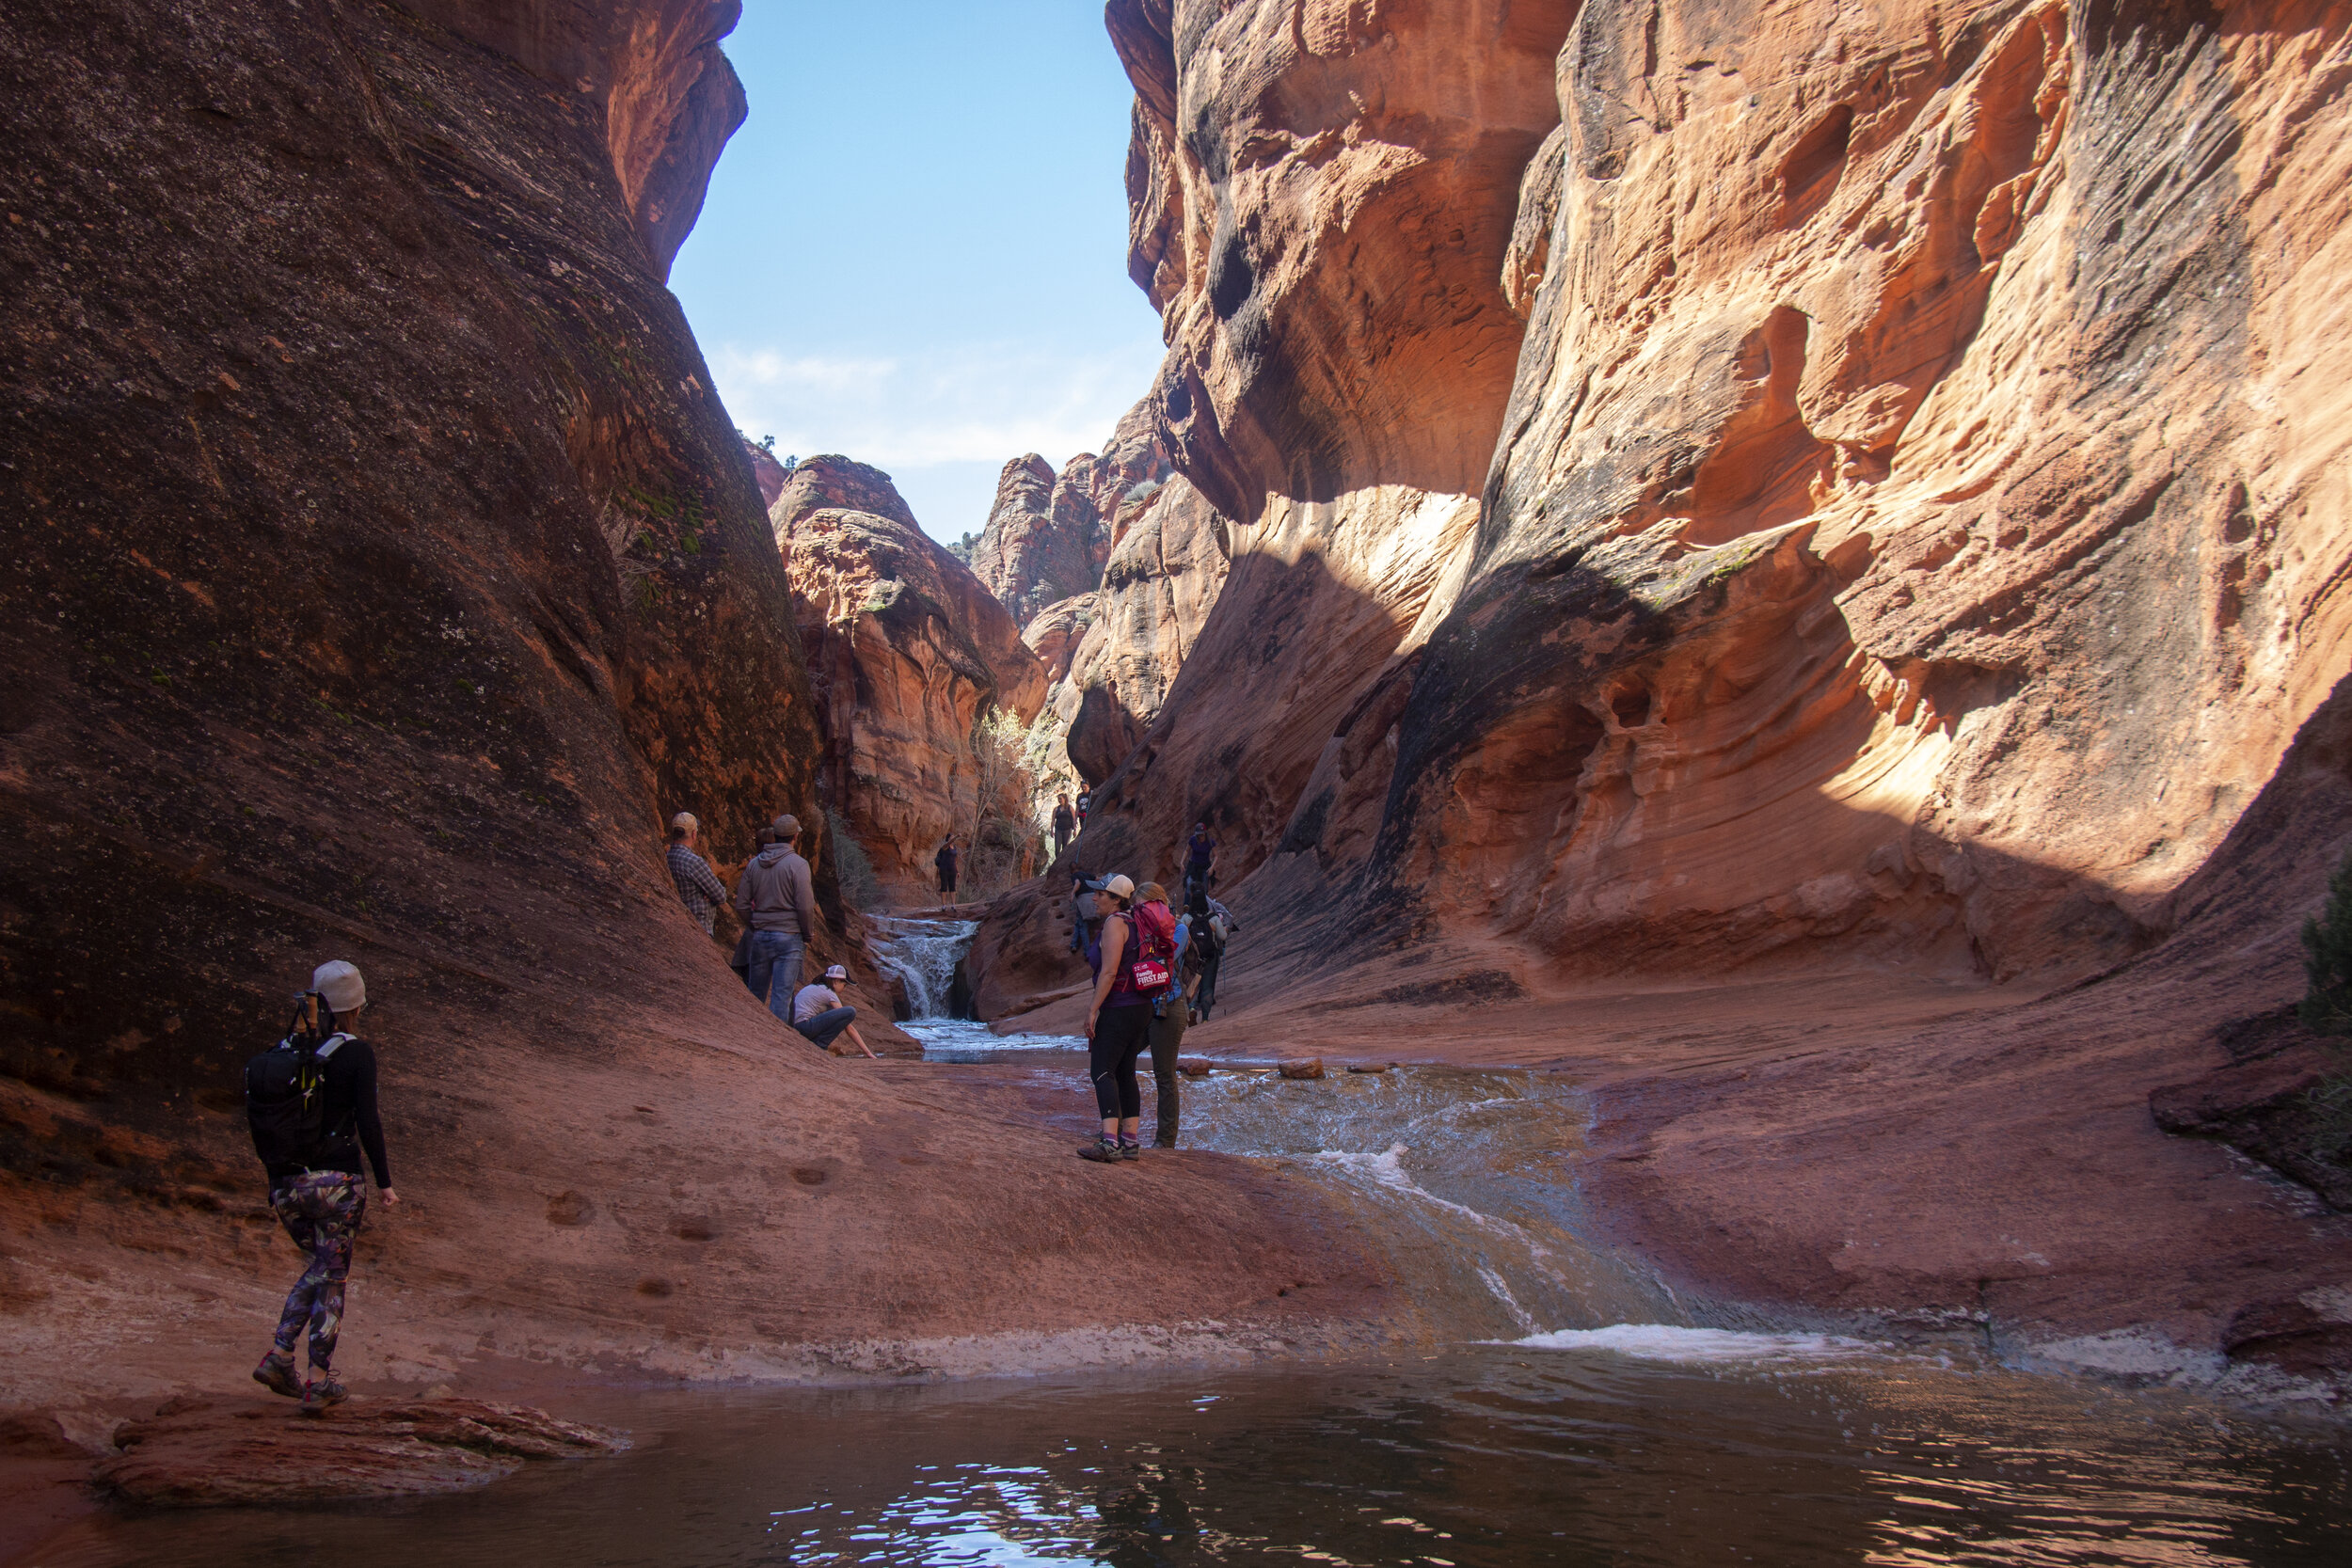
We hiked into the canyon late in the afternoon on Tuesday and made good time reaching the confluence of Hurricane Wash and the Escalante River right around headlamp-o-clock. There were at least half a dozen tents camped at the confluence, so we hiked on for another mile before stopping for the night at an empty, sandy beach that stuck out from a bend in the river. As the full moon rose, it cast bright light on the sandstone cliffs and made it look like there was a spotlight. There was no way our cameras could capture it, but it was pretty amazing. It was beautiful watching the stars and bats come out.
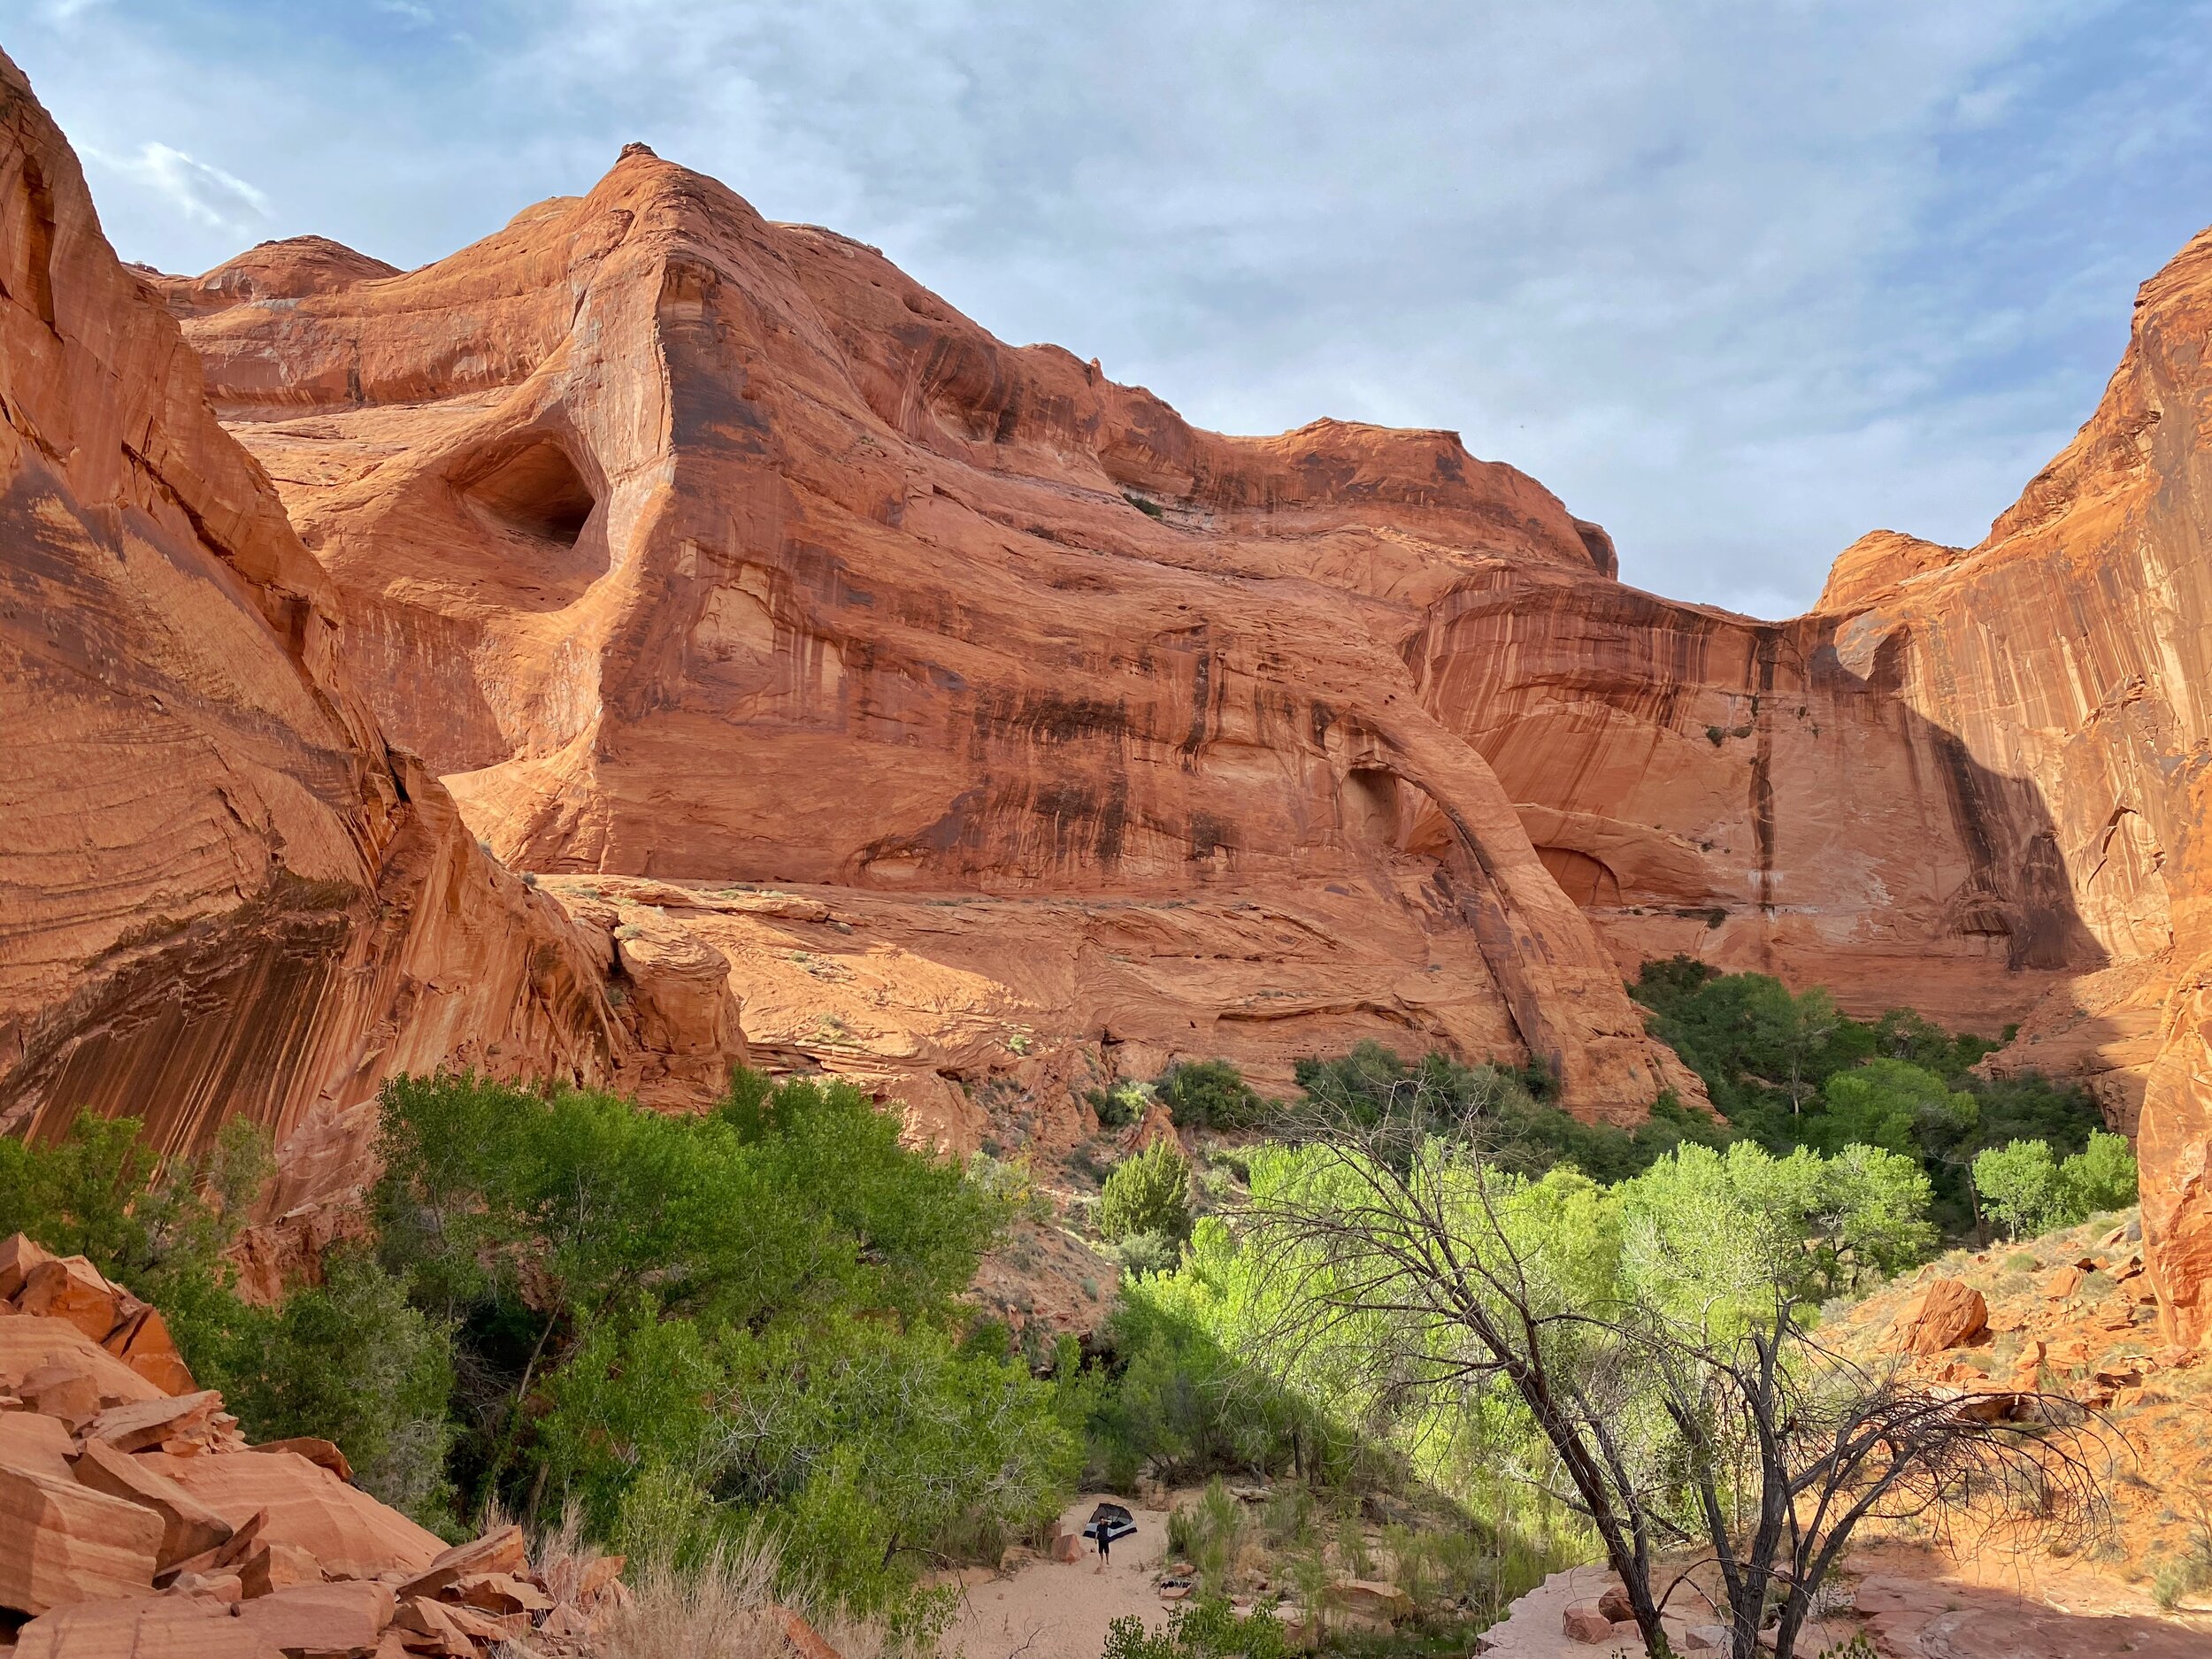
In writing this post and sorting through the photos that all three of us took, one thing that stands out to me is that photos really don’t do this canyon justice; especially when it comes to the sheer size of the sandstone cliffs. There are a few shots that have people in them and you can barely see them because the cliffs are so huge. I’ll try to point them out in the captions.

They are so tiny compared to the cliffs!
The next morning we packed up and headed further into the Gulch intending to explore Jacob Hamblin Arch and to get closer to Coyote Natural Bridge or Cliff Arch, depending on how we were feeling. There was some cloud cover that morning, so we were spared having the hot sun beating down on us.
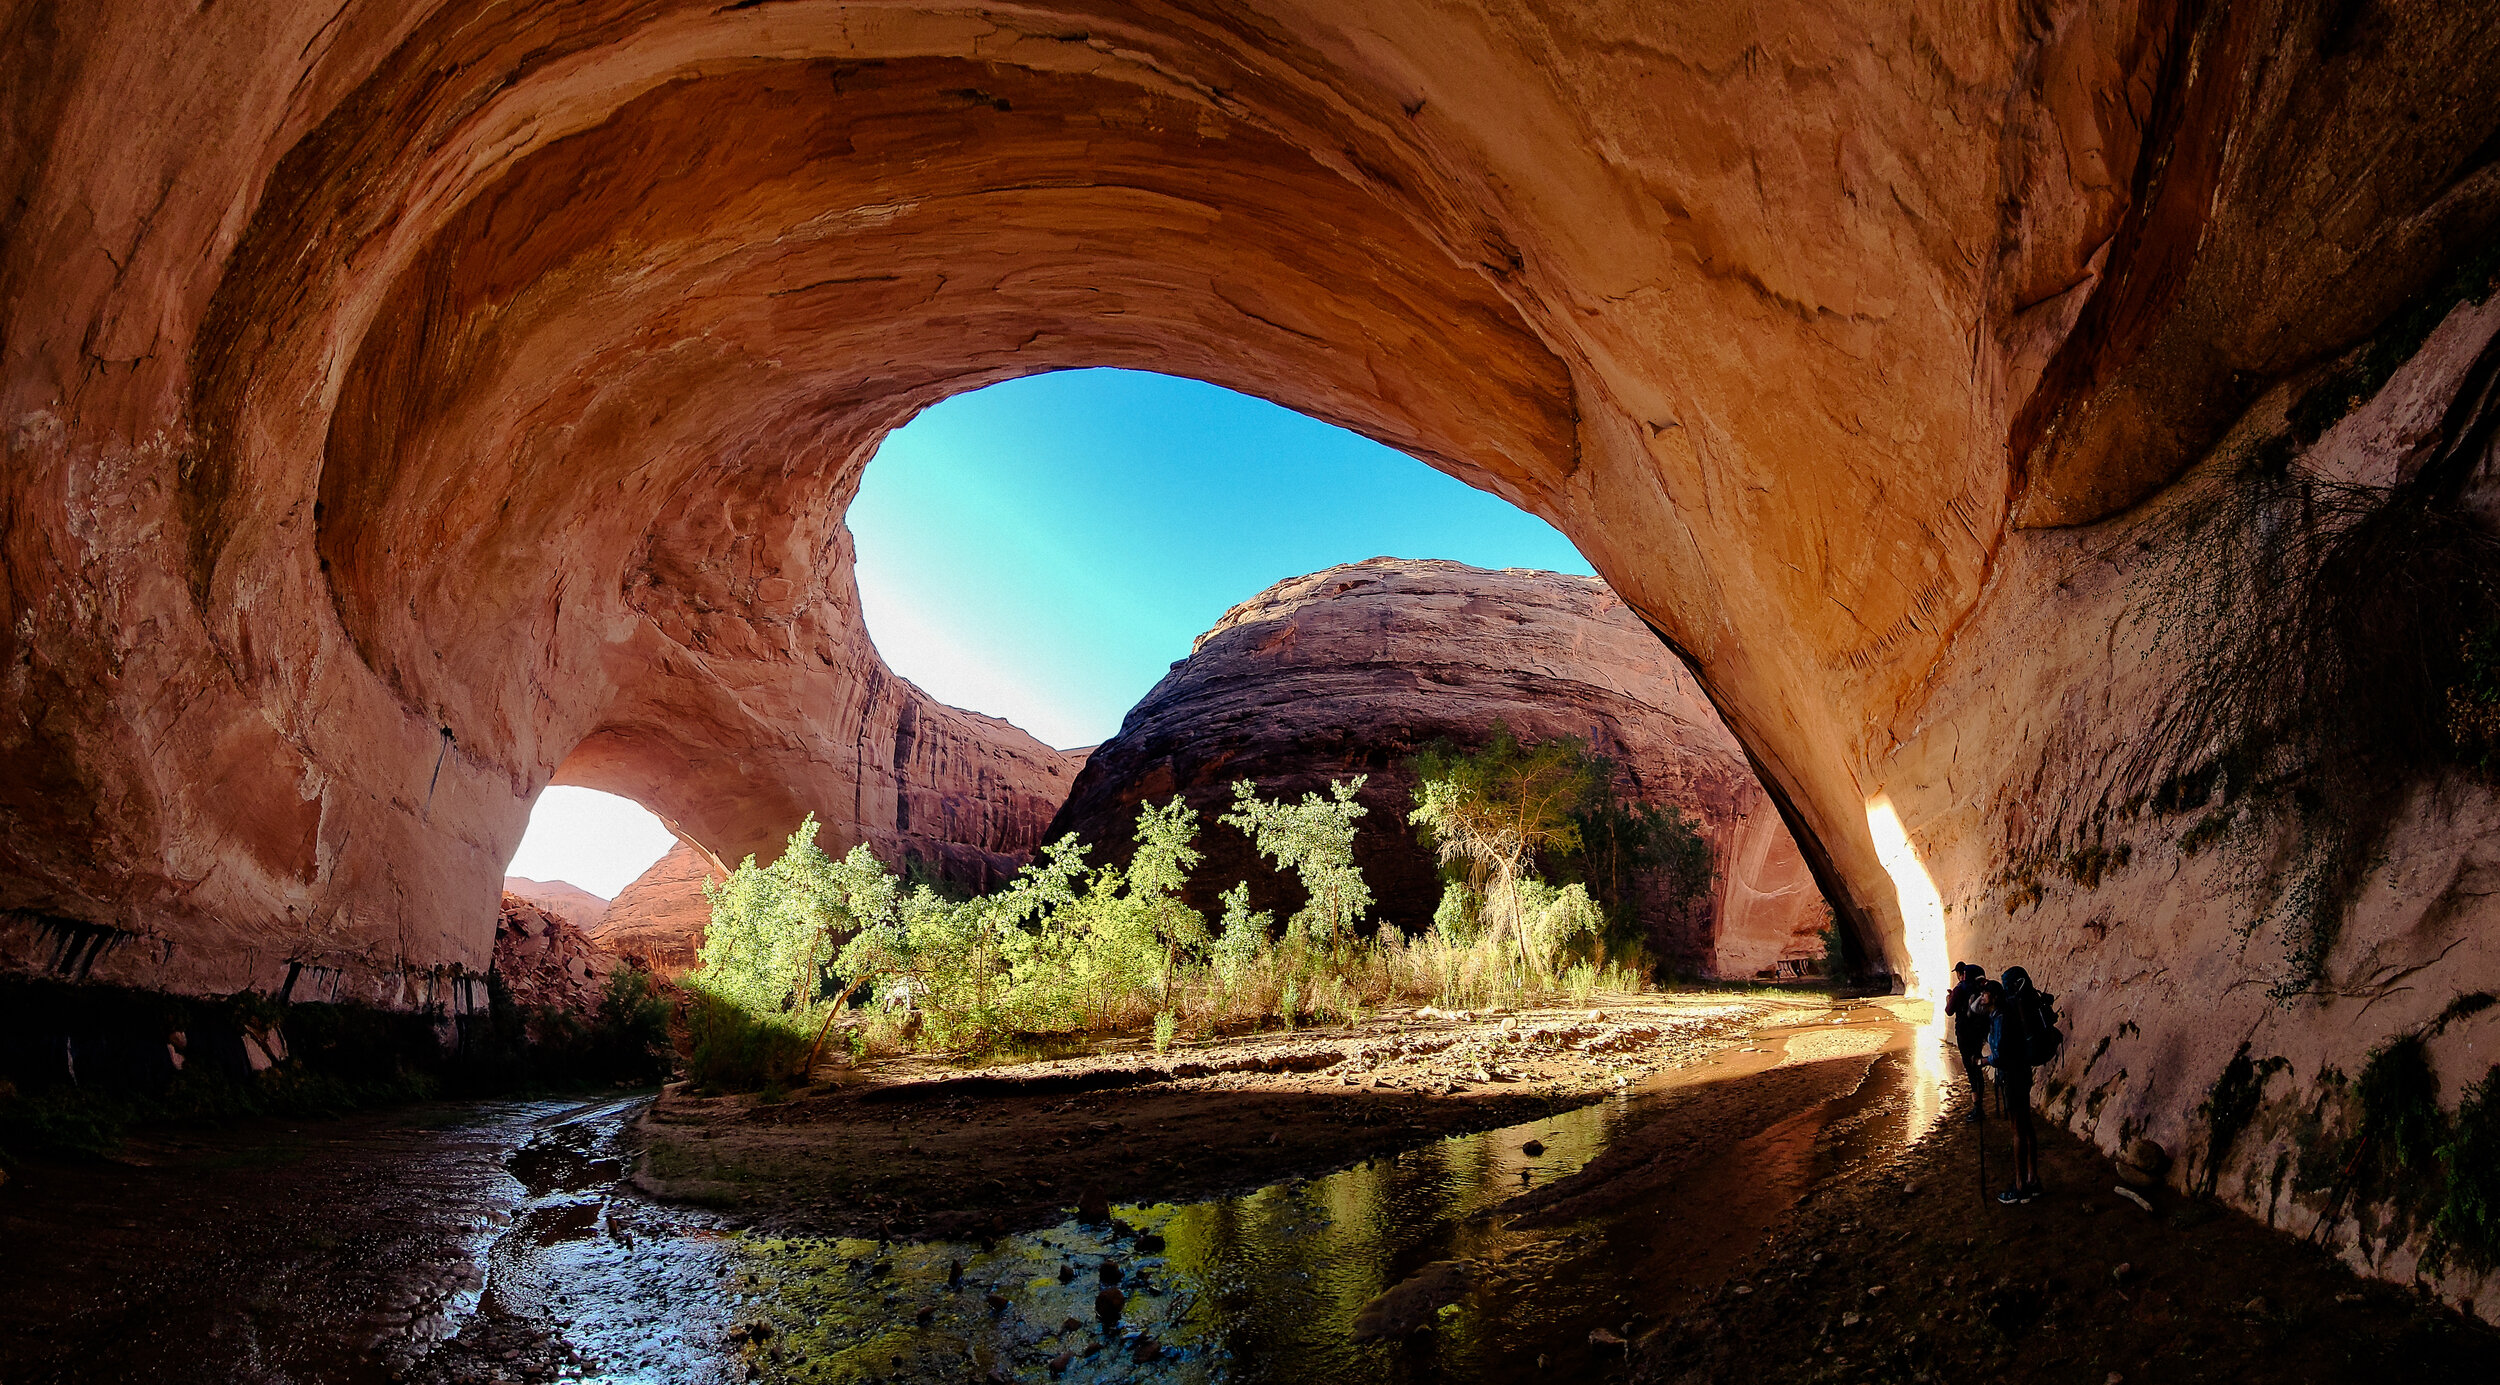
Image by Michelle Craig
Jacob Hamblin Arch was freaking epic!! Cameras really can’t capture the scale. My iPhone struggled with the light, but Michelle’s Galaxy did a great job. I had brought a few stickers with me and made sure to get a photo of my sticker at Jacob Hamblin Arch.
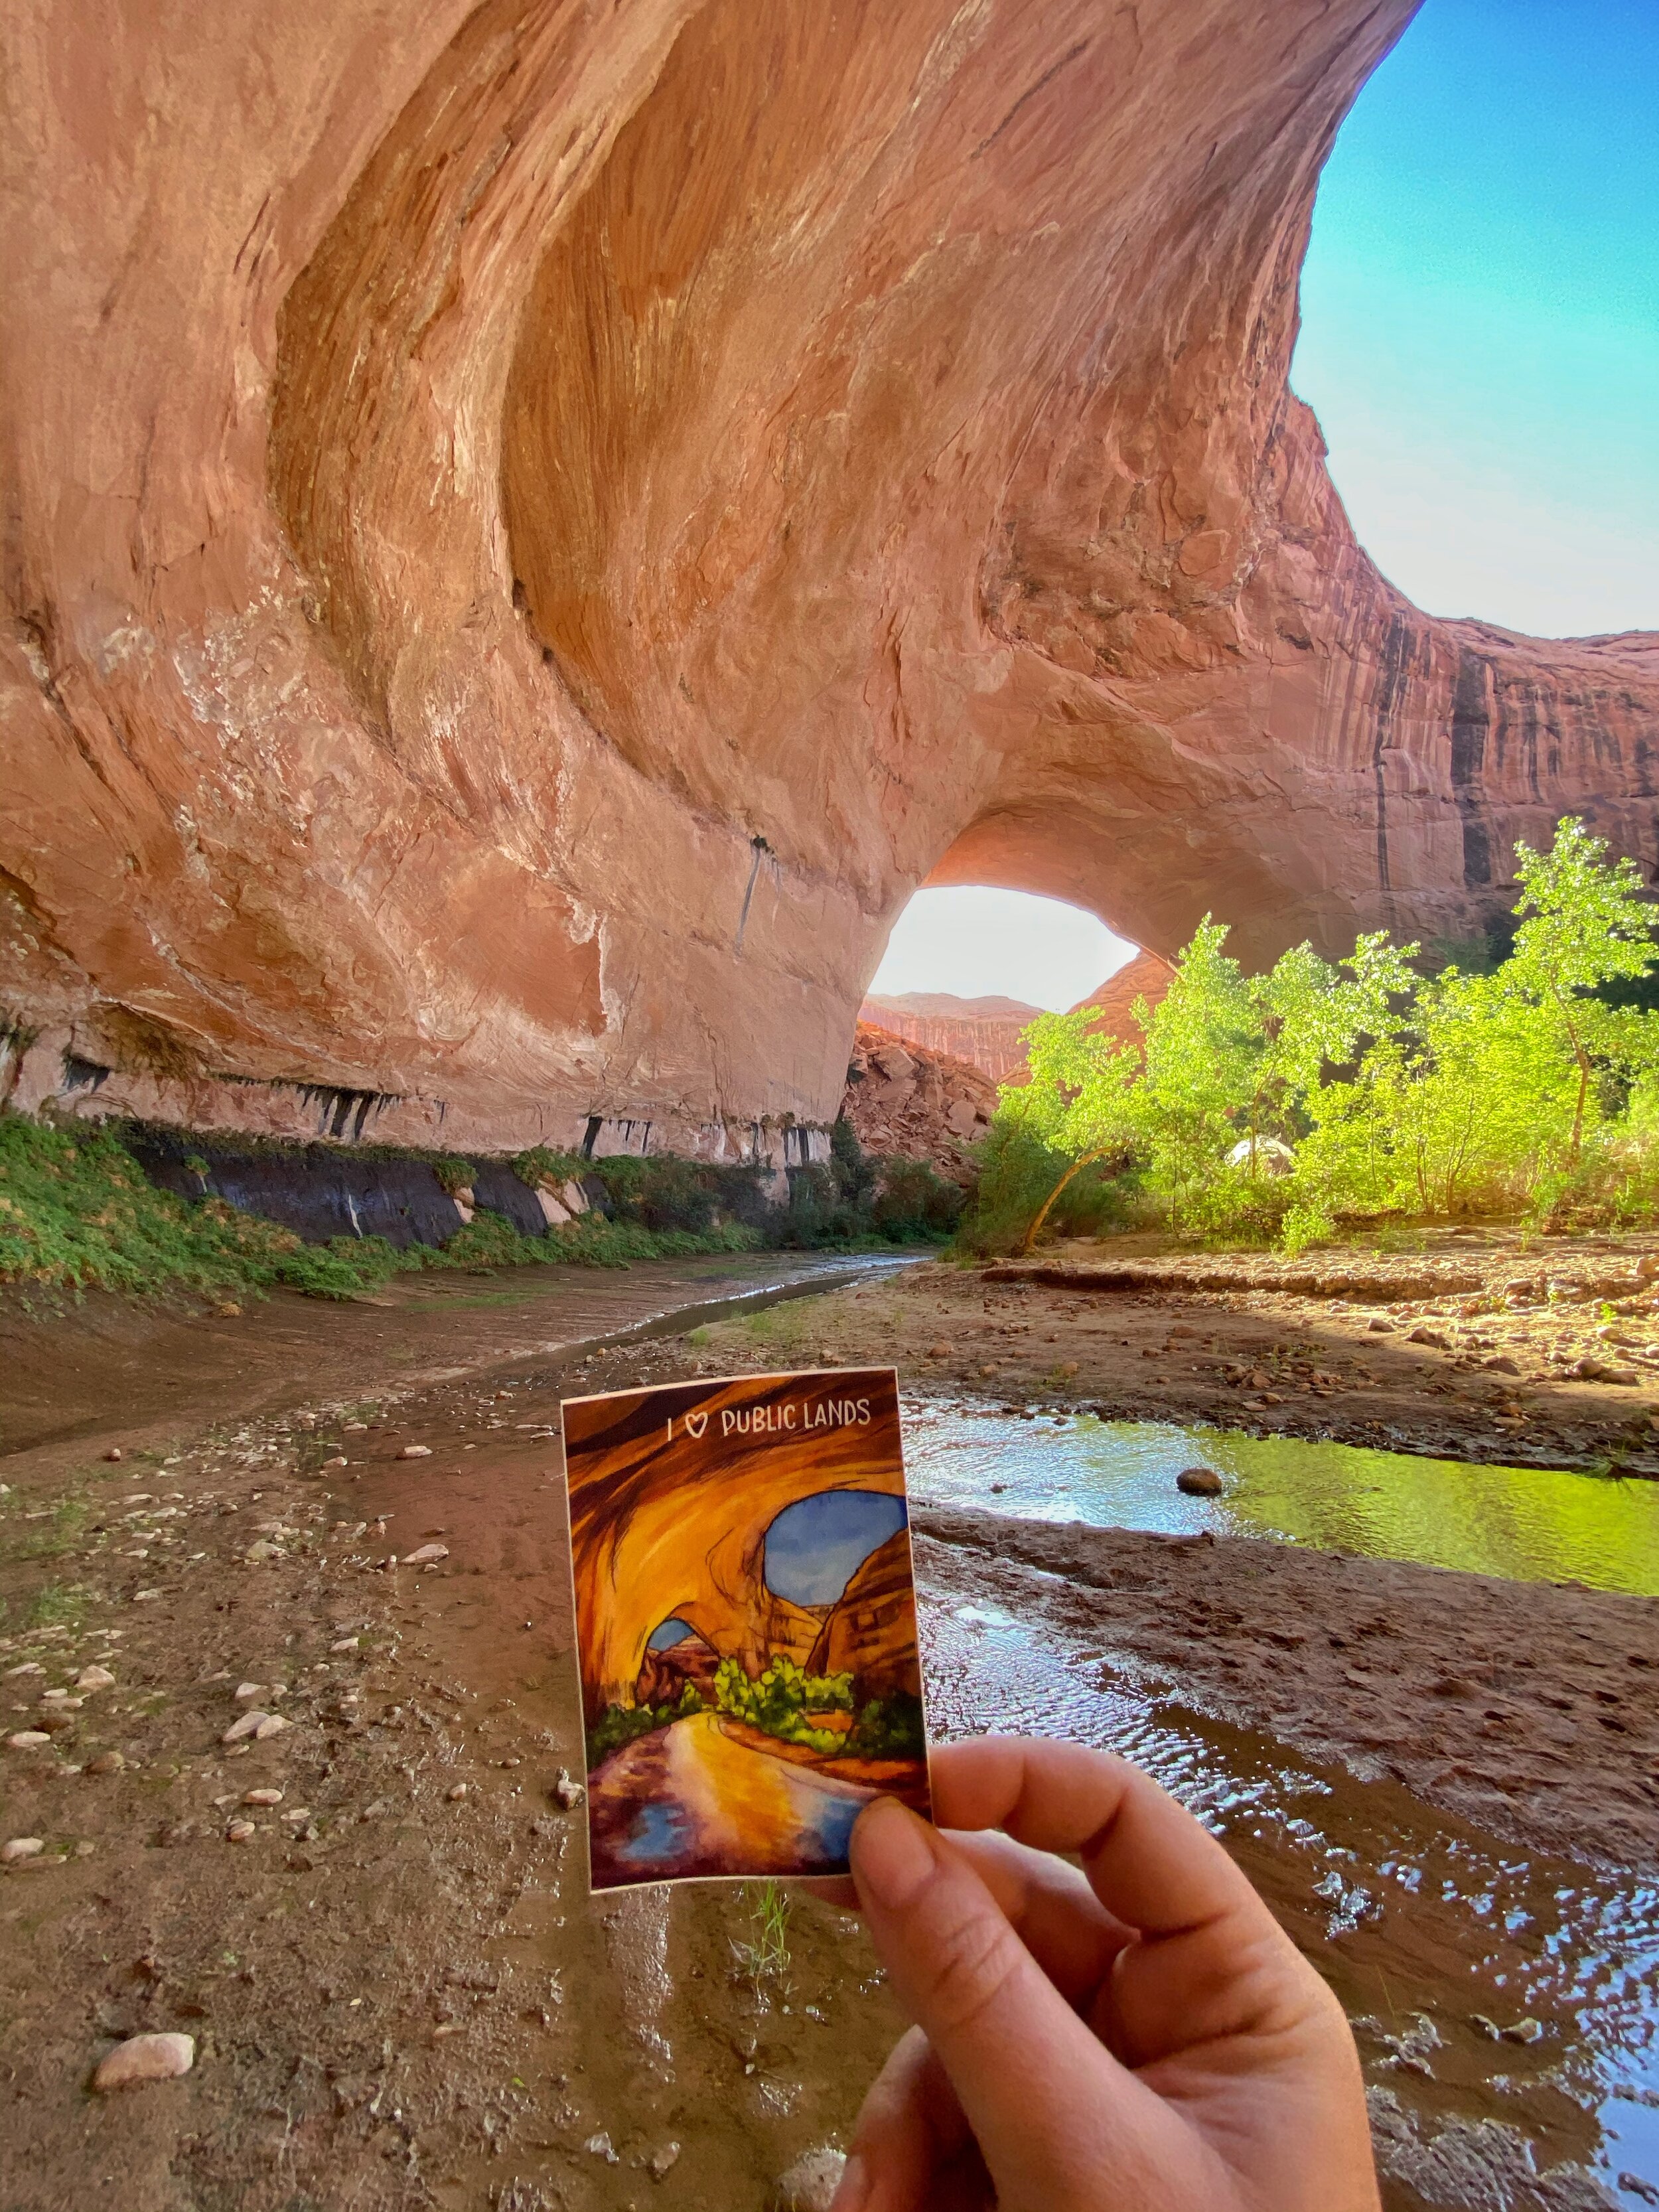
Click on this photo if you’d like to buy one of these stickers.
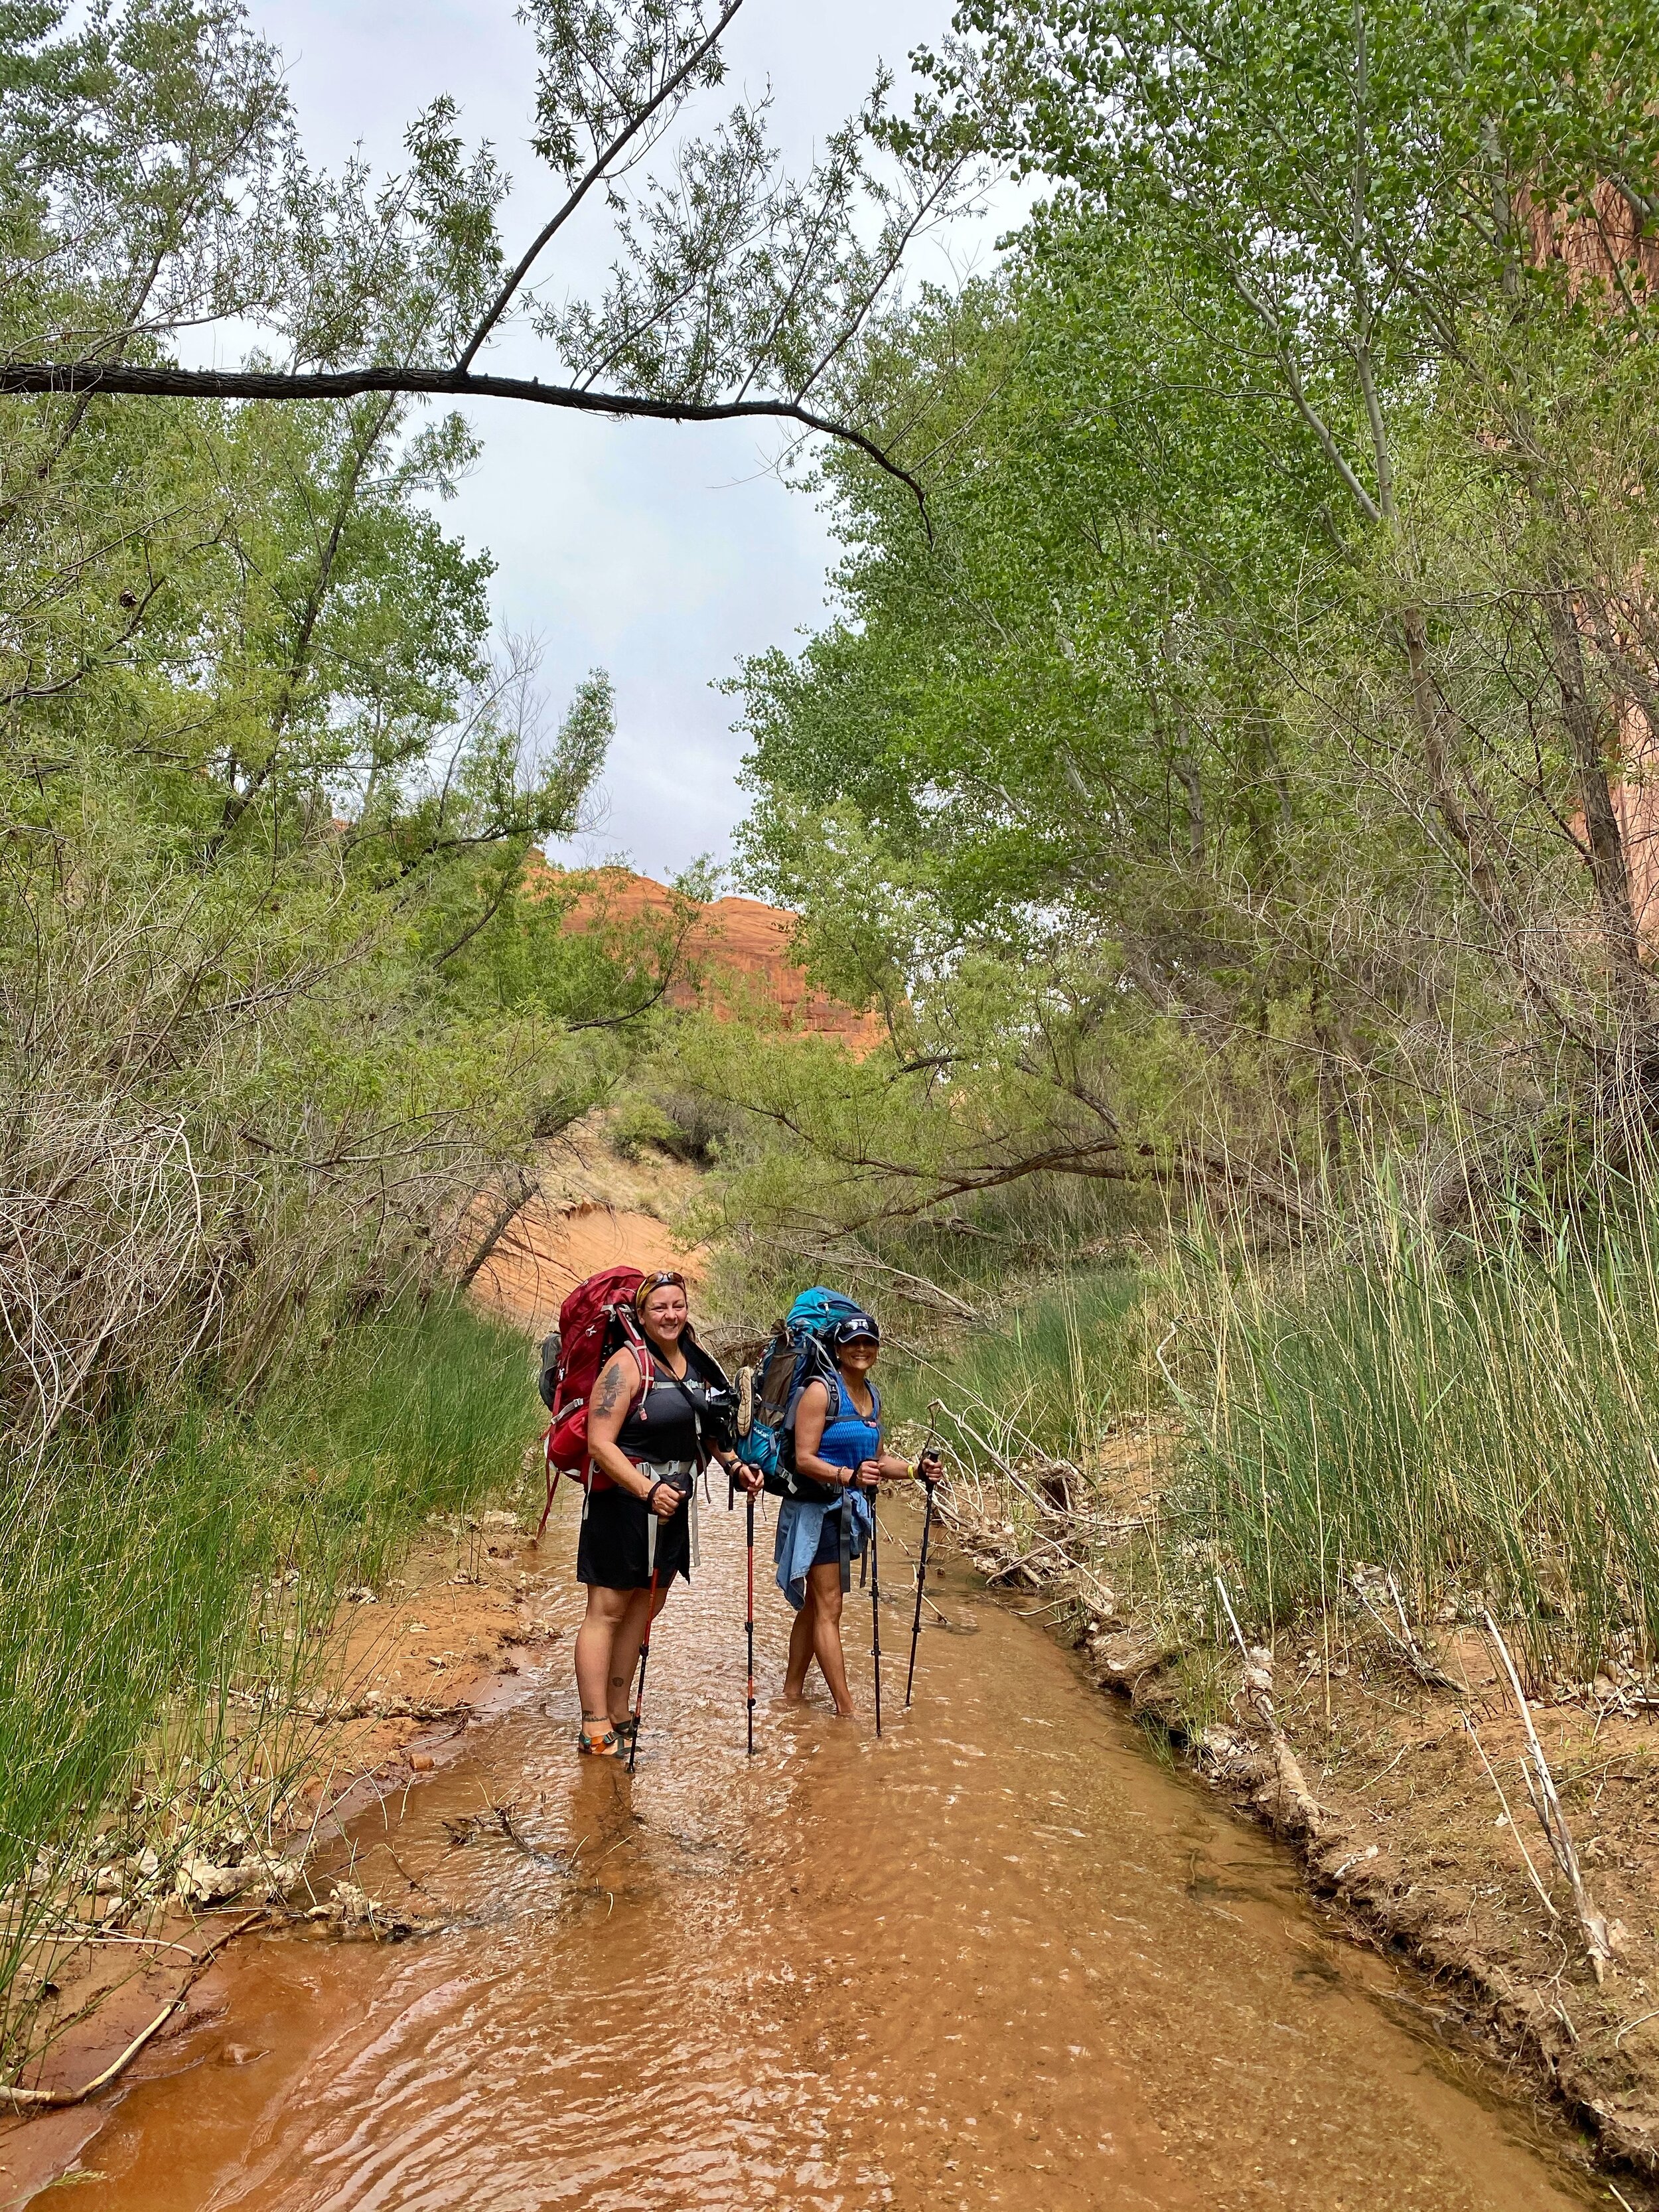
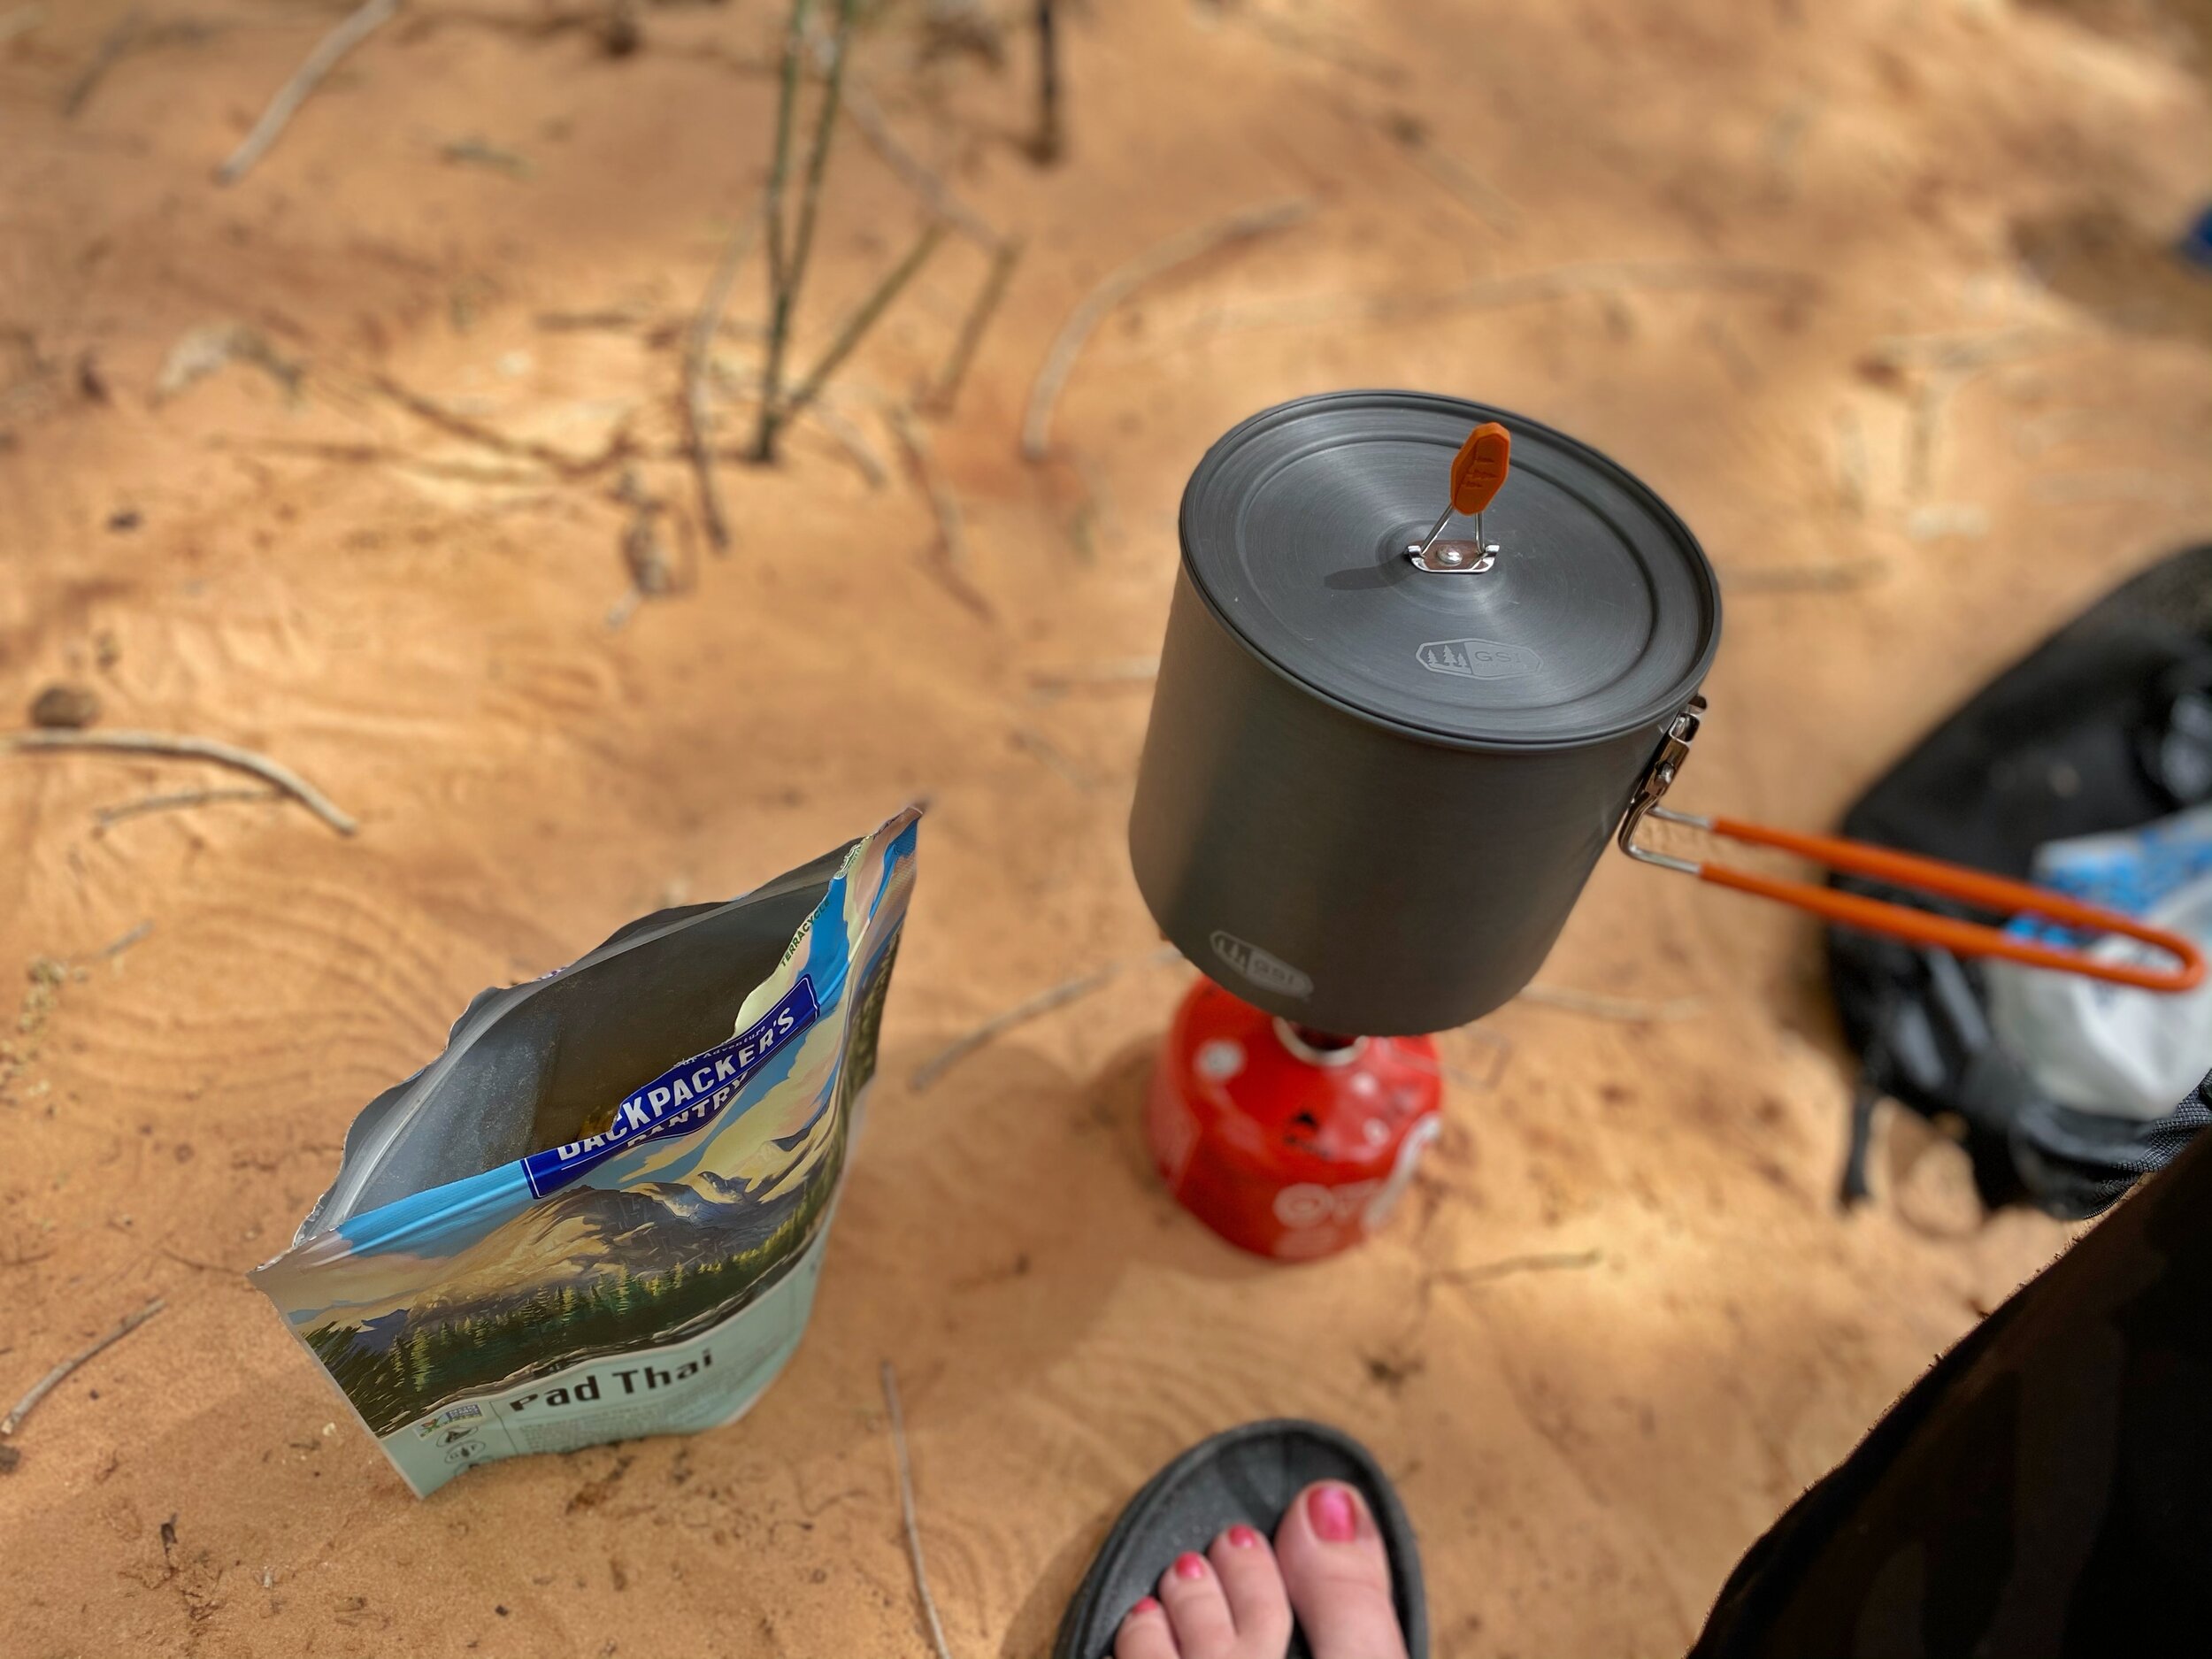
We hiked further into the canyon and physically in the creek for a little bit, and then set up camp. For lunch I had the vegetarian Pad Thai from Backpacker's Pantry and it was delicious, but it was also a really massive portion; even for two people. I felt bad that I was barely able to eat half of it. Michelle and Sumitra shared the vegan Thai Curry from Good To-Go and it was delicious too… almost shockingly so. I need to find more food options that are just one serving.
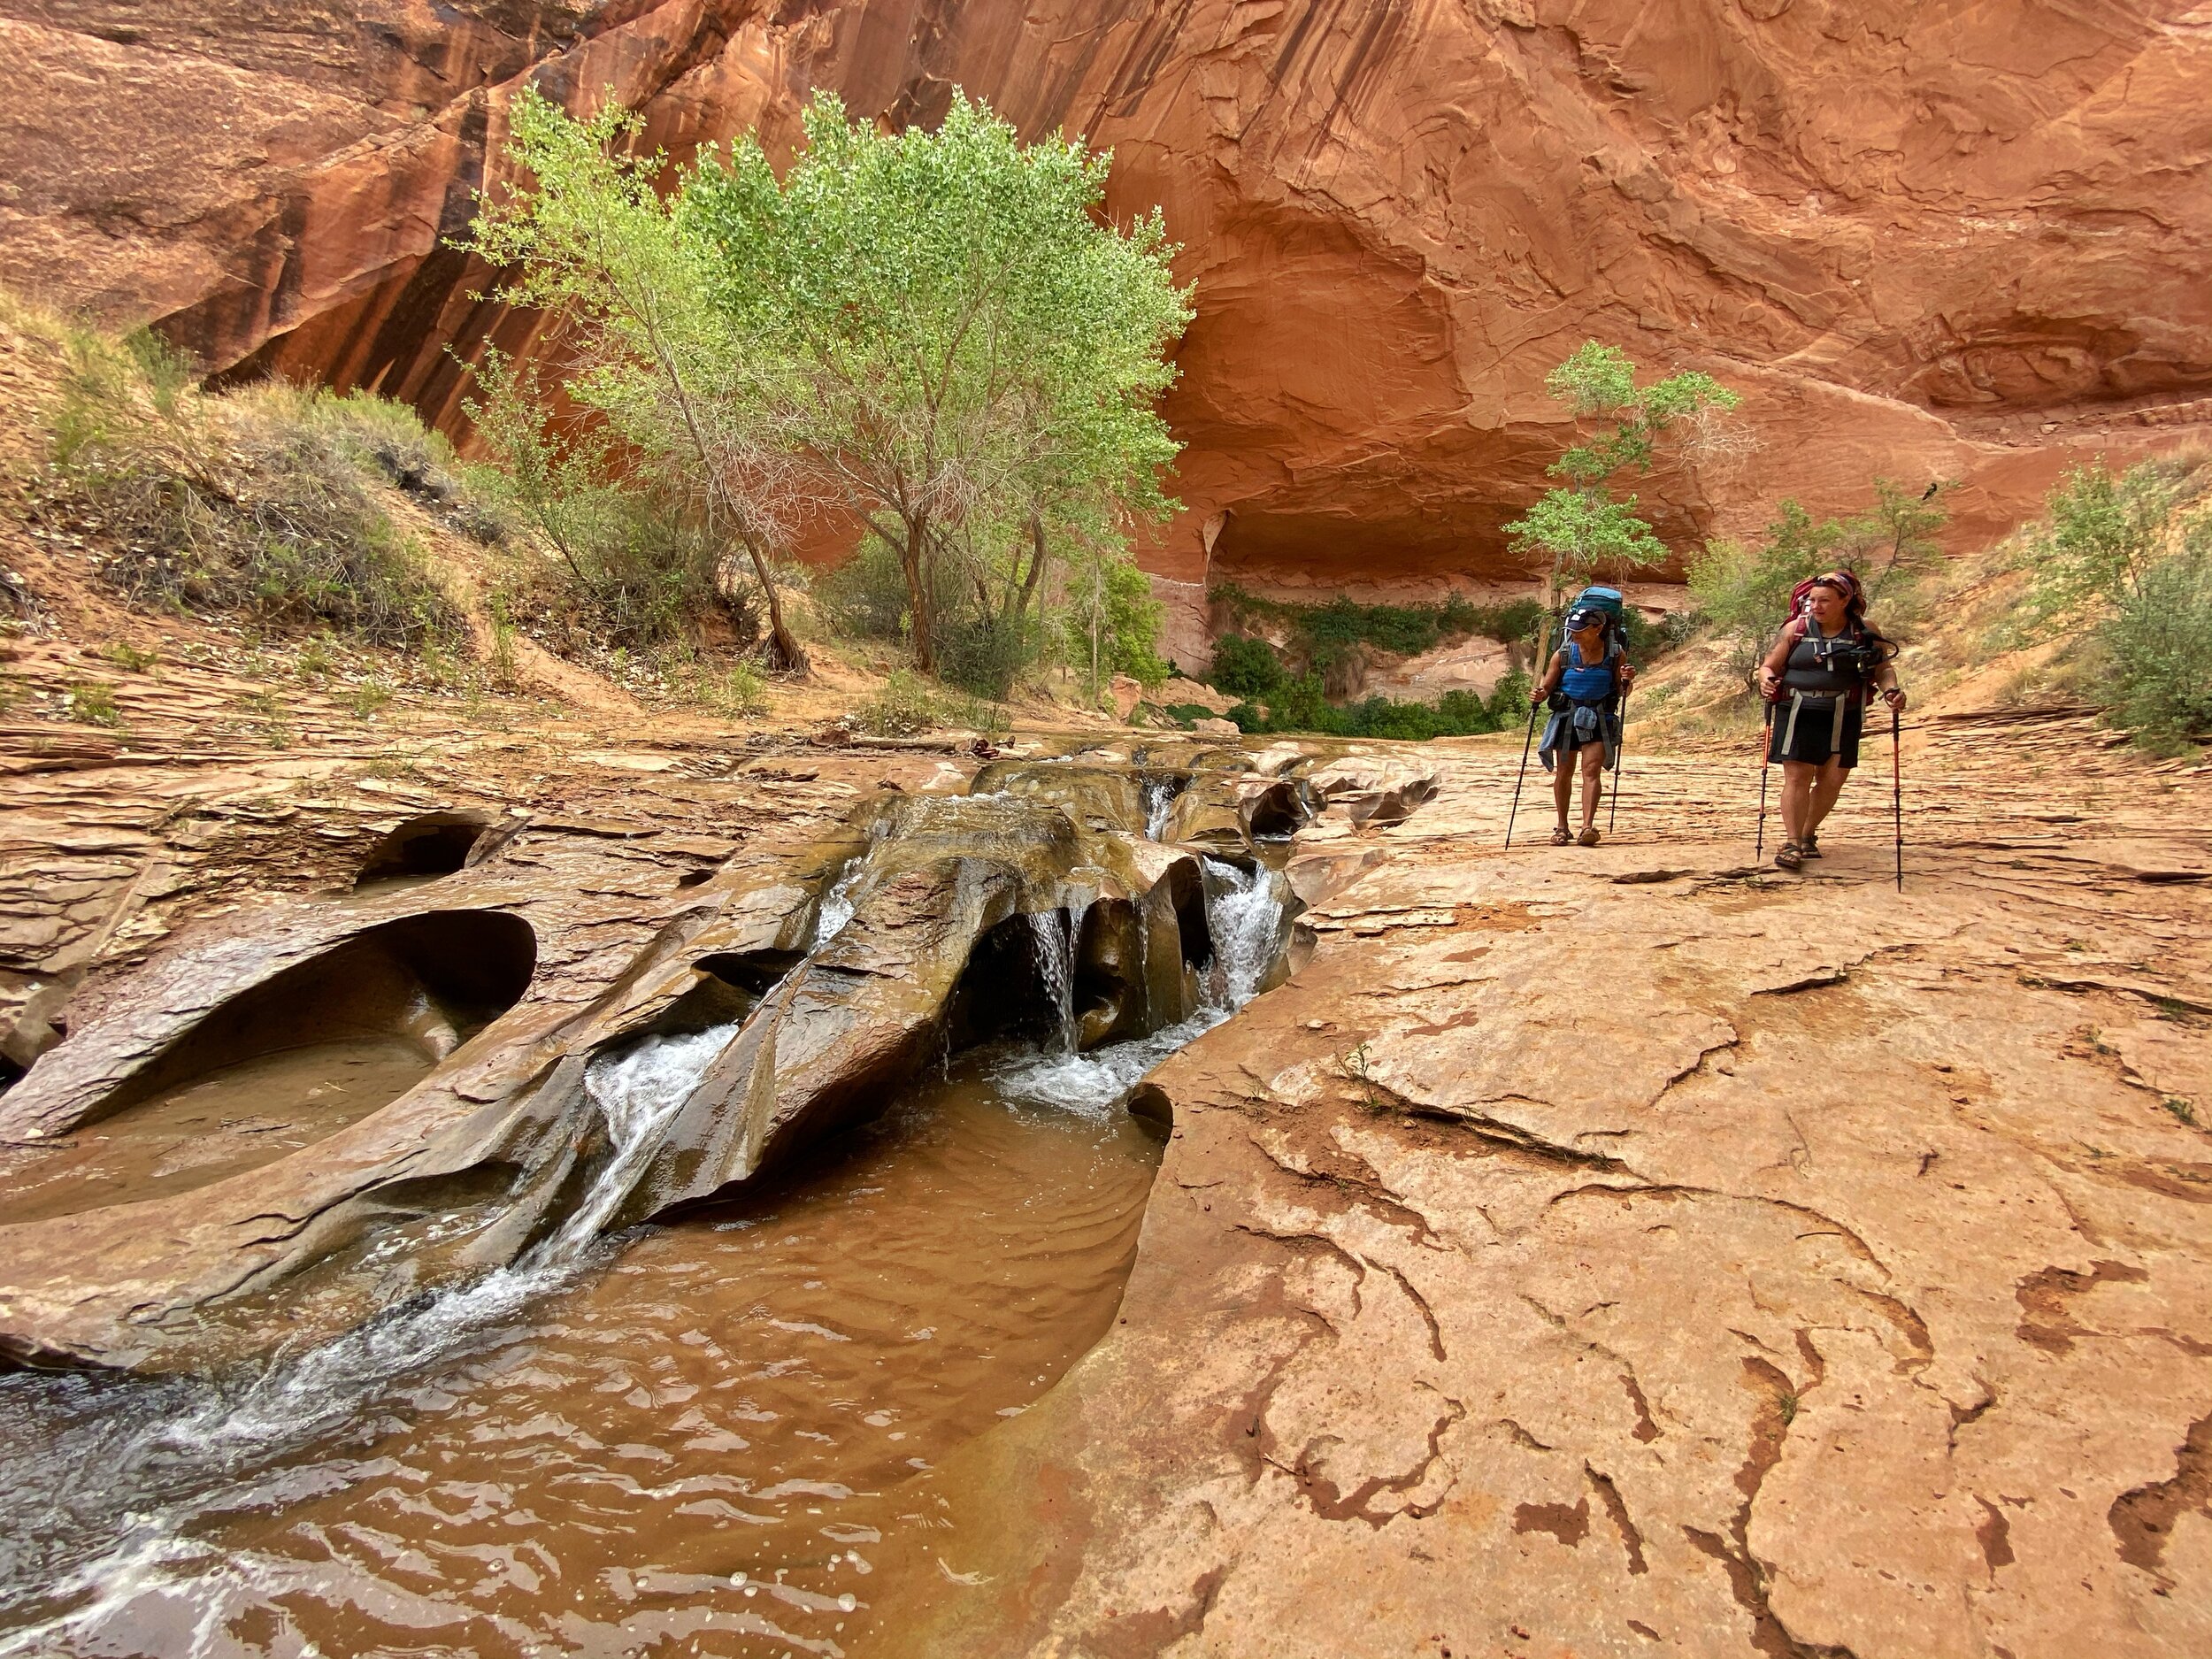
After lunch we stocked up on water and snacks with our day packs and headed further into the canyon to see if we could get to the confluence of the Escalante River and one of the northern arms of Lake Powell and also find Stevens Arch; another massive arch in the area. We were also on the lookout for a spot called the Black Lagoon. It's a somewhat-hidden swimming hole that was supposedly easy to find, but also easy to miss if you didn't know where to look. We used satellite and topographic maps that Michelle had downloaded from AllTrails to see if they could help, but alas, we couldn't find it. No hikers we passed seemed to know either.

Coyote Natural Bridge

We didn't see another soul for the hours we were there, soaking up the last of the day's sunlight and watching the bats come out. It was pretty magical.

We headed back to camp and called it a night and fell asleep to a much noisier section of the canyon. The trickle of the river was drowned out by crickets and another creature we assumed was like a cicada, but it sounded like a monkey. I think we ended up hiking about 10 miles total that day.
Cliff Arch. You can see a tiny tent at the bottom of the frame. Helps with scale a little bit.
The next morning we headed out with daypacks on the hunt for the Black Lagoon again. After looking at the maps again, we thought we had a better idea where it might be. We explored for a little bit and "thought" we might have found it, but the water was quite low and didn't look great for swimming. Utah is in a severe drought this year too. We snapped some photos with plans to look online again to see if we had been in the right spot. I have looked at a few blog posts and I still don't think we were in the right spot.
We headed back to our camp, packed everything up, and started heading back toward Jacob Hamblin Arch with plans to camp and then head back to my car the following morning. We stopped for a couple of hours at Swiss Cheese Falls to have lunch and play in the water. Michelle took some photos of the Lily Trotters compression socks she had and we enjoyed the water and the shade. We didn’t see any other hikers for the time we were there either.


We only hiked a little bit further before stopping in what I've seen others call the Great Alcove just before Jacob Hamblin Arch and we decided to set up camp. It was quite an epic place to camp and we chilled for the rest of the afternoon.

We’re so tiny!

Seriously one of the best campsites ever!
I broke out my Art Toolkit and I did a quick painting of the Great Alcove while Sumitra and Michelle went on short, solo hikes. I’ve painted a lot of desert landscapes and I’m used to painting the muted, silvery-greens of sagebrush and yucca. But in this lush canyon, the cottonwood trees are a bright and surreal shade of green that contrasts incredibly with the oranges and red of the sandstone. It almost looks artificial!

Images by Michelle Craig
For dinner I had Peak Refuel's Chicken Pesto Pasta. It was tasty, but a little rough on my stomach. Michelle and Sumitra had the Forever Young Mac n Cheese from AlpineAire. It was really delicious too and we all agreed that it would be great with some tuna thrown in.
We chilled that evening watching the stars come out. It was a pretty perfect evening after a short amount of hiking that let us rest up for what would be a tough hike back out to the trailhead the following day.

The last morning we set out before 8am for the last slog back to the trailhead. We knew we would be pushing 7.5 miles on what was supposed to be the hottest day of the week, and in the middle of the day. We stocked up on water, energy drinks, salt tablets, and hit the trail. The first half was really pleasant with lots of shade.

Once it was all exposed, I really struggled and the last 2 miles were really hard for me. I ran out of water close to the end, but the others were happy to share. It was hot, I was really, really tired, and I was feeling a little nauseated because I should have eaten more at breakfast. But I knew there was a 6-pack of Cokes waiting for me in the cooler of my car and it helped push me to the end.

Overall, we hiked about 27 miles between 4 days. A lot of it was in loose sand.
Would I do it again?? YES!
I know that my 11yo would have a blast, but I don’t know if my 7yo would be up for it quite yet; especially hiking in so much sand. He’d need some seriously motivating factors. Michelle, Sumitra, and I agreed that it would be really fun to bring our kids and I think we’ll talk again and consider trying next spring. They would likely have the most fun if we set up a basecamp in one spot and just explored the canyon with day hikes rather than pack up every day. We also want to learn more info on the alternate routes into Coyote Gulch. Hurricane Wash is the flattest and easiest to navigate, but it’s also the longest with a stretch of about 5 miles with no water. The Sneaker Route is one we’re going to see about because it’s only about 2 miles and places you really close to Jacob Hamblin Arch.
We also would want to have a vehicle that’s an SUV or a truck that can handle going a little faster than 10MPH on Hole in the Rock Road. Hell, we will rent a damned truck if we have to next time!

Image by Michelle Craig
Double check that my sunscreen is functioning! Literally right when we got started at the trailhead, I noticed that the nozzle on my sunscreen bottle was broken, rendering it useless. I had sunscreen for my face, but not enough to also use on my arms and shoulders. Thankfully, I had a lightweight, long-sleeved shirt from Columbia that worked for when I needed it. My shoulders still got a little burnt and that shirt was sooooo smelly!
Get some supportive water sandals like Chacos or Keens. I really would have liked to be able to hike through the water without worrying about my socks getting wet. My hiking boots did amazing, but some sturdy and supportive sandals would have been nice too.
When the weather is warm, rely more on snacks and less on meals. At mealtimes, if I was tired or really hot, I didn’t feel like making and eating a full meal. I ended up eating all of my snacks, but only a couple of the meals.
Research more about food options. Michelle taught me about bringing vacuumed-sealed packs of tuna or salmon to add to dehydrated food like Mac n Cheese or to mix with preprepared mayo and spices for a quick sandwich. Payday candy bars don’t melt like chocolate would and are great for when you’re tired of granola bars or energy bars. Tortillas are kinda heavy, but awesome for nut butter sandwiches. They’re also handy for making a breakfast burrito with a breakfast skillet like the one from Mountain House.
Add arch supports to my hiking boots to keep my feet from pronating when I hike (or consider getting custom insoles). I ended up with blisters inside my heels because of this misalignment. It wasn’t the boots but rather my ankles.
Bring a swimsuit or quick-drying clothes so I can swim when there’s a place to swim.
Swiss Cheese Falls, my kids would LOVE to play in the water here.
Deuter Aircontact 60+10 SL Pack (loved it, really comfortable and easy to pack and cram as much into as possible)
Nemo Disco Men’s Down Sleeping Bag (I’m a side sleeper, a size 16, and I hate mummy bags. Women’s sleeping bags are usually too tight in the shoulders for me and I love the spoon shape of Nemo’s bags)
Klymit Insulated Pad XL (I debated bringing my son’s Klymit pad that’s a little smaller, would have been nice to have a smidge more space, but not sure I would have rolled off of it. Gonna think about it for future trips.)
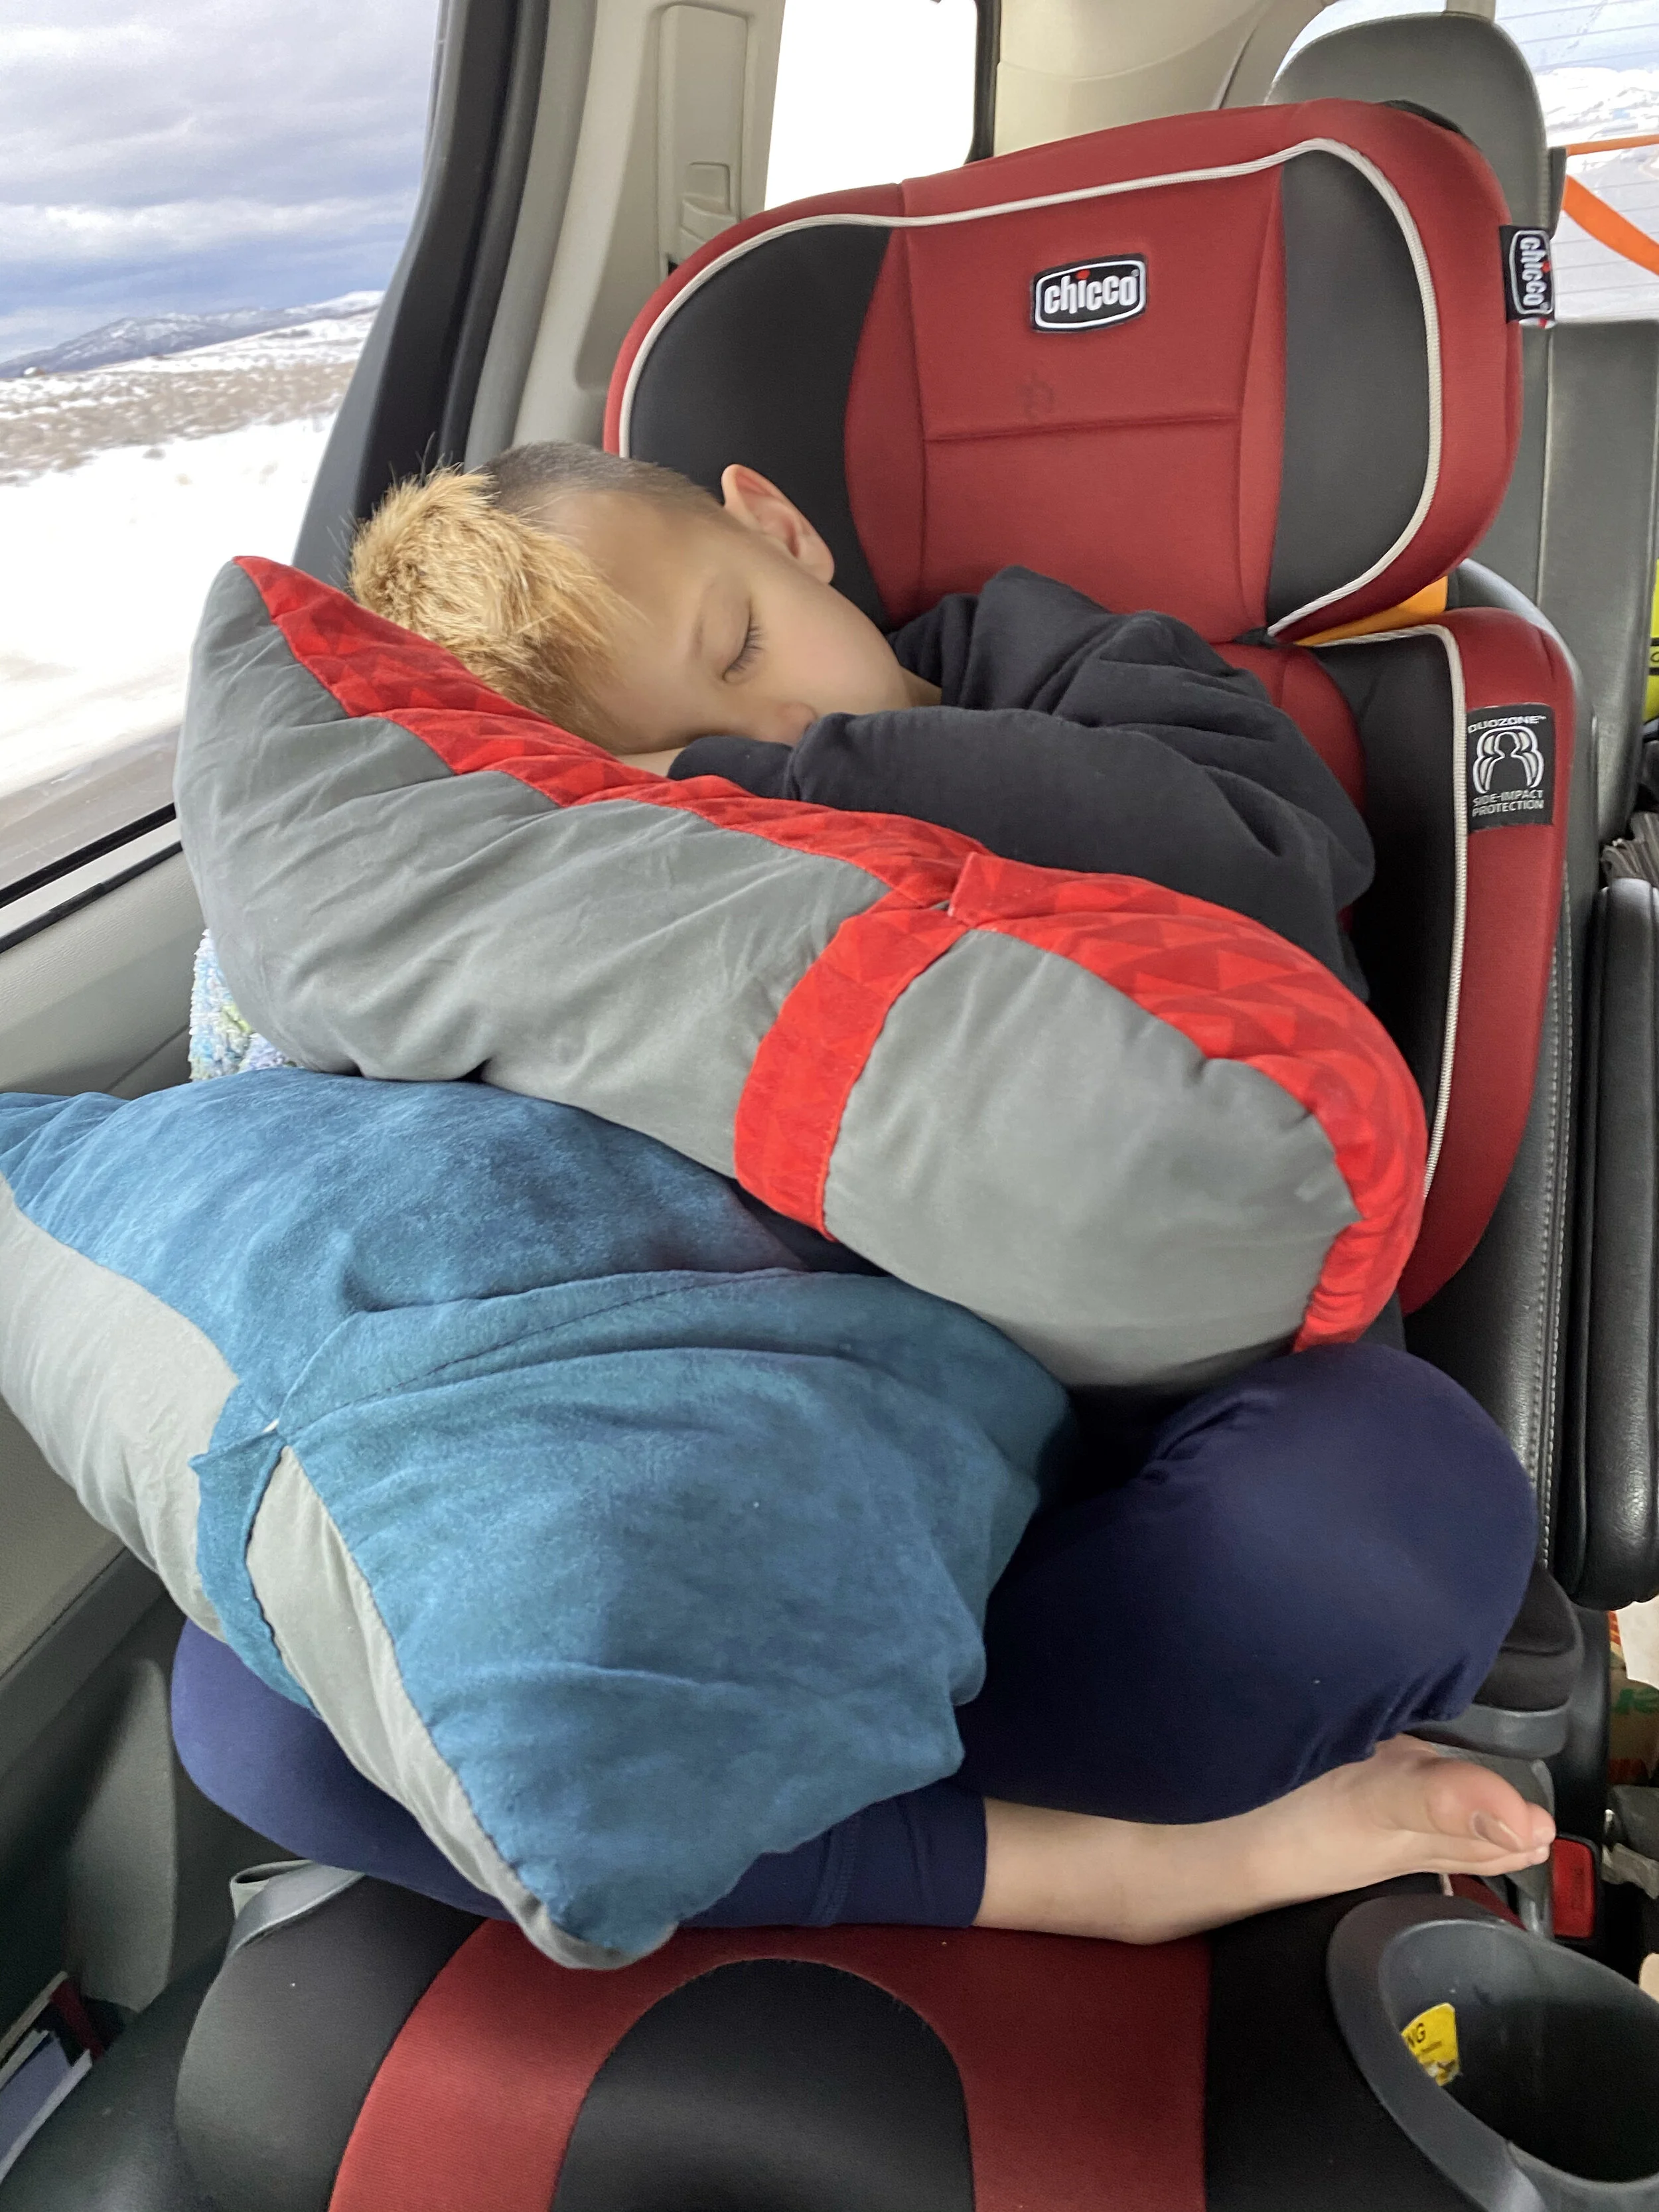
Packing Cubes (mine are from The North Face, bought super cheap at Sierra. Lightweight packing cubes are worth using to keep shit organized and the one that holds my clothes doubles as a pillow)
Sawyer Mini Water Filter (for backup, the Katadyn has a much faster flow and is easier to fill)
Kelty Origami Trekking Poles (I have Black Diamond poles that I love and are a little lighter than these, but I could NOT find them before this trip. So I grabbed these on clearance at Sierra and they did a great job. I think I prefer cork handles over synthetic, but they served me well and I was very happy to have them.)
ENO Moonbeam Headlamp (I have a brighter headlamp from Black Diamond, but the battery needs replacing)
Kula Cloth, PStyle, and Wag Bags… for nature’s calls.
I am sure there are plenty of lighter-weight options for most of my gear. I’m never going to be a UL backpacker, and I’m perfectly alright with that.

Image by Michelle Craig
A CHAIR! On a whim, I bought the lightweight chair that Costco was selling this year. It’s from Cascade Mountain Tech and it’s about 3.5 pounds and has a 250 pound weight limit. It was SO nice to be able to rest my legs and back every afternoon and evening. I almost didn’t bring the chair because my pack was full, but I was able to strap it to the outside of my pack and it was super easy to bring. I will never NOT bring a chair with me from now on and I’m looking at investing in one that’s lighter weight like the ones from Klymit or Helinox.
A pillow. To make backpacking and camping more enjoyable on my body, I have been working hard on figuring out the best way to get a good night’s sleep. I learned years ago that I can’t sleep on an inflatable pillow. Then I found that Thermarest makes collapsible pillows filled with memory foam. They come in a bunch of sizes and roll down to less than half their size. They truly feel like I’m sleeping on a real pillow at night and have been really amazing. I actually have two in Small and Large and they come with us on every camping trip and every road trip. The best part: they are machine washable and can go in the dryer.
Wet wipes. Having some simple wet wipes to scrub down my face, neck, hands, and feet every night really helps me feel cleaner and refreshed. I may or may not use them for a quick PTA bath too. Totally worth bringing.
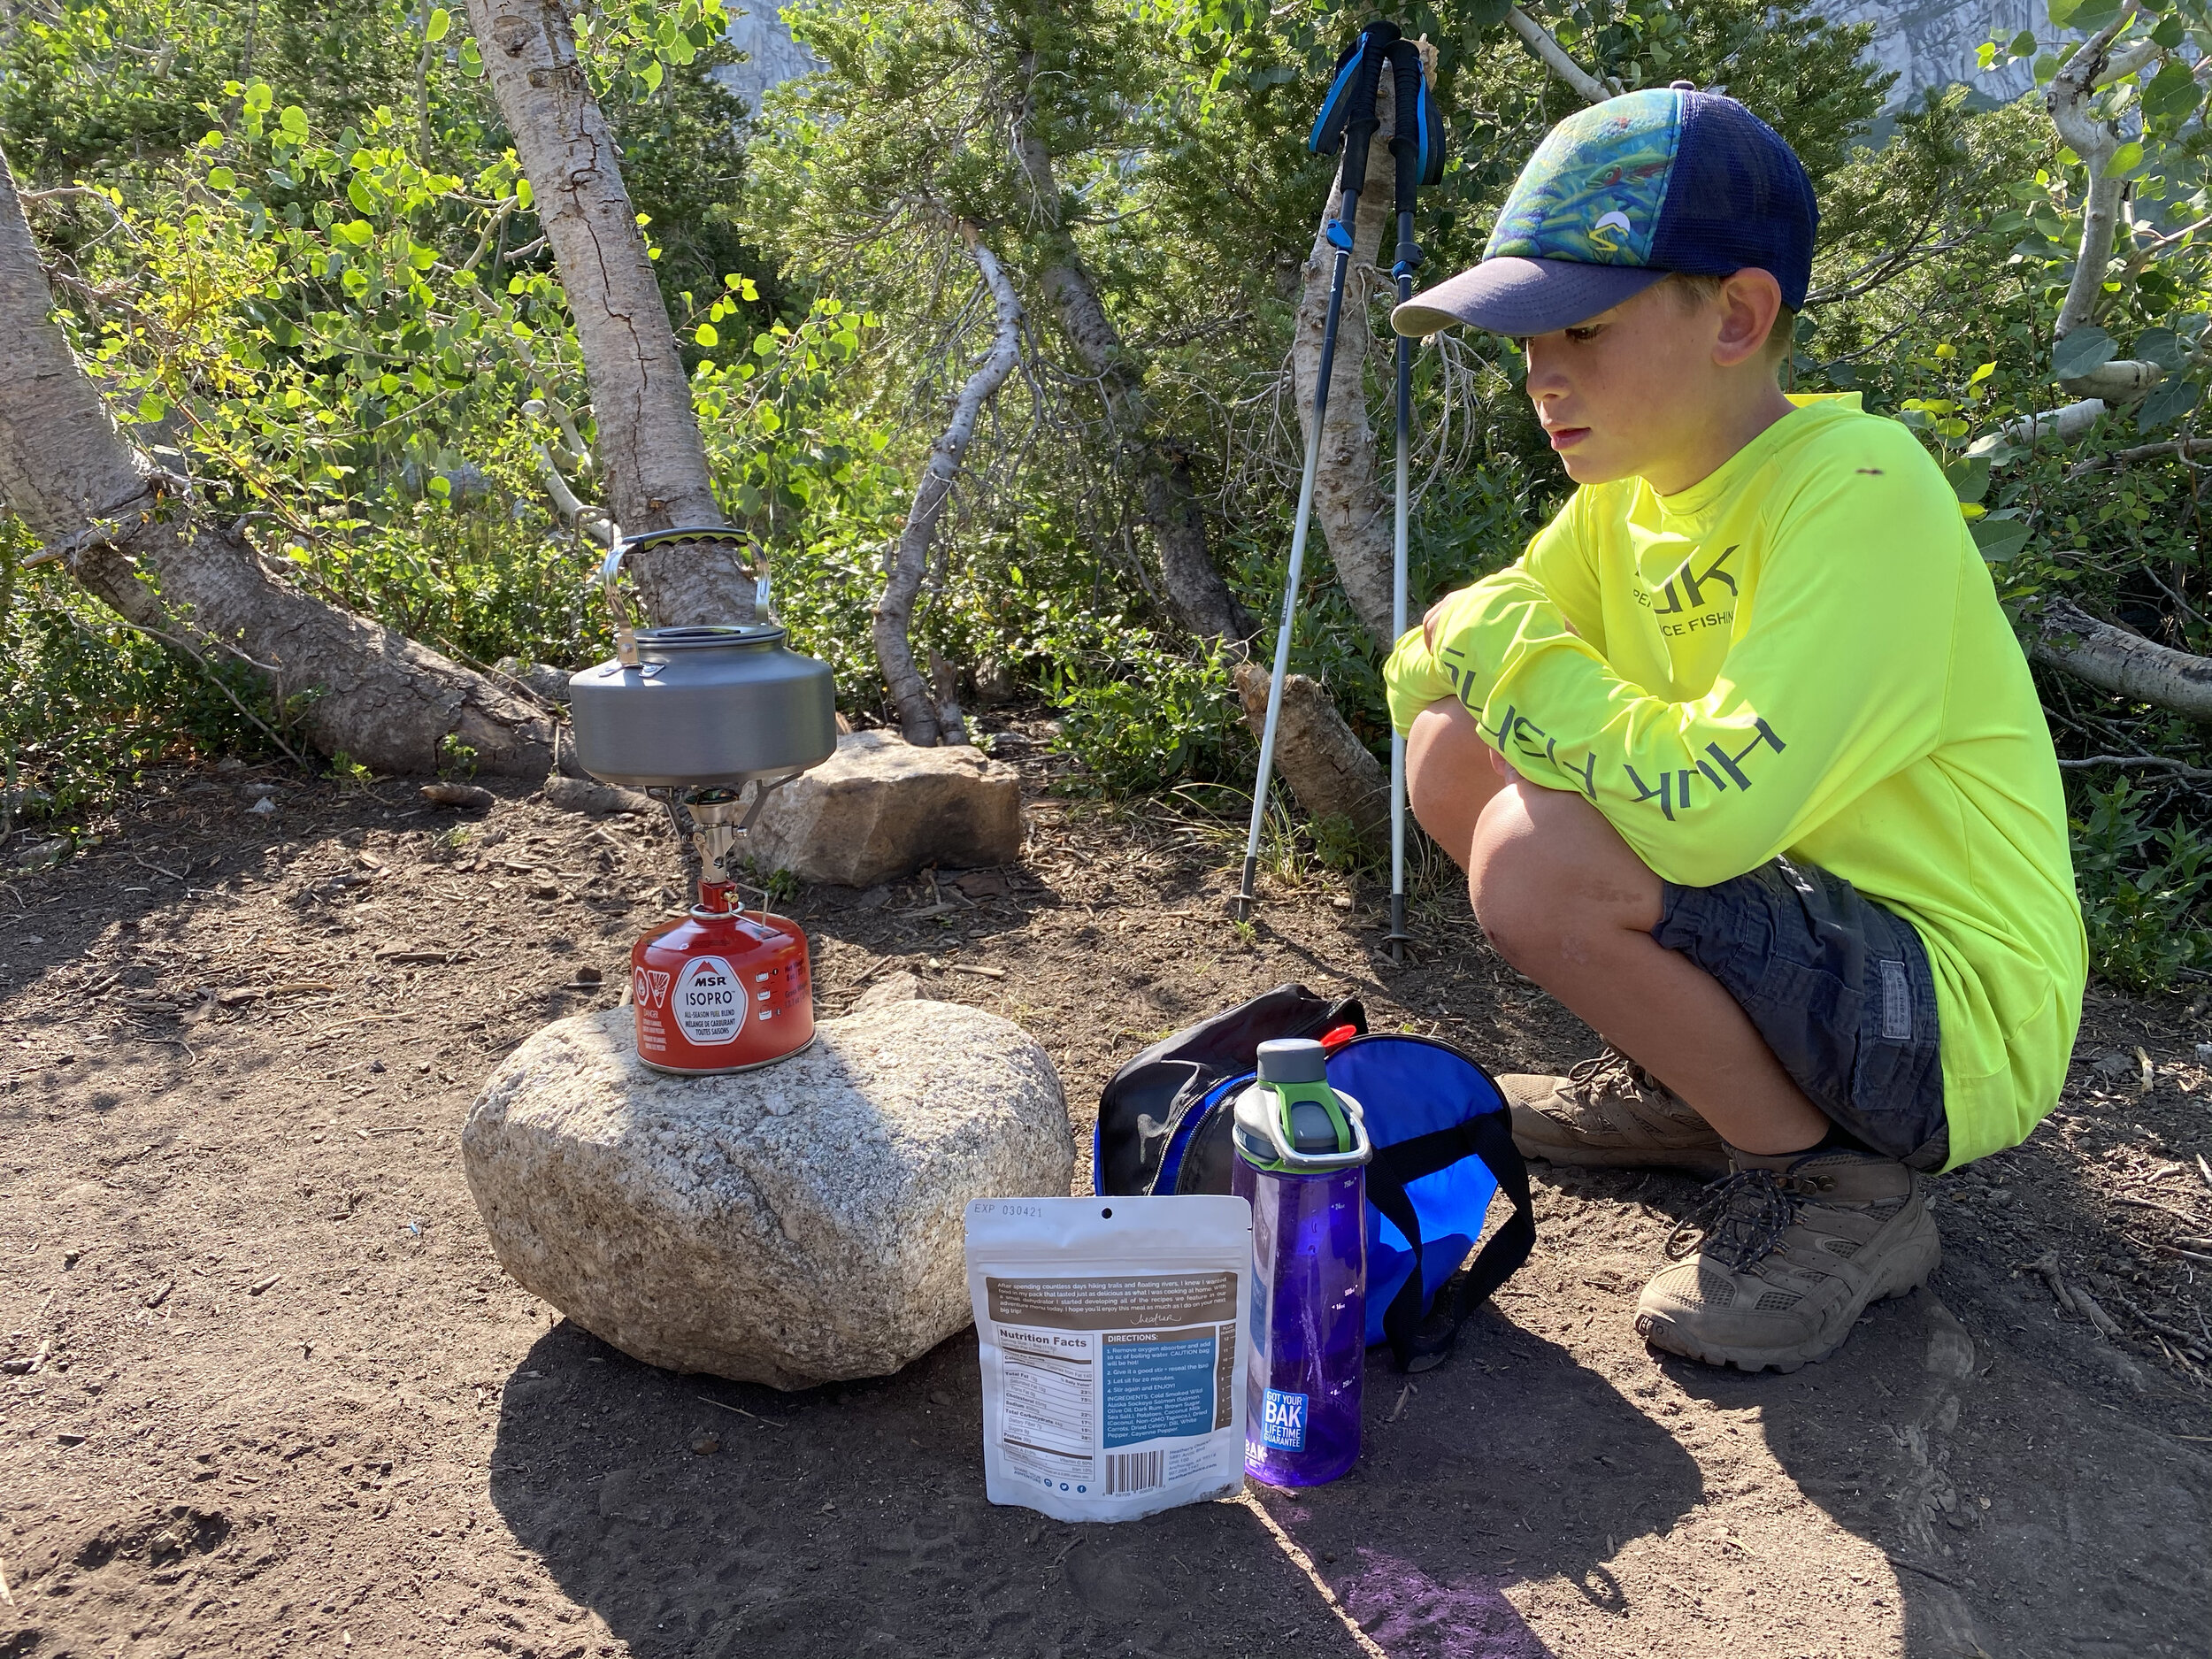
A measuring cup. When rehydrating backpacking meals, it’s important to use exactly the right amount of water. Too little and you end up with crunchy chunks of meat or noodles. Too much water and you have mush. A few makers of backpacking food are starting to give us a fill line rather than a measured amount, but a few still list 2/3 of a cup or whatever measured amount. Having a small, plastic measuring cup is really helpful to have; especially if you can store it somewhere out of the way. Mine fits in my cooking pot along with some soap, matches, and my MSR stove.

Image by Michelle Craig
To end, this trip was a truly memorable experience and it has really lit a fire in me that makes me want to delve into backpacking more. While it was physically exhausting and really pushed me outside of my comfort zone, I would totally do it again and it makes me really appreciate how stunningly beautiful Utah is and just how little of it’s gems we’ve seen. And I feel like we’ve seen a lot!
What are some other amazing places to backpack in Utah? Got any suggestions?
I backpacked for the first time when I was about 18 in northern California and I didn’t go backpacking again until last month; so 24 years later. My oldest son was quite literally hooked on fishing a few years ago thanks to YouTube and he wanted to add backpacking to his repertoire and try some fishing in more remote lakes. He really wanted to hit up the Uinta Mountain Wilderness, but I didn’t want to go quite that far from home for his first trip. There are a few affiliate links in this post. Shopping through them earns me a few cents and it helps me pay for this outdoor stuff with my kids, thanks!
If you would have asked me to go backpacking about 10 years ago, I would have told you I was too old for it… seriously. Why is it different in my 40s? Maybe because I have a kid who shows enthusiasm for it and I want to share it with him? Maybe because I’m in better shape physically now than I was in my 30s? I dunno yet. I’ll go on a few more trips and see if I can figure it out.
I did a little research on fun places to backpack along the Wasatch Front and reached out to a few friends who are frequent backpackers and got a good list of recommendations. We settled on a one-night trek up to Silver Lake in American Fork Canyon, which was a little less than an hour from home.

On the off chance that we did this one trip and we both HATED backpacking, I tried to buy gear as cheaply as possible. I bought a used REI Tarn 65L kid’s pack from a friend and I bought myself a Kelty Redwing 50L pack on clearance. My mom gifted me a 2-person backpacking tent for my birthday and we started to figure out what else we were going to need.
My son watched a bunch of backpacking videos on YouTube and declared that we needed a $180 backpacking stove, so I bought the MSR Pocket Rocket for $45 from Scheels. He wanted $200 trekking poles too, so he got a broken pair from Cascade Mountain Tech that we got at Costco a few years ago. They are duct taped to his perfect length. Through a discount from a friend, I ordered two Klymit insulated sleeping pads because I’m an utter wimp if I have to sleep in cold weather. Through that same discount, I splurged on a men’s Nemo down sleeping bag for myself because I’m a side-sleeper and larger then your average hiker. I hate mummy bags and most women’s sleeping bags are too small for me. I found a kid’s backpacking sleeping bag for my son from the REI Garage. We already had good hiking boots and trekking poles for me. We did some research on a recommended water filter and settled on the Sawyer Mini along with a couple of Camelbak Chute water bottles that we already had.


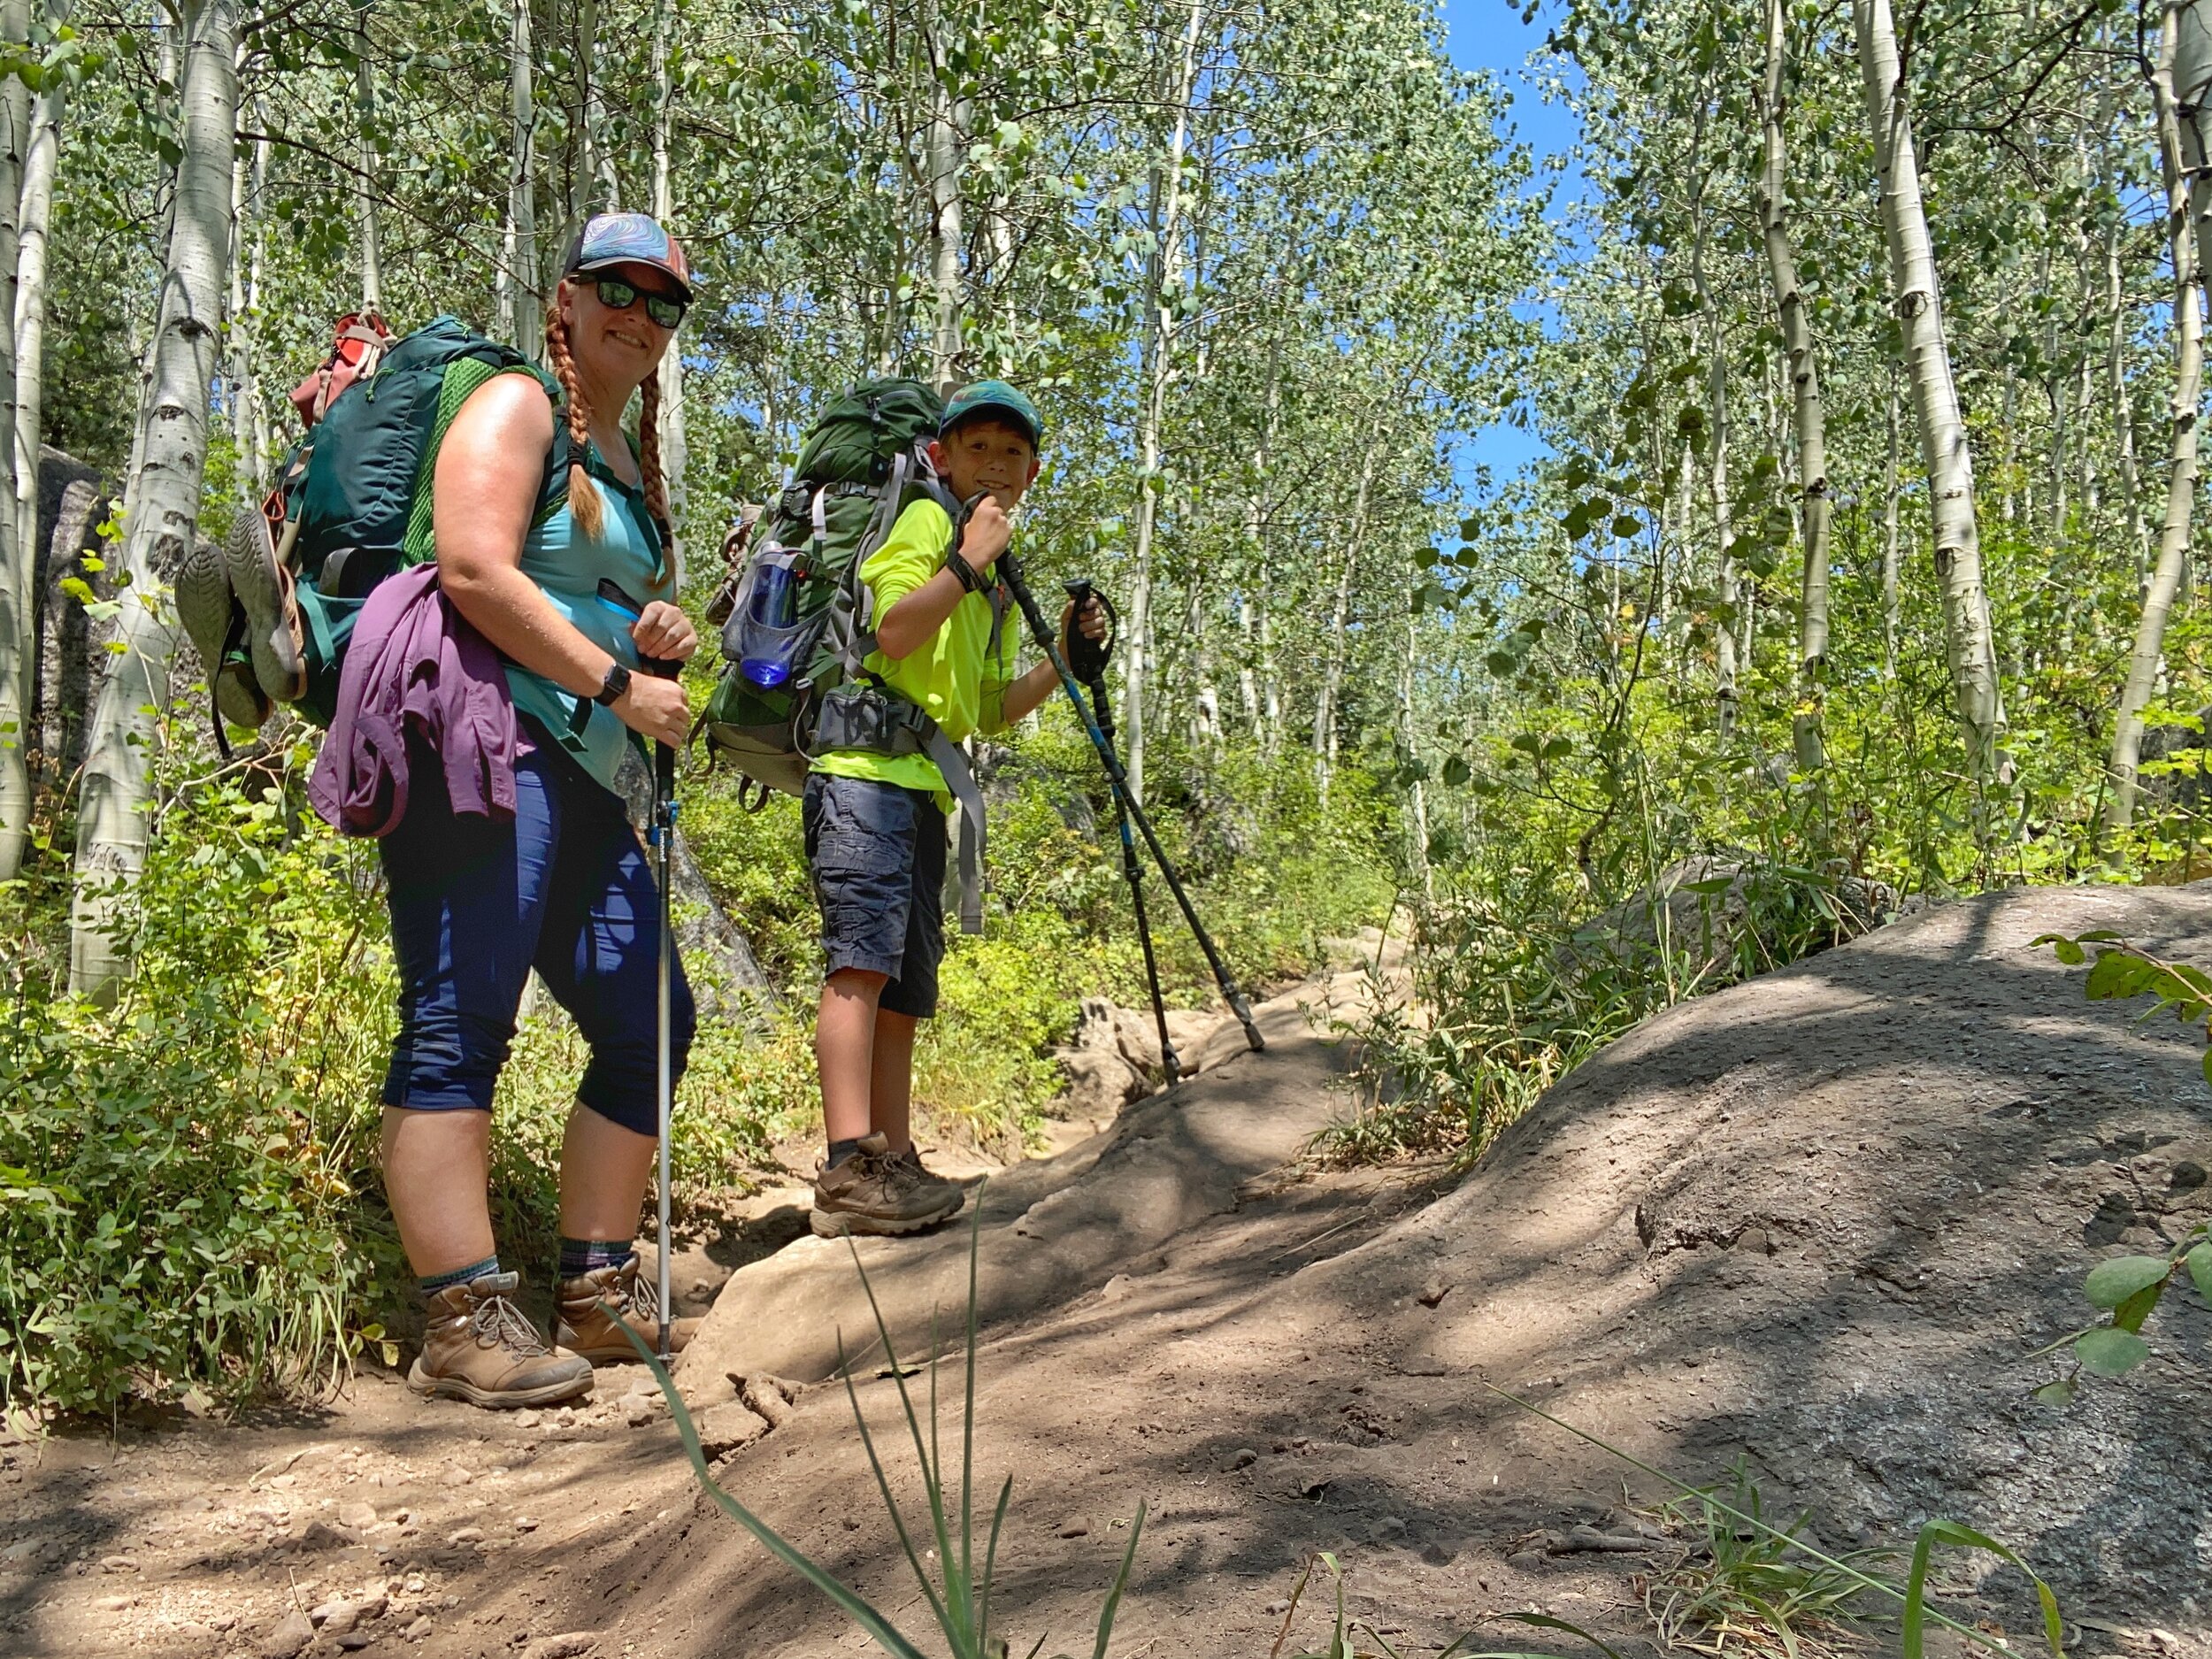
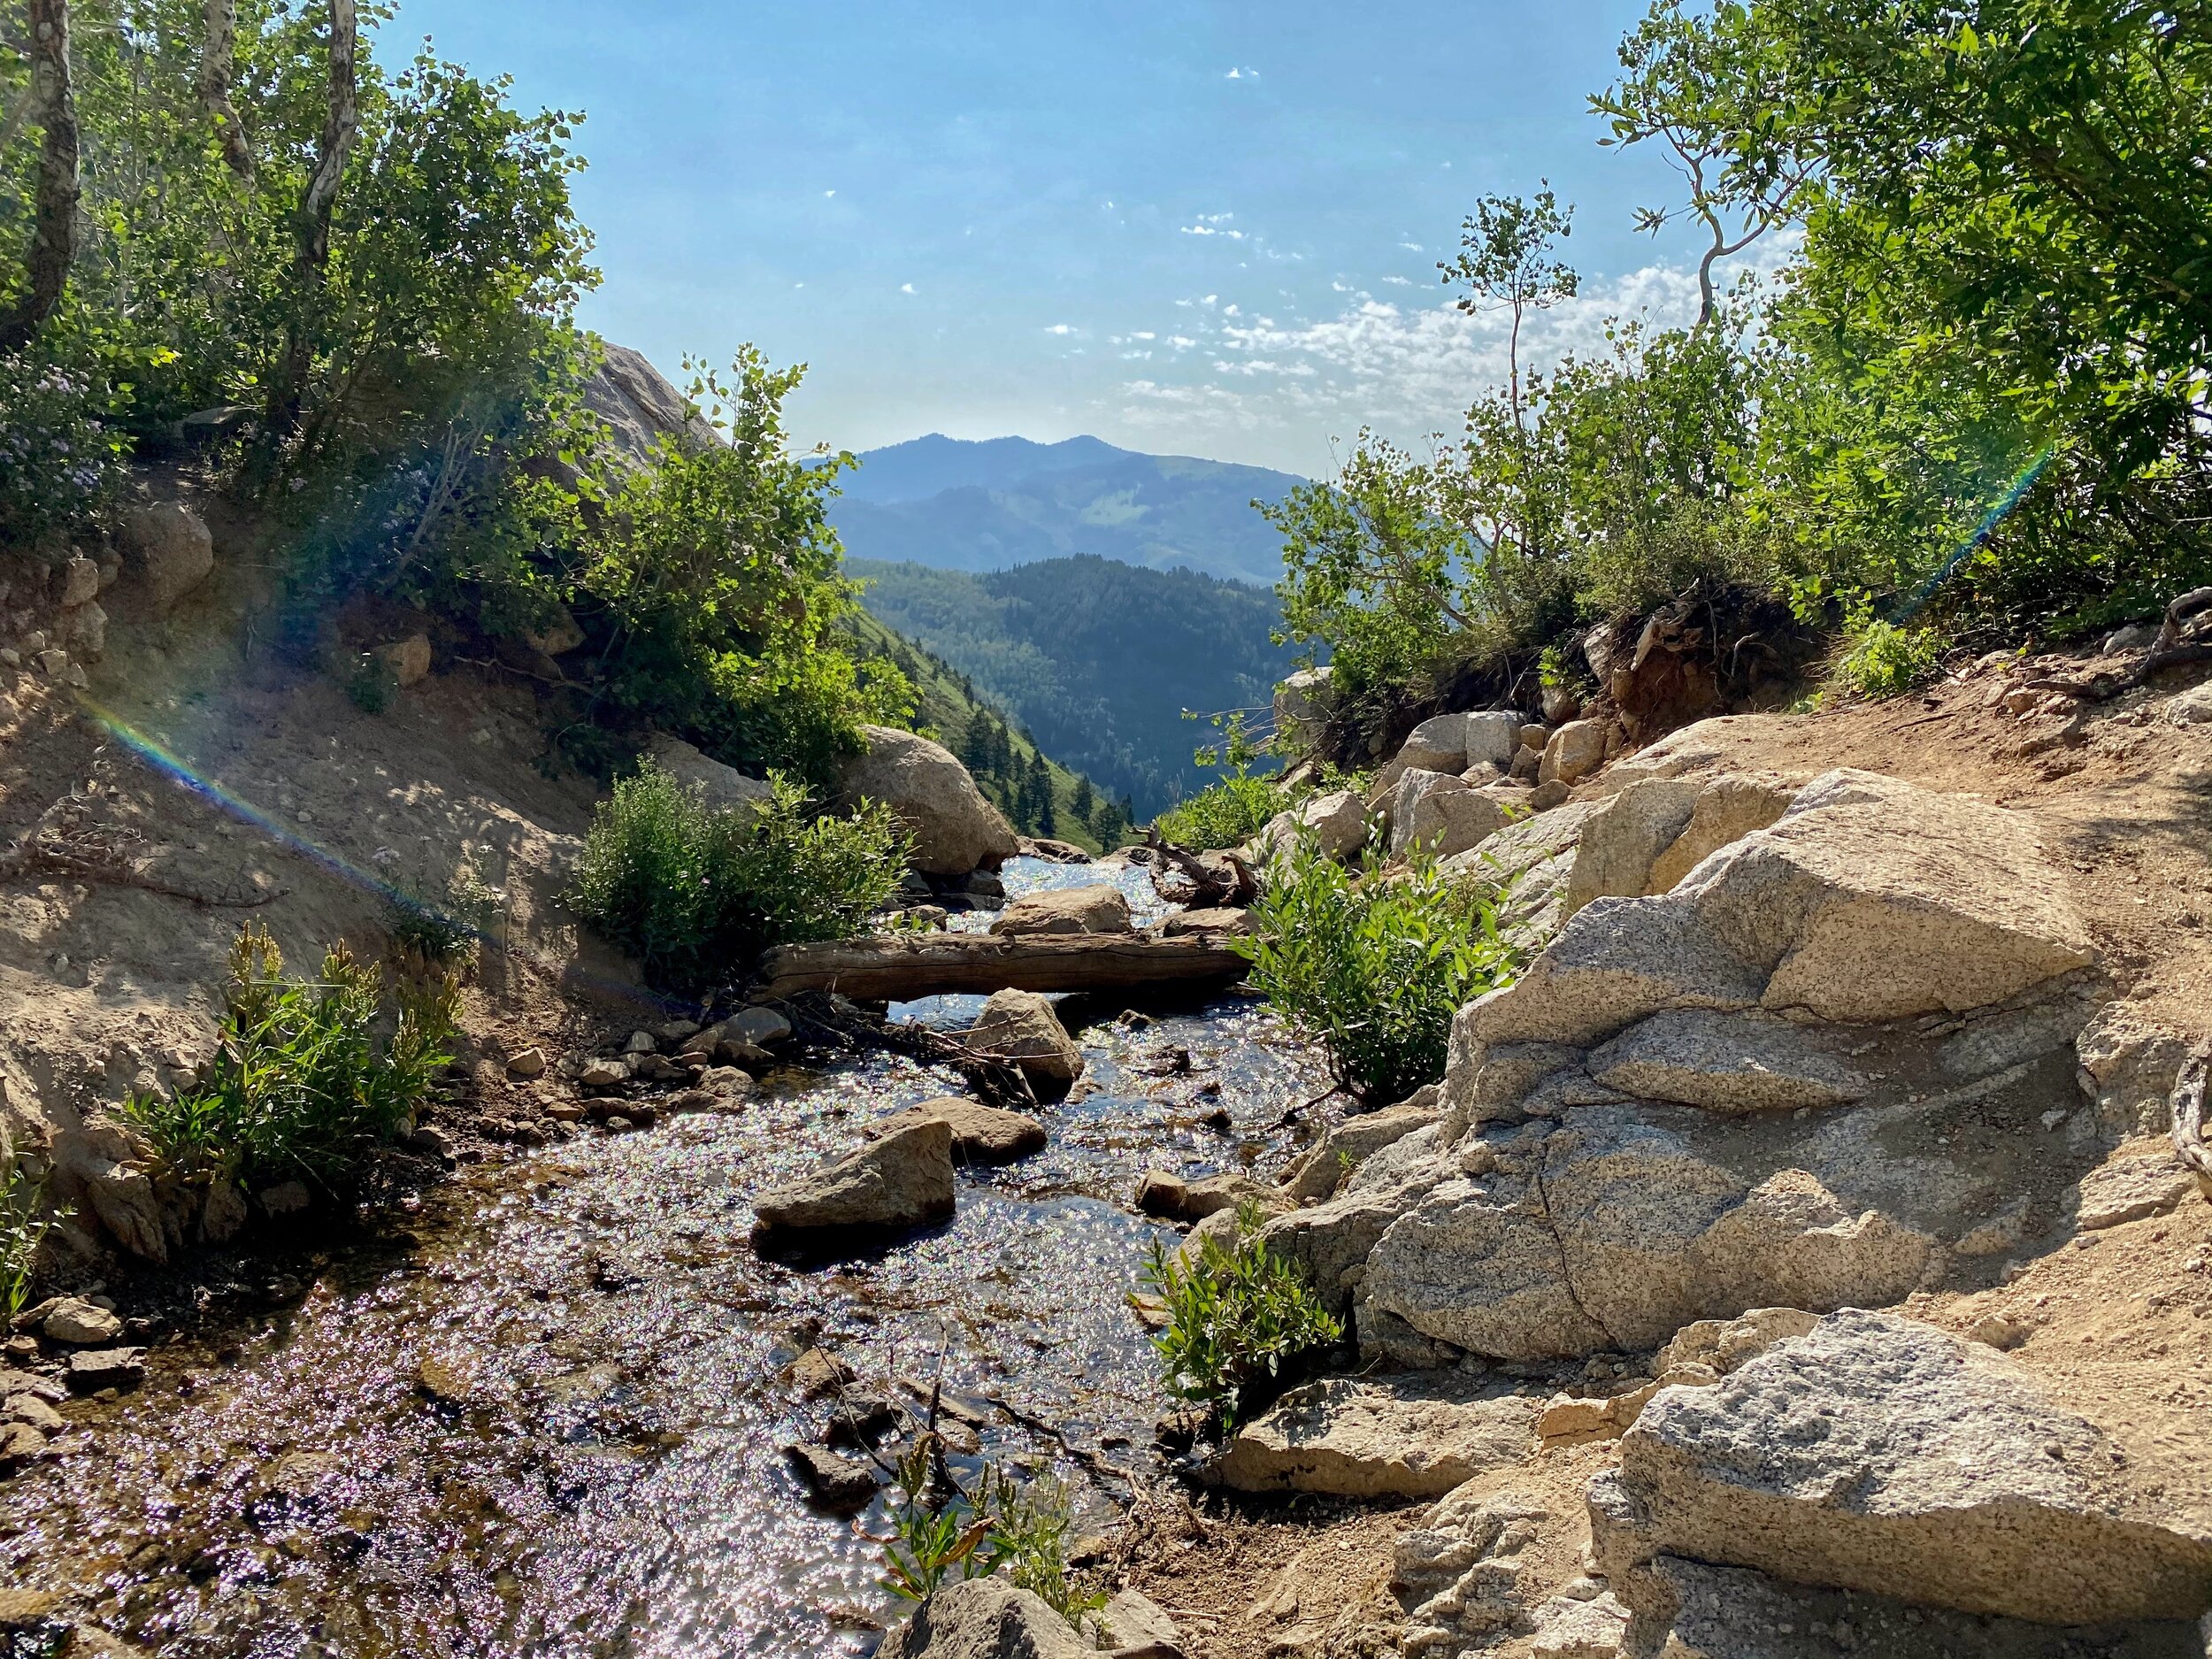
We went midweek to avoids crowds and wanted to leave in the morning, but we didn’t get there until lunchtime. It was hot too. AllTrails said it was 4.7 miles roundtrip, but my Apple Watch clocked us at a smidge under 3 miles one-way. The first half of the hike was in the shade in a beautiful aspen forest. Then the trail opened up to a few switchbacks and panoramic views of the canyon and Mt Timpanogos in the distance. Thankfully, we were warned that the last half-mile to the lake would very steep and rocky; kinda like a stair climber. That was definitely the hardest part, but overall, it was a really beautiful hike.
Hiking with a heavy pack isn’t all that different than hiking with a toddler on my back, so for me, it wasn’t a difficult thing for my body to remember. My son had never hiked with a heavy pack before, and with my pack only holding 50L, it was a challenge to fit everything we wanted to bring and not have his pack be too heavy for his skinny frame. I knew the “rule” was to make sure your pack wasn’t more than 20% of your body weight. That was only about 15 pounds for my son. UGH!
We made it up there and it was beautiful. We found a campsite right away and my son immediately broke out his fly rod and went fishing while I set up our tent.

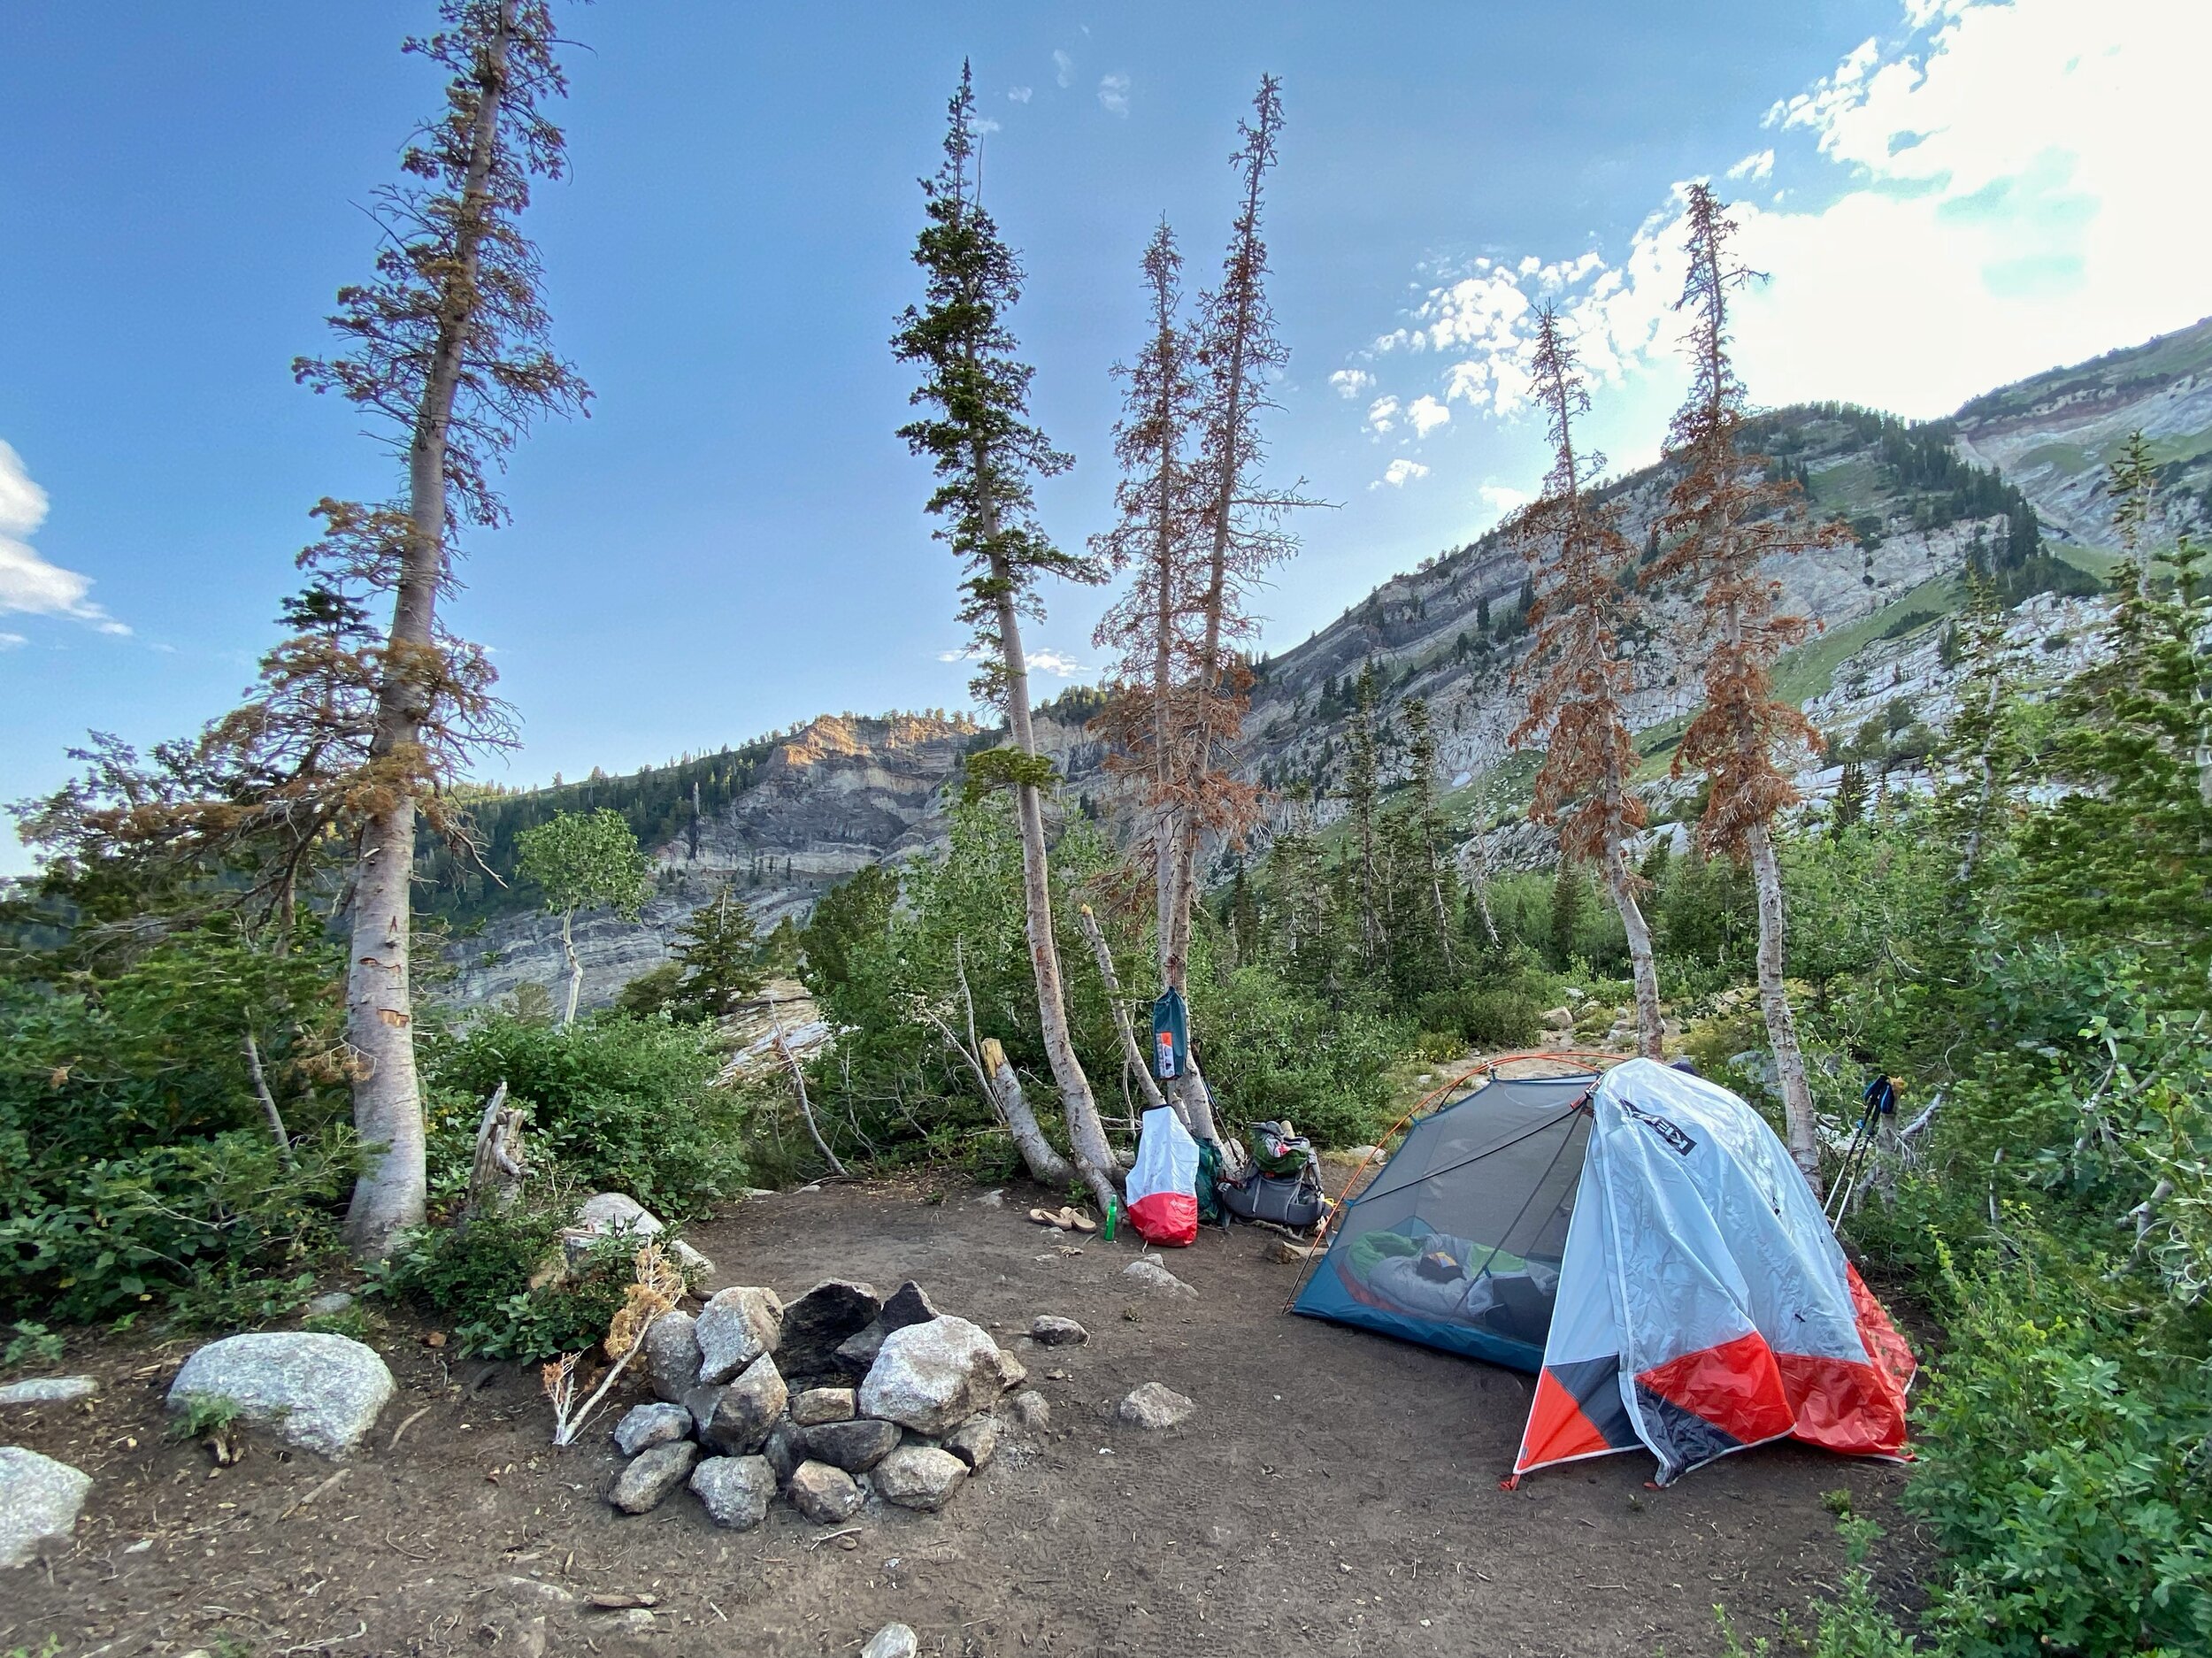
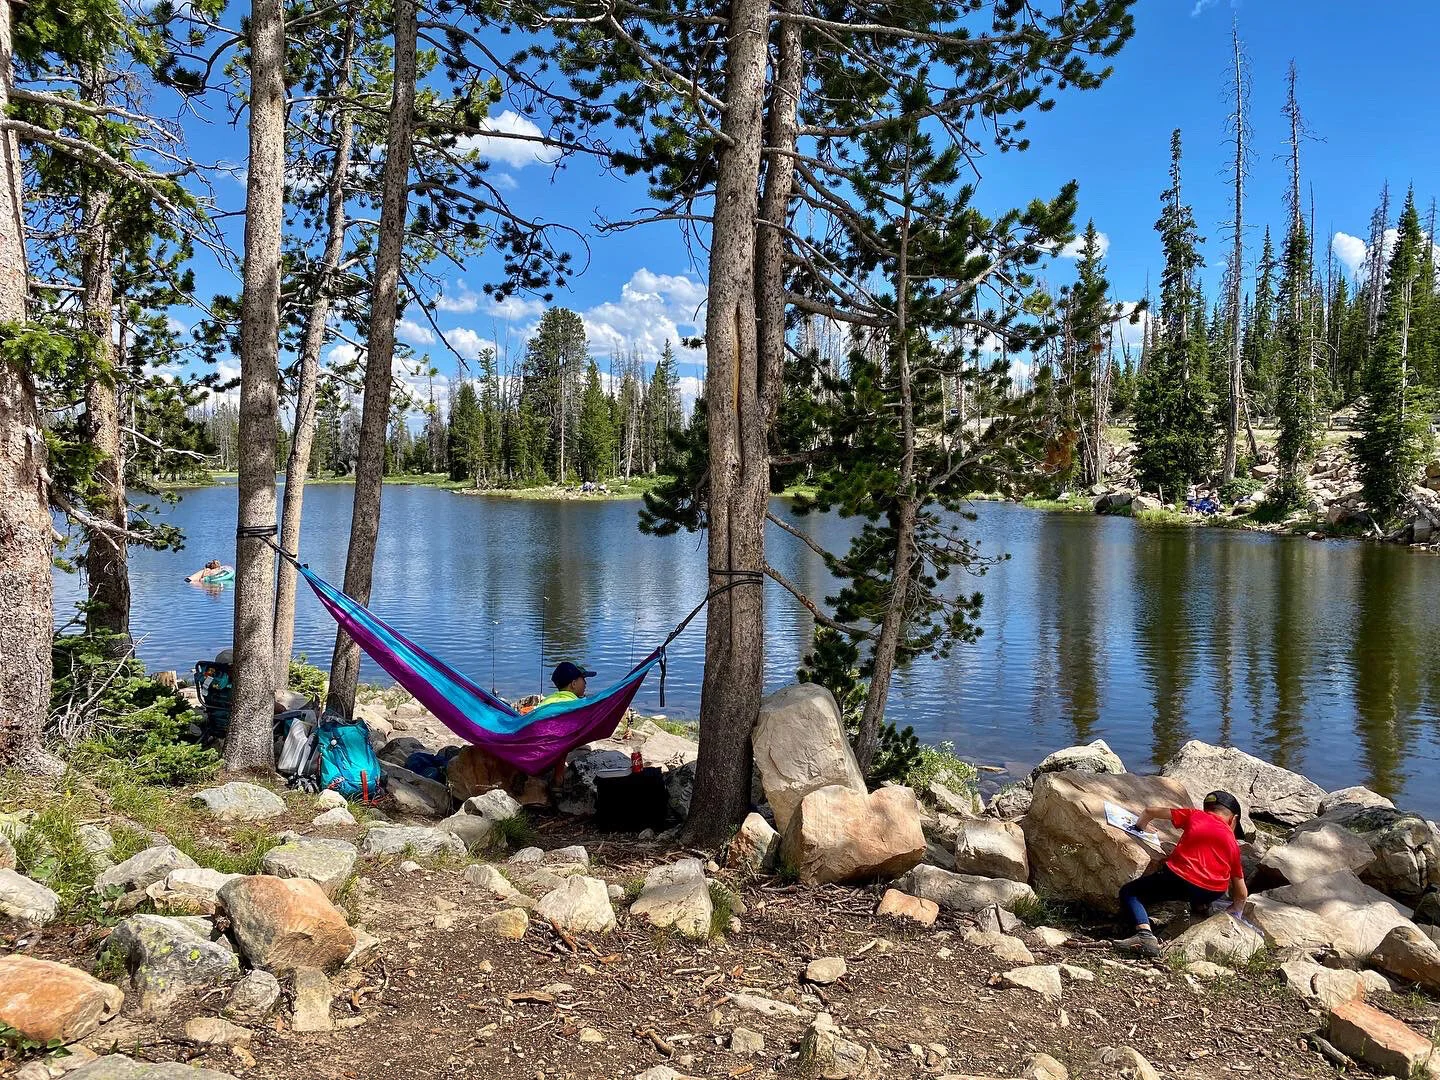
Our campsite. We were under a fire ban at the time, so we dismantled the rock fire ring that some previous visitors created. Those trees would’ve easily held a hammock, gotta consider bringing one next time.
We had Heather’s Choice Sockeye Salmon Chowder for dinner. We followed the instructions exactly and it was terrible. The flavor was good, but it had a gritty texture that was awful and neither of us could manage more than a few bites. Instead we cooked the lasagne from Mountain House and it was delicious.
After dinner my kiddo did some more fishing, but the wind picked up a little bit and there were no bites. The sun set on the high mountains and there was a gentle breeze. We packed away all of our food and toiletries that have a smell and put them in a waterproof bag and strung them high up in a tree. It only took us like six or seven tries to get it up there, hahahahah!


I never sleep well on the first night of a camping trip, so I tossed and turned, even though I was physically tired. We were close enough to the creek to hear it’s trickling, but I end up wide awake any time I hear what might be an animal. I do really well in a noisy forest with great ambient noise. My son crashed hard and slept through the night. I wonder if it would be worth it to bring a battery-powered white noise machine for me?

In the morning it was a little chilly, but not freezing. My son cooked our breakfast on his own; I was so proud of him wanting to learn how to use the backpacking stove by himself. We had the Breakfast Skillet from Mountain House; which we’ve had before. It’s fantastic.

He fished for a little while and I packed up our tent. We hit the trail just before lunchtime and started to make our way back down the mountain.

I was booking it pretty well, but my son really struggled heading downhill. His pack rubbed on his bony hips and he took a lot more breaks than I expected.

We stopped at a McDonald’s in Lehi for some lunch (his choice) and discussed backpacking overall and whether he wanted to do it again. I was happy to hear him excited to go on more trips.
I need a larger pack, at least 60 or 70 liters. Maybe I’ll sell my Kelty and get something else, but to be able to fit everything we wanted to bring, I needed more space. I will never be a UL backpacker, and I’m okay with that.
The Sawyer Mini water filter worked well, but the flow was pretty slow. The pouch was also tough to fill up unless we filled it at some kind of waterfall or fast creek. It would have been really tough to fill if we’d only had the lake. Research other options.
Research different options for keeping our site bear-safe. Maybe a bear canister instead of hanging our food? It was kind of a pain in the butt.
I brought a little 3-legged stool and I’m SO glad I did. I really loved being able to sit down on something that wasn’t the ground. Research more lightweight chair options.
Bring a larger portable battery so I can keep my iPhone and watch charged. I liked being able to clock our distance on my watch. The little battery pack I had didn’t last long enough.
Figure out some padding or something to help prevent rubbing on my son’s hips with his backpack.
Pack more snacks and get different ones that we usually bring camping. We had a whole bag of snacks that neither of us felt like eating.
Pack Ibuprofen. I had a headache at bedtime, blech!

REI Tarn 65 Kids Backpacking Pack (an older model)
Klymit Insulated Sleeping Mats (mine is XL, his is regular)
Eureka Cypress Kid’s Mummy Bag (an old model found on REI Garage)
String Lights (for inside the tent)
L.L. Bean Stowaway Women’s Puffy Jacket
I’ve been a fan of Kula Cloth since I discovered them over a year ago. They make reusable, washable, antimicrobial pee cloths for when nature calls and we’re out on a trail, camping, or on a run with no restroom around. There becomes no need to pack wipes or toilet paper and it’s better for Mother Earth to have less in landfills. They easily clip onto backpacks or fanny packs, they dry quickly, and the best part: they come in beautiful prints; many with artwork created by fellow women artists.
CLICK HERE to vote for my artwork!

Image by Zion Adventure Photog - Arika Bauer
Kula Cloth launched a design contest this week to have a new design printed and asked artists to submit designs. I submitted this watercolor painting I made from Red Cliffs National Conservation Area in southwestern Utah. It’s one of my most favorite places on the planet and home to the endangered desert tortoise, loads of unique wildlife, petroglyphs, and some truly amazing landscapes. Because it’s BLM land, it’s at risk of being developed as the surrounding cities need to accommodate growing communities. There was a proposal to build a highway through part of Red Cliffs and I don’t know if that plan is still happening or if conservationists are still fighting it.

Click on this image to get to the voting page.
Here are a couple gorgeous photos from the Red Cliffs area by Michelle Craig:

Image by Michelle Craig Photography
Image by Michelle Craig Photography
Here are a couple photos I took last year from Red Cliffs:

It’s a stunning part of Utah and worthy of protection from development!
In case you missed the link above, here it is again: CLICK HERE to vote for my artwork! Feel free to share the contest link on social media and vote for your favorites. Voting goes through May 7, 2020 at midnight. Thank you to everyone who’s voted!
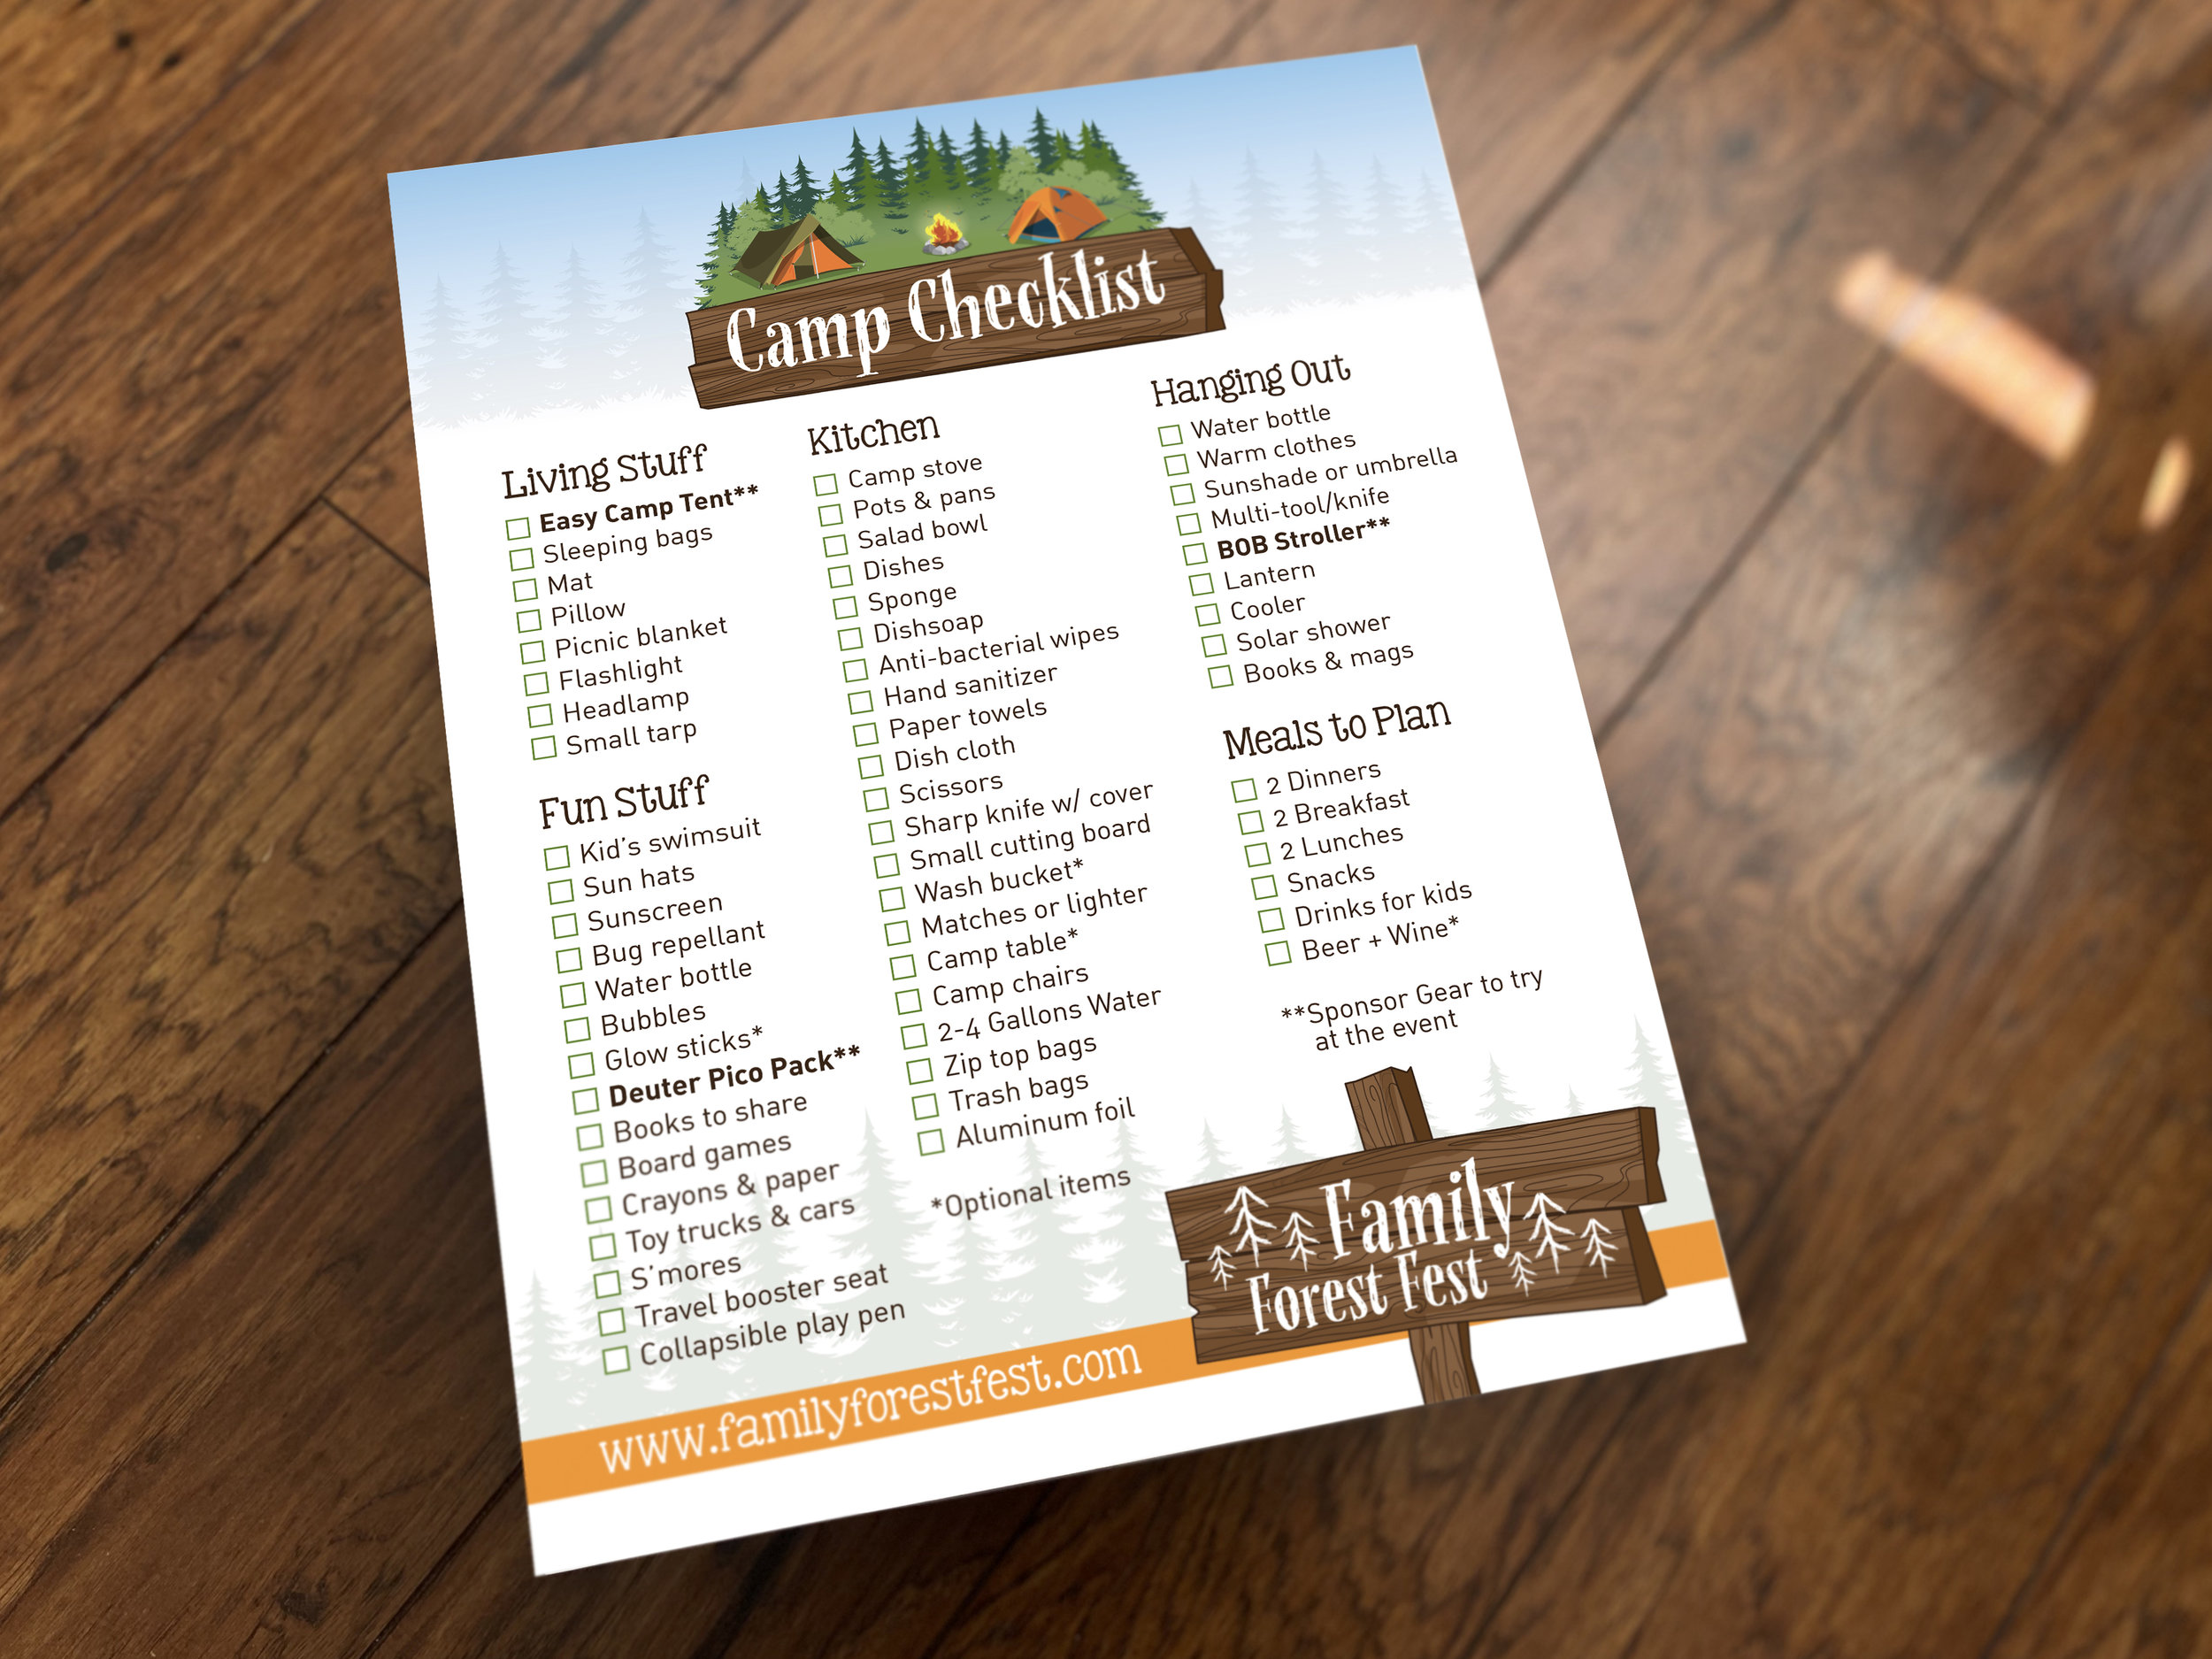
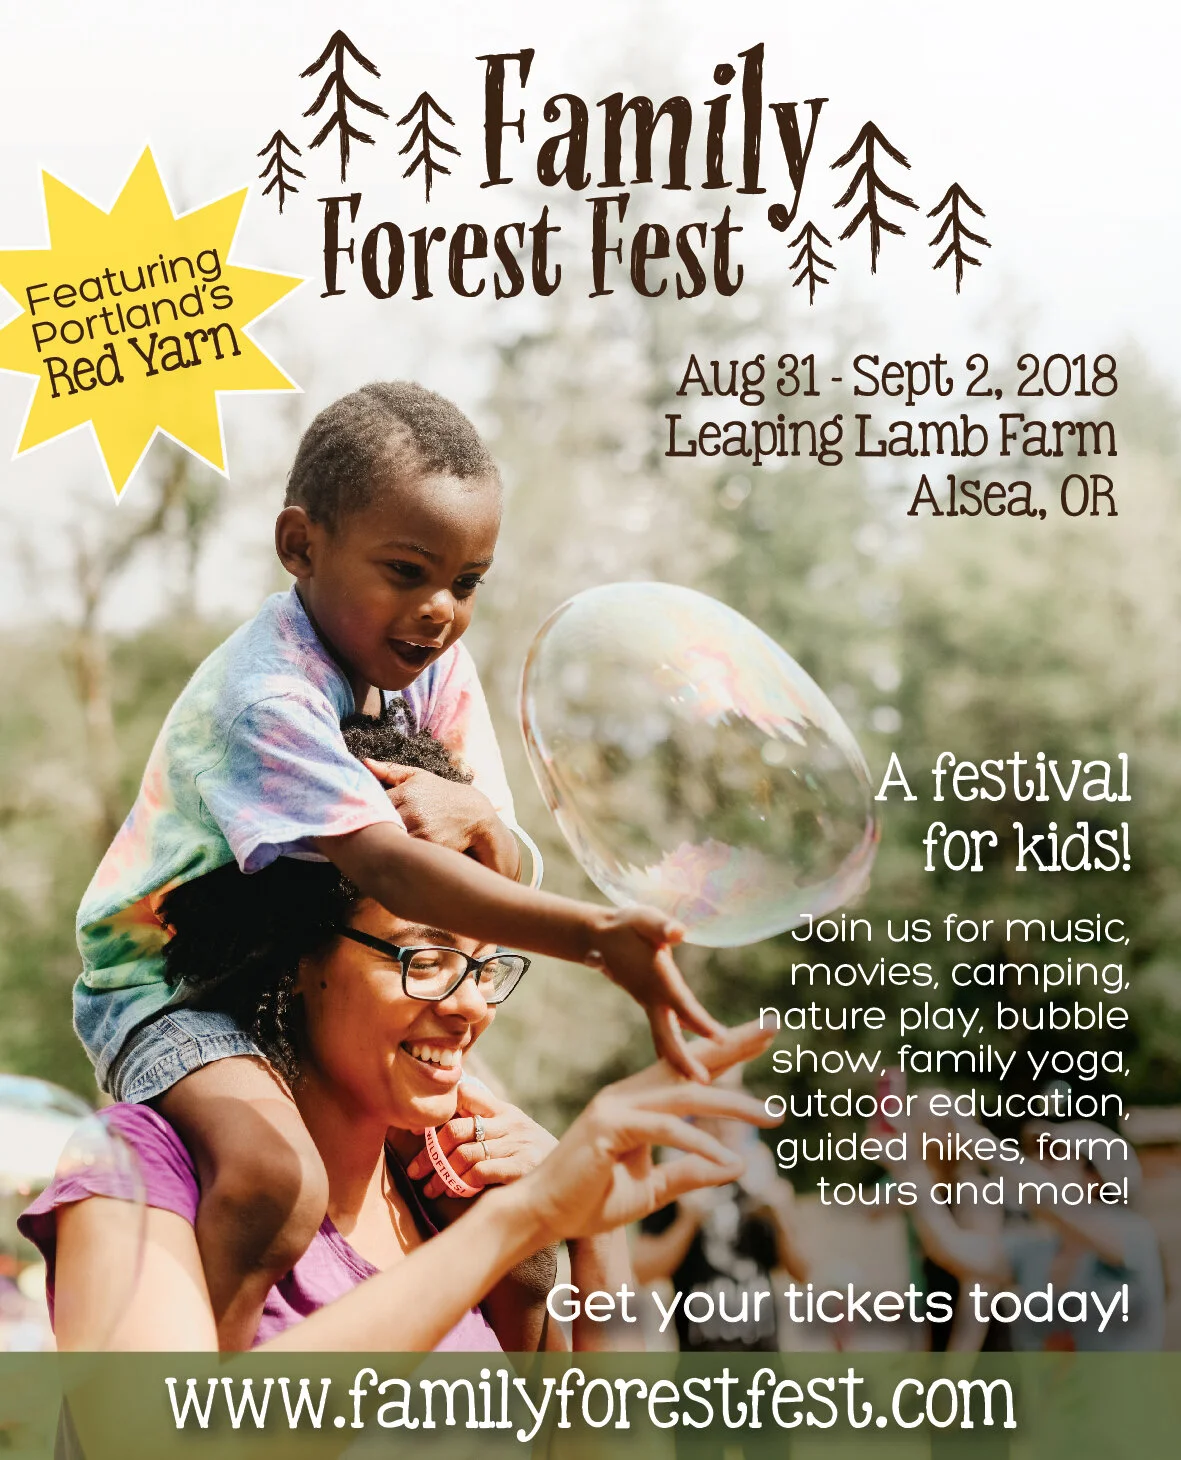
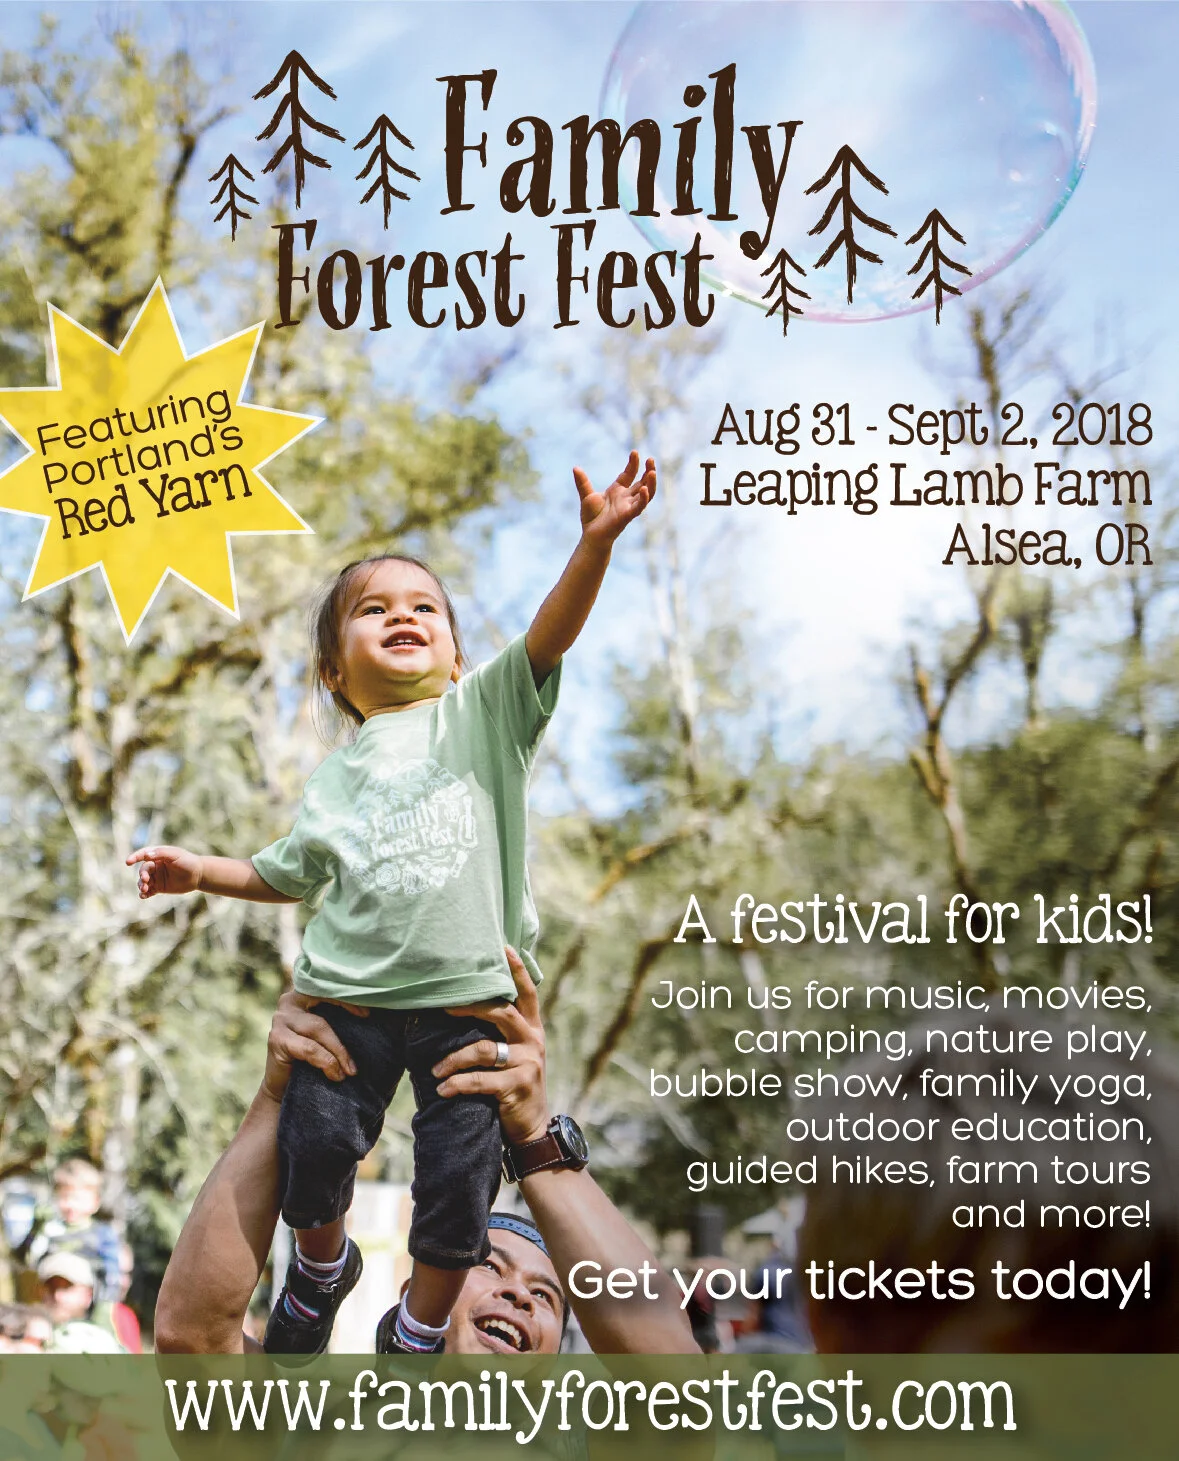
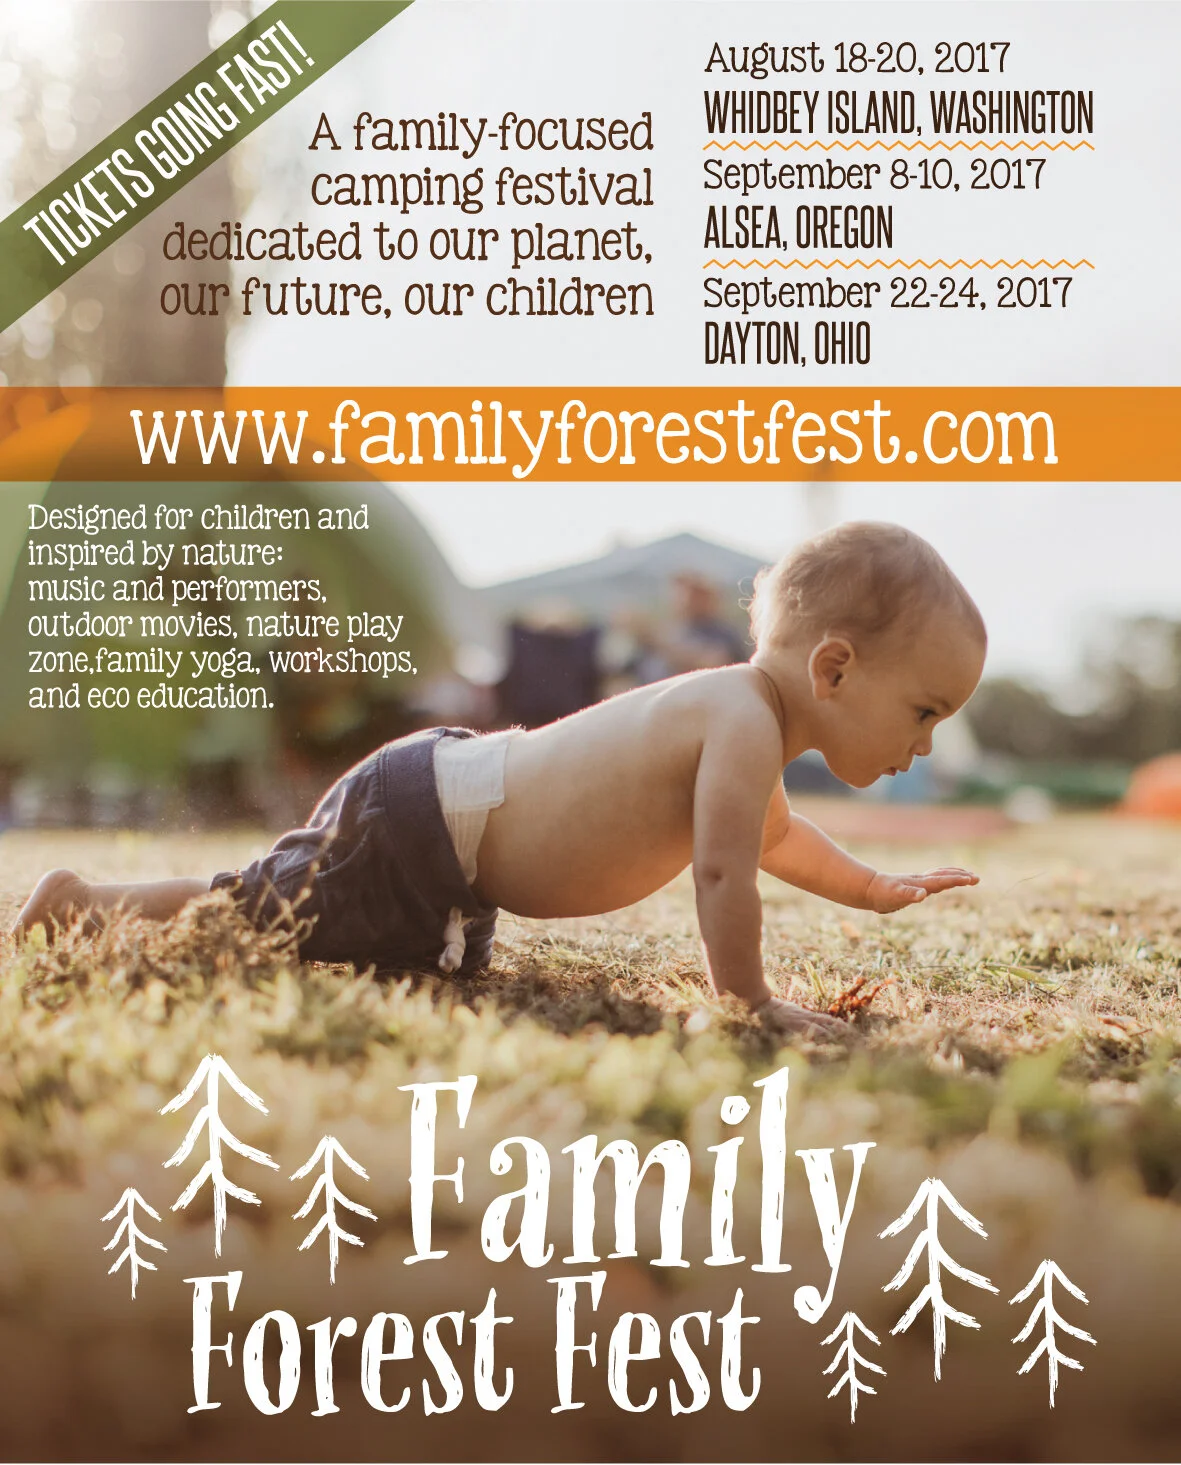
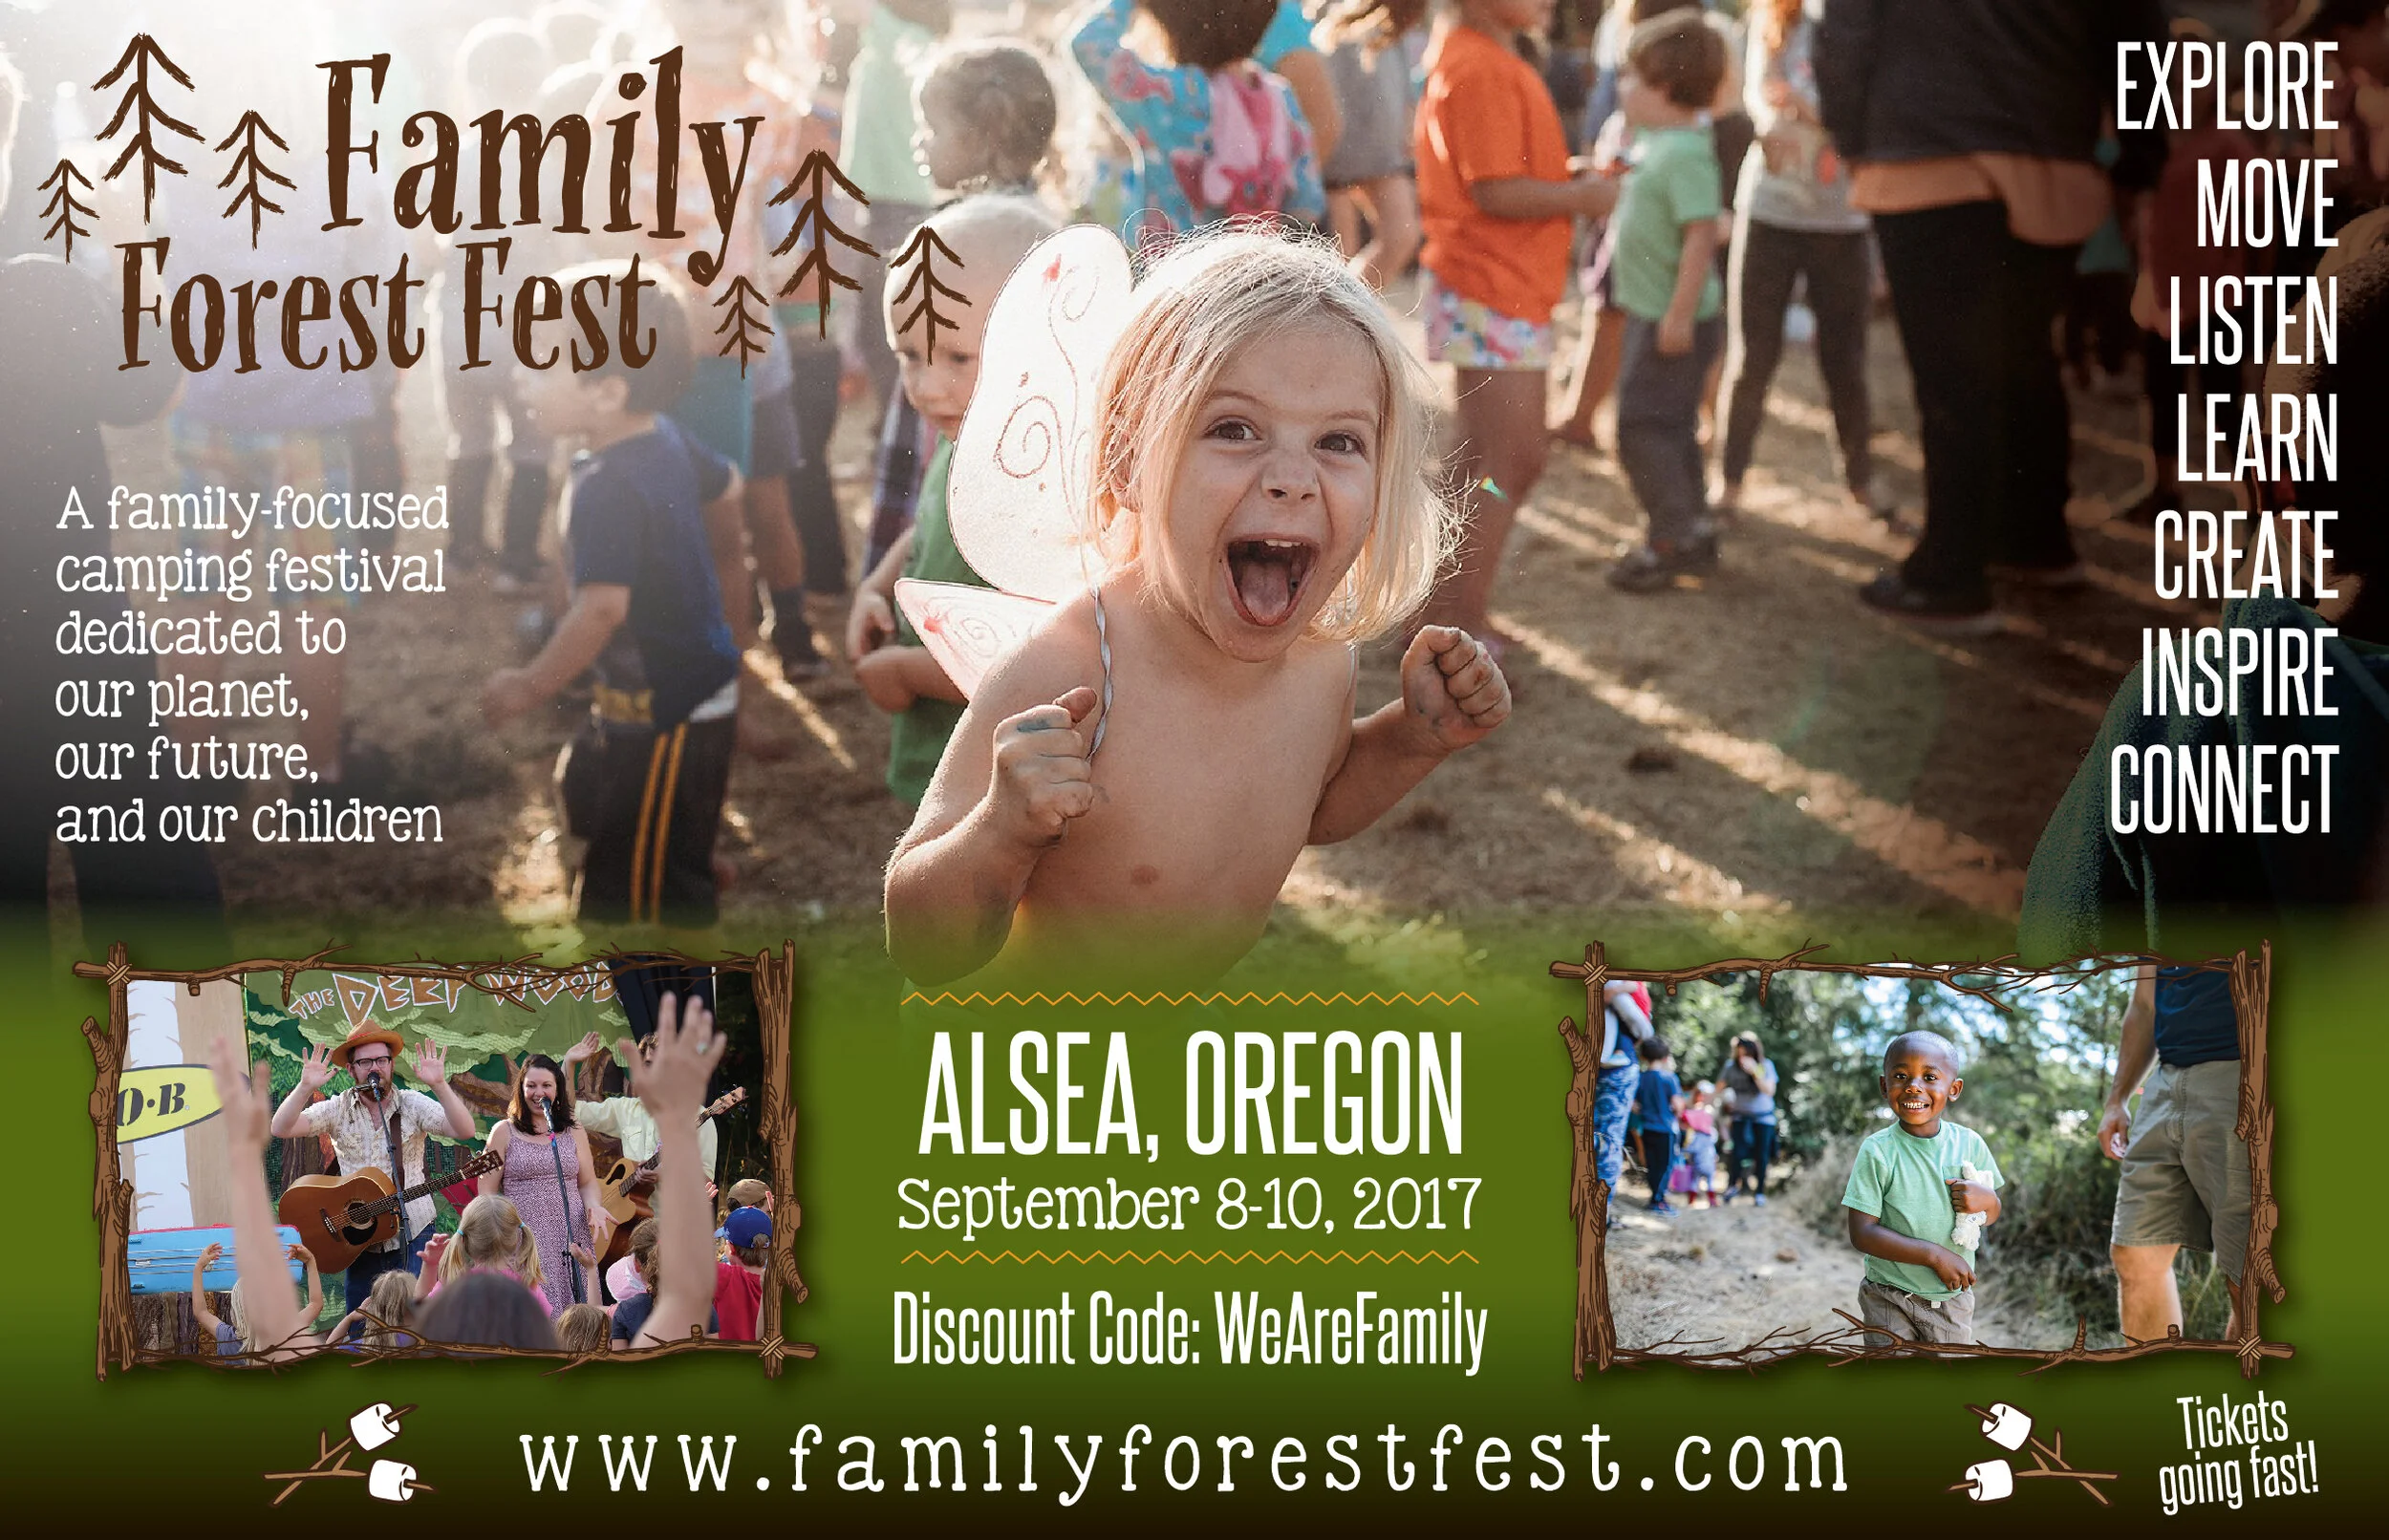
I had the privilege of creating artwork for the Family Forest Fest; a camping experience designed for families with young children. In 2017 they had events in two locations; one on Whidbey Island outside of Seattle, the other at Leaping Lamb Farm in Alsea, Oregon. In 2018, they had one event in Alsea, Oregon. They hosted a teddy bear hunt, outdoor play for kids, live music, bubble professionals, a movie night, a costume carnival, night hikes, family yoga, and so much more. There were also outdoor gear vendors there with gear for campers (and kids) try out. It looked amazing and I was sad to see them stop the events when it was becoming too difficult to make it sustainable.
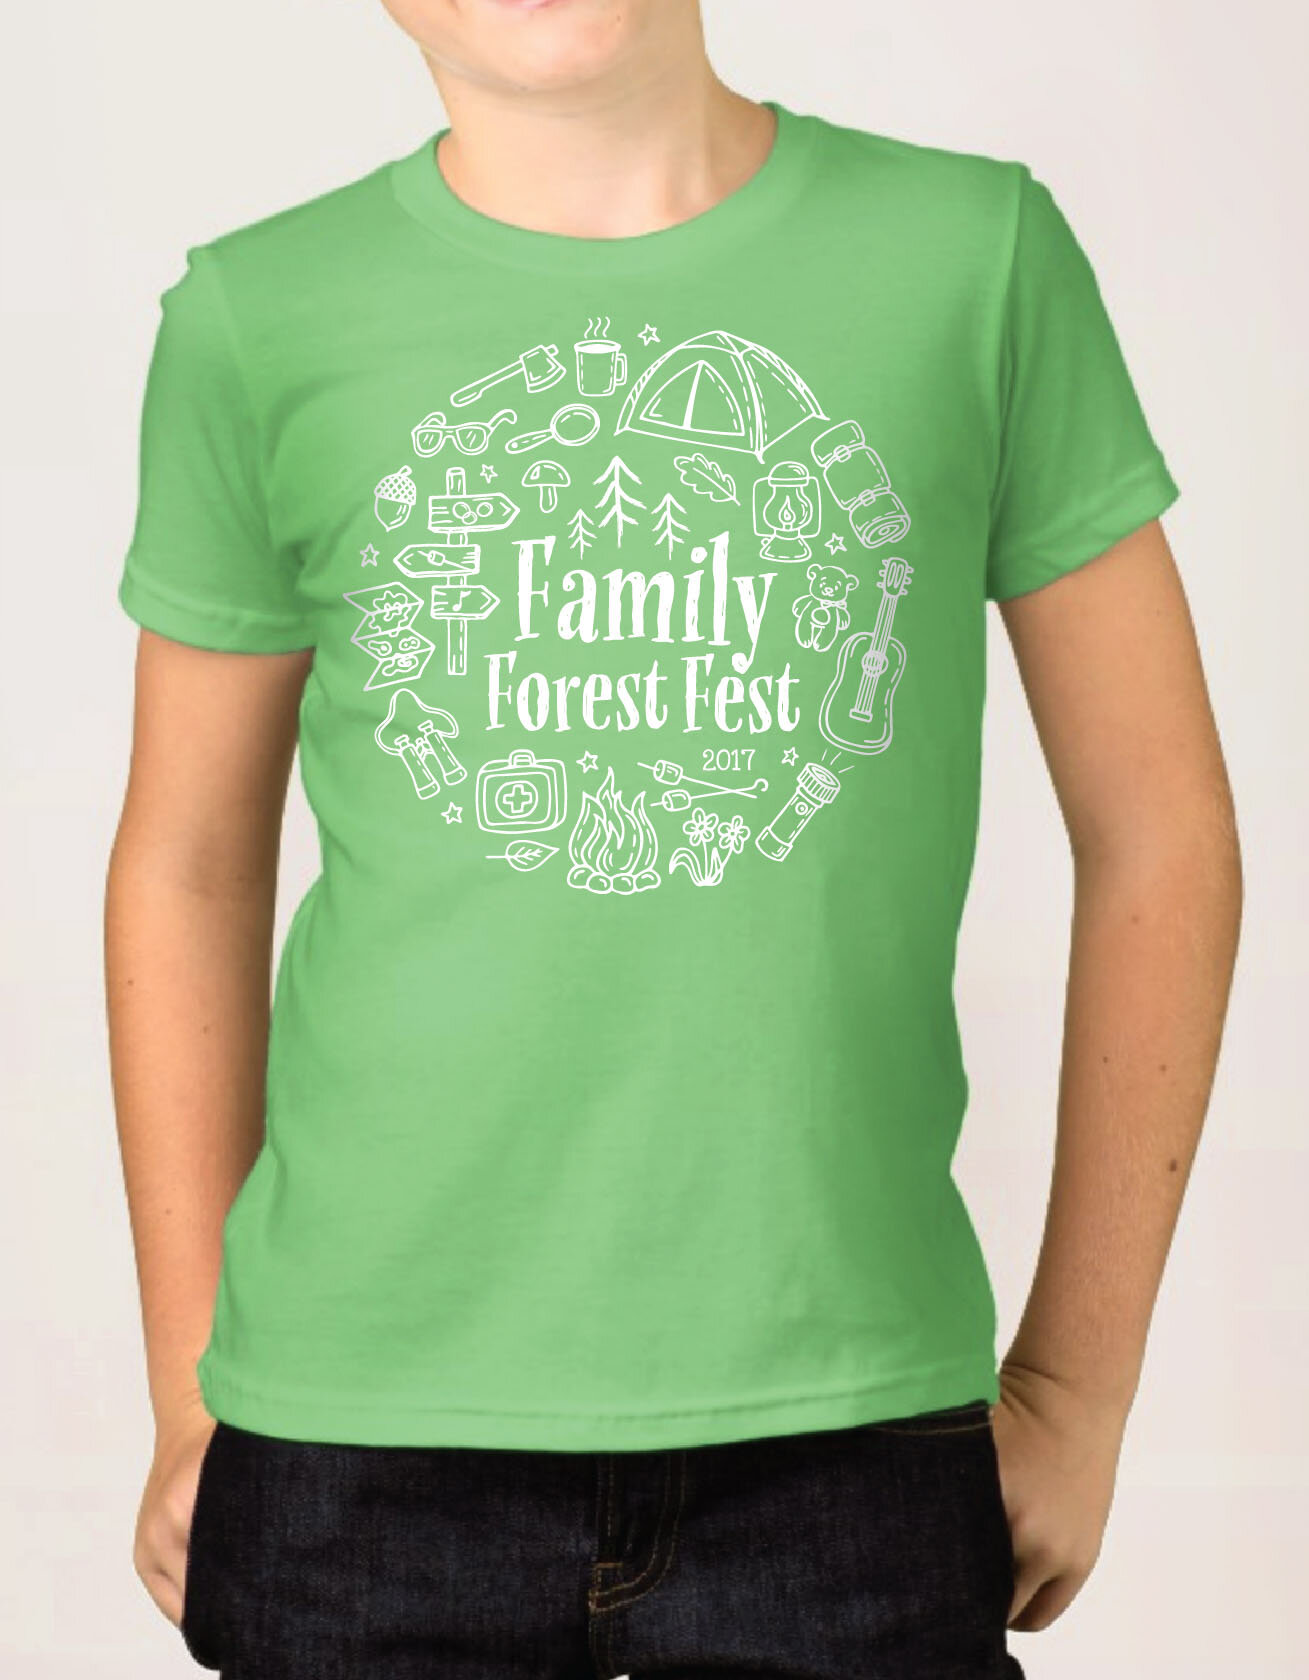
I designed t-shirts for the events along with magazine ads, social media graphics, event maps, signs, and banners. Here's the adult t-shirt from 2017. It was printed in kelly green for staff members and navy blue for adult attendees.

The kids tees were printed on lime green.

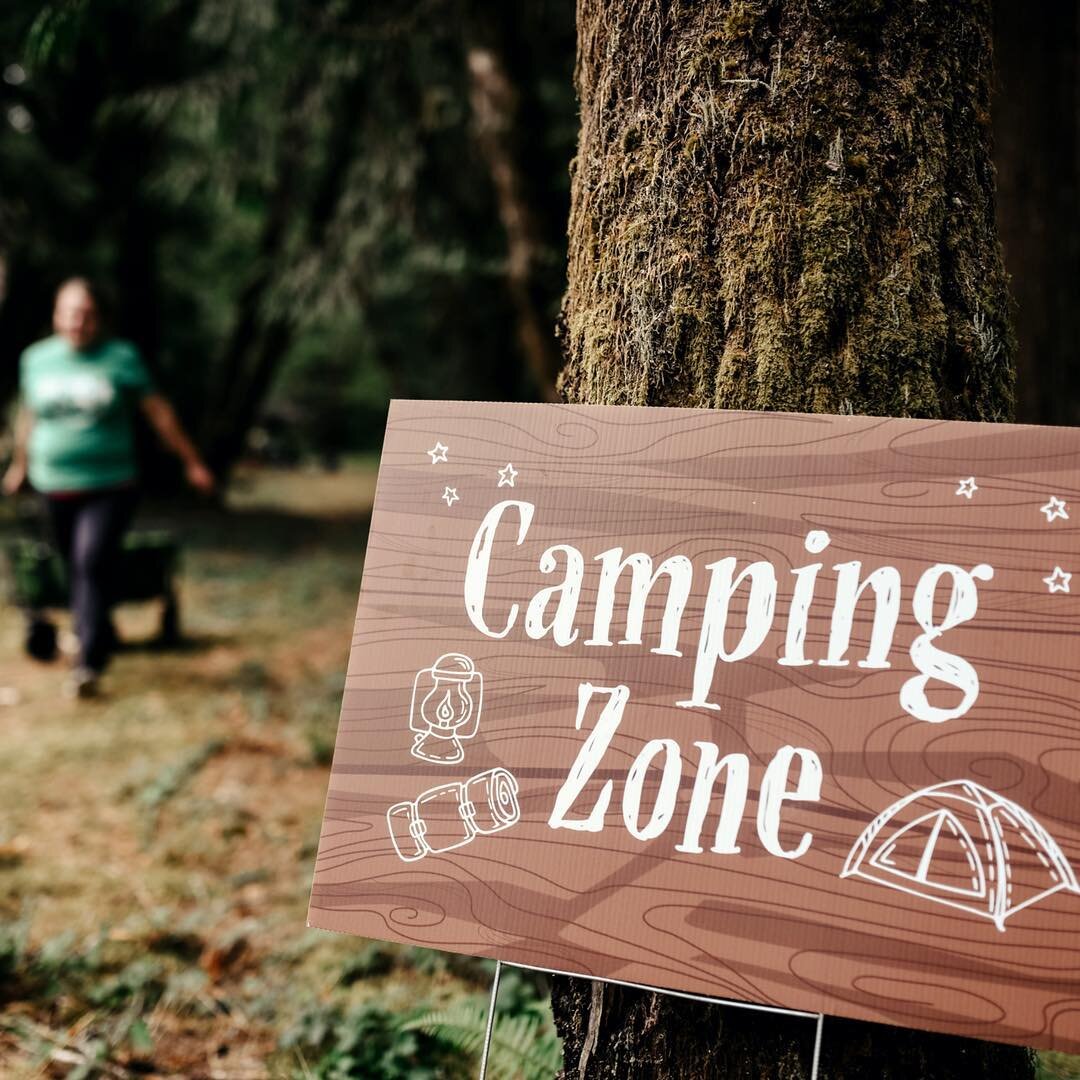
I also created signs to identify different parts of the camp and a map of each location so campers knew where everything was. Some spaces were even sponsored.

Event map for the Oregon event:

For the 2018 event, they were able to use many of the same signs, but we did revamp the t-shirt designs:
Kid’s shirts were bright blue:

For the adult tees, they went with this lovely shade of dark green along with some lighter green and gray options:


Image by Heartbeat Photography
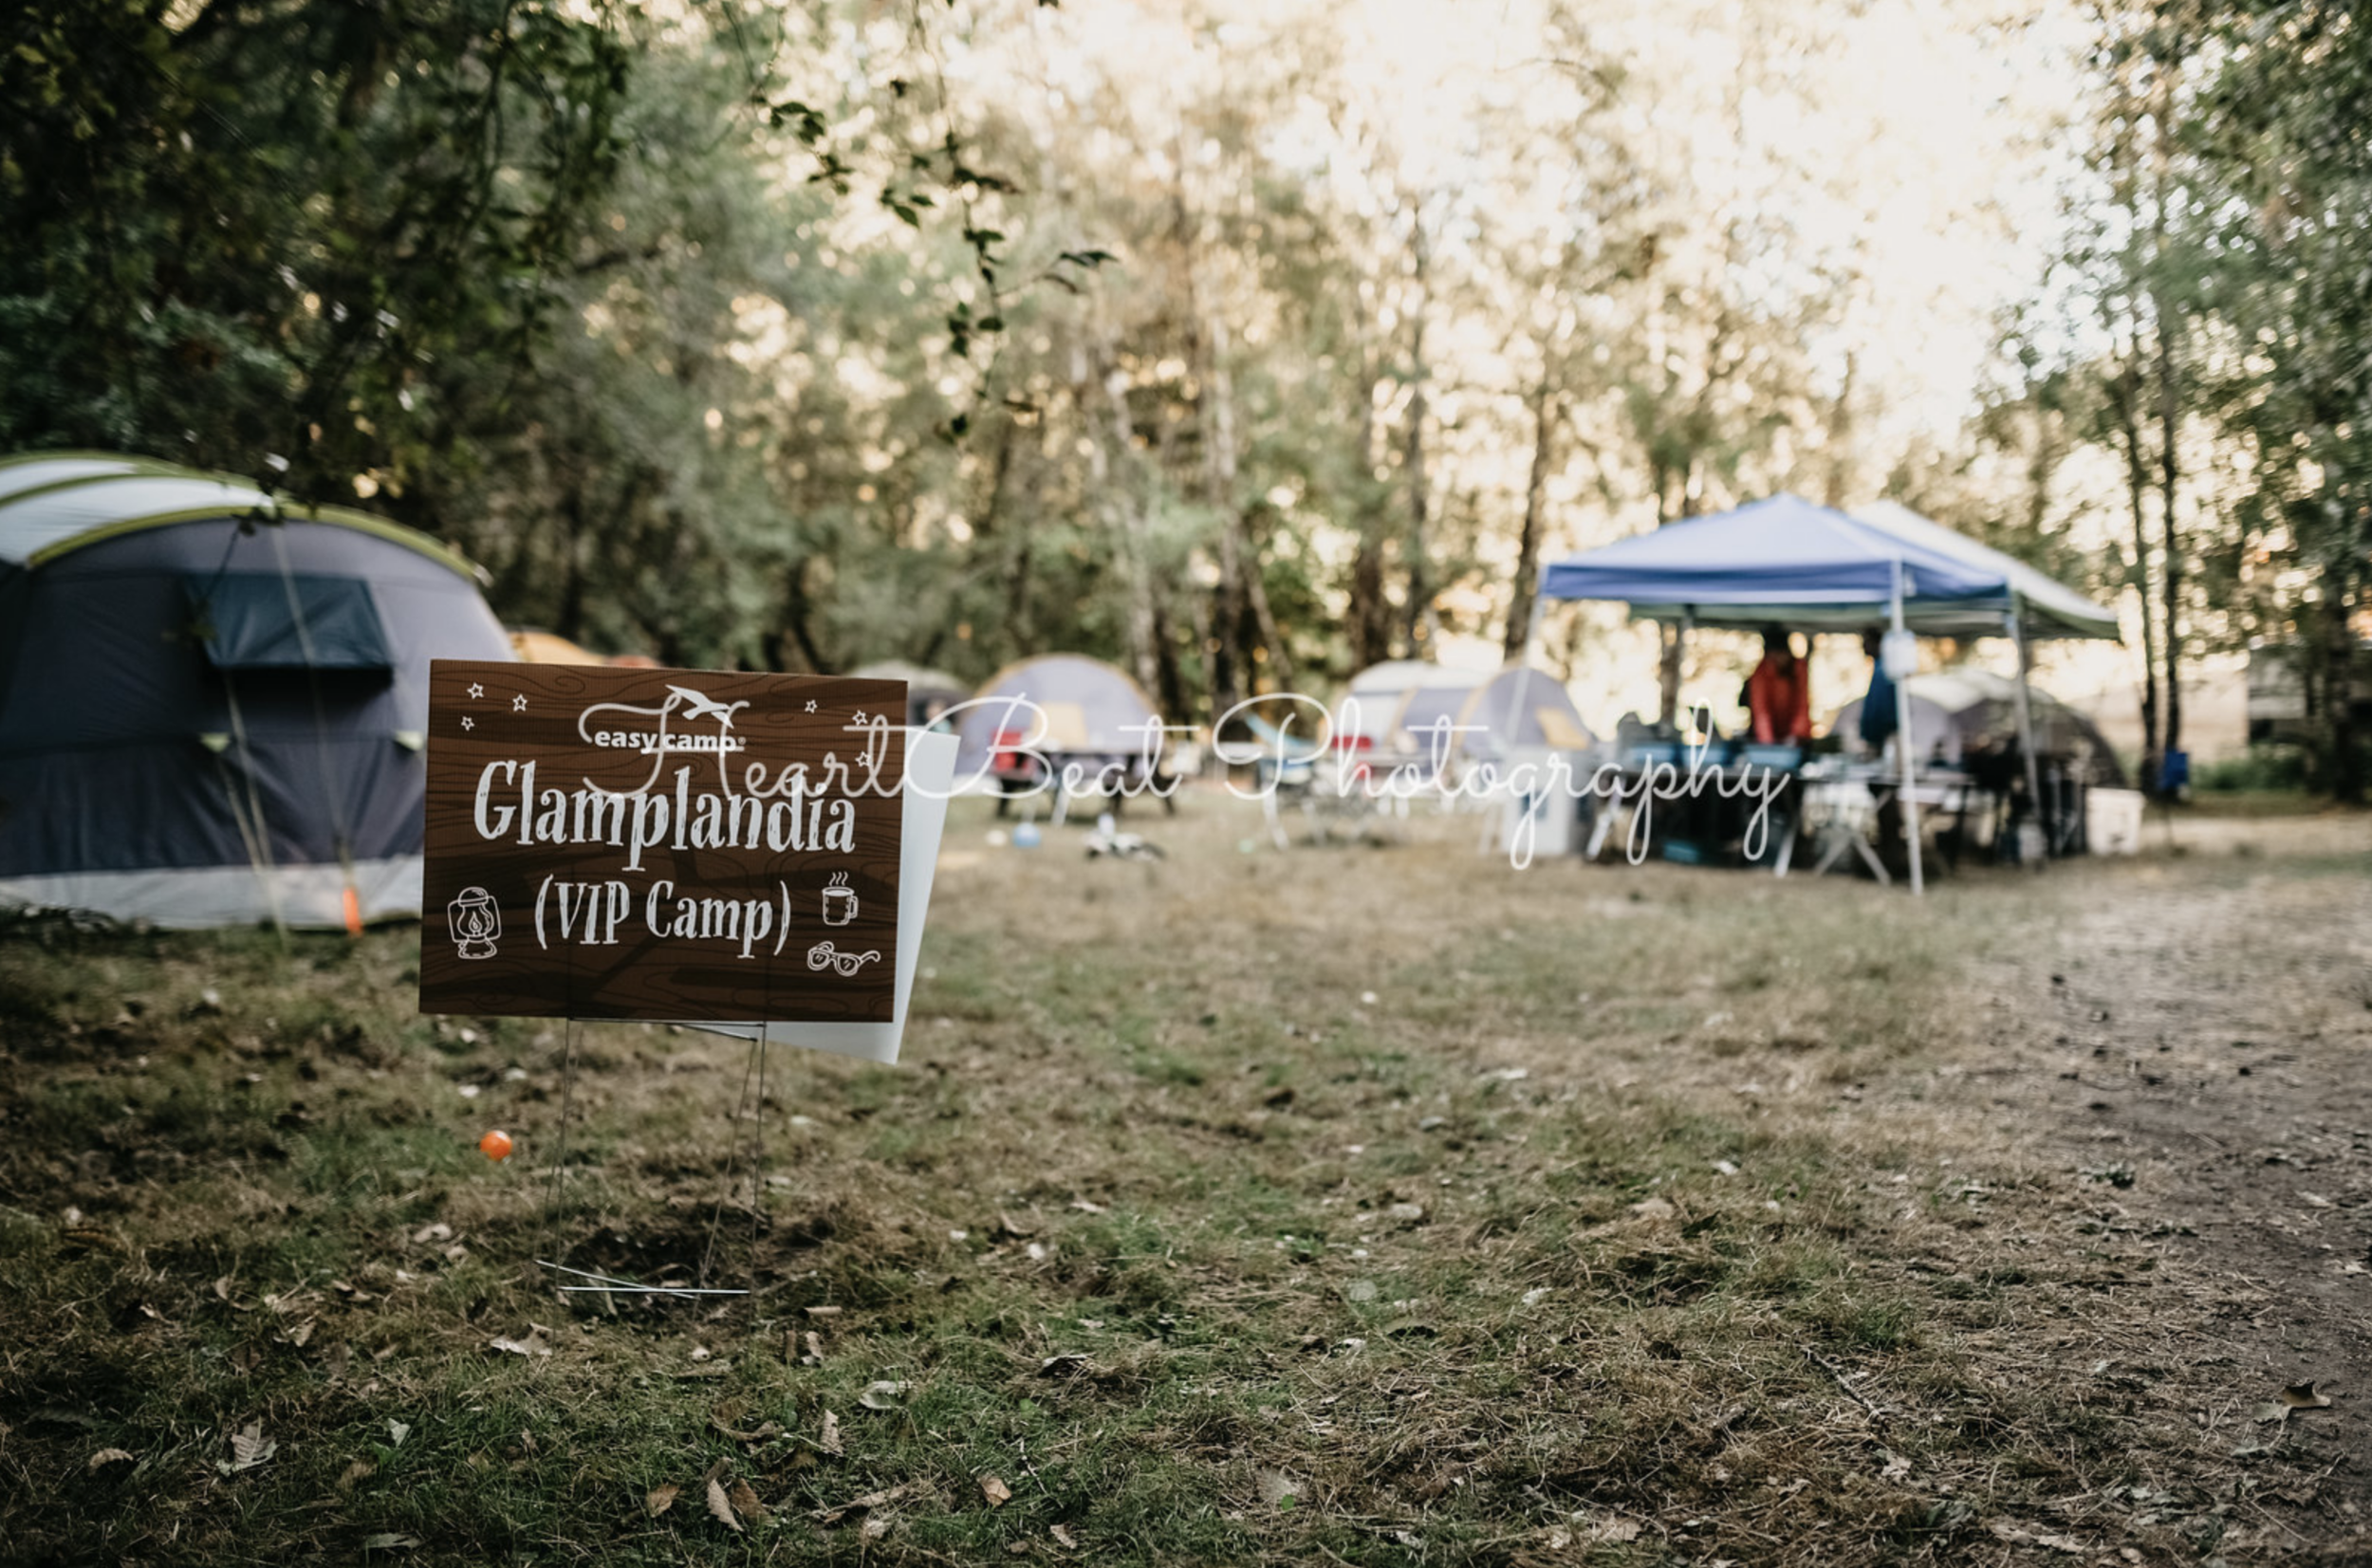
Image by Heartbeat Photography

Image by Heartbeat Photography

Image by Heartbeat Photography
It was such a pleasure to work on all of these items for Family Forest Fest. Thank you so much Shanti and Erin!
I wanted to share some of the ads I created for Family Forest Fest over the last few years. They’re pretty awesome and worth checking out. They were able to get some of these ads into some Oregon and Ohio family magazines and websites. I think one or two were printed into flyers too. This event looks like so much fun, I need to see what the drive would be like to get out to Alsea, OR from Utah with my kids!
*ETA 11/2020, since they are no longer holding events, their website is no longer up. These looked like such fun events for the two years they happened. Maybe someday the founders can try again. You can see some photos and an update on why they stopped on their Facebook page.

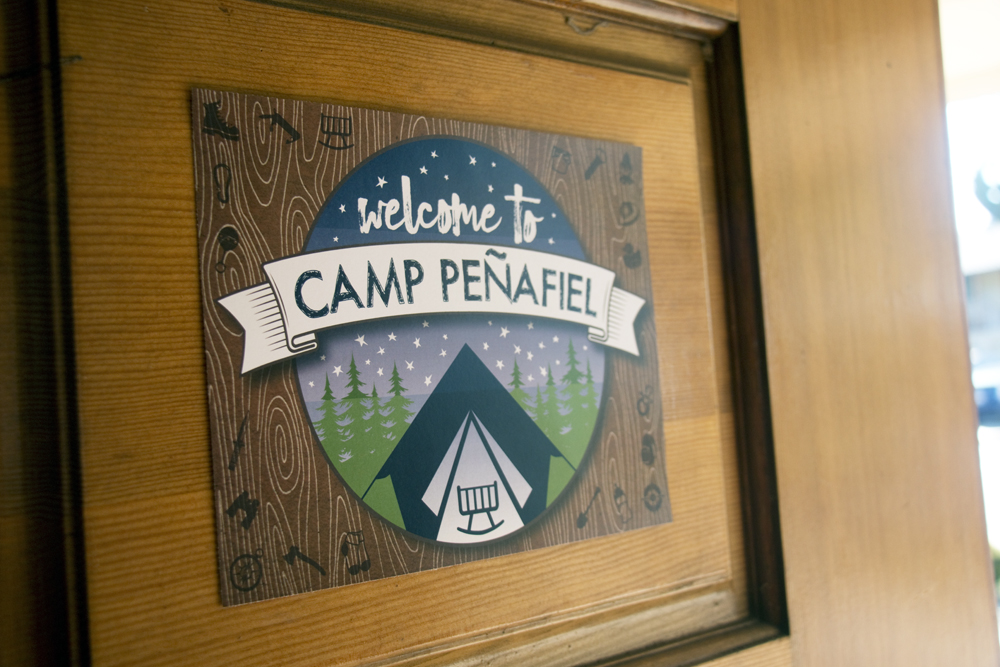
My sister, Jackie is pregnant with her first baby I was thrilled to get to plan a baby shower for her along with our mom and our friend Joanna. Jackie and my brother-in-law, Michael wanted a coed baby shower and we took a little time brainstorming ideas for a theme. We decided on a camping theme, but there were a few stipulations. The lumberjack theme is popular right now, but none of us wanted to go that route. So no fake beards, no buffalo plaid, just simple camping with a few "tactical" elements thrown in for Michael. It was pretty hard to figure out, but we managed to sneak in a few.
For the invitation I reworked a birthday invitation I created last year (I'll get it up on the blog someday).


The insert included where to find their registry and rsvp information.

Never fear, the email address and URL have been changed to protect privacy.
I had these printed at Office Depot and I mailed them in Clover envelopes from Paper Source. I actually had most of this stuff printed with Office Depot. It was really easy to upload the files to their website and pick them up from my local store within an hour. I was even able to specify that some be printed onto card stock and some not. It was really, really convenient!
We started with a sign for the front door (this is the only item where I wasn't thrilled with the print quality):
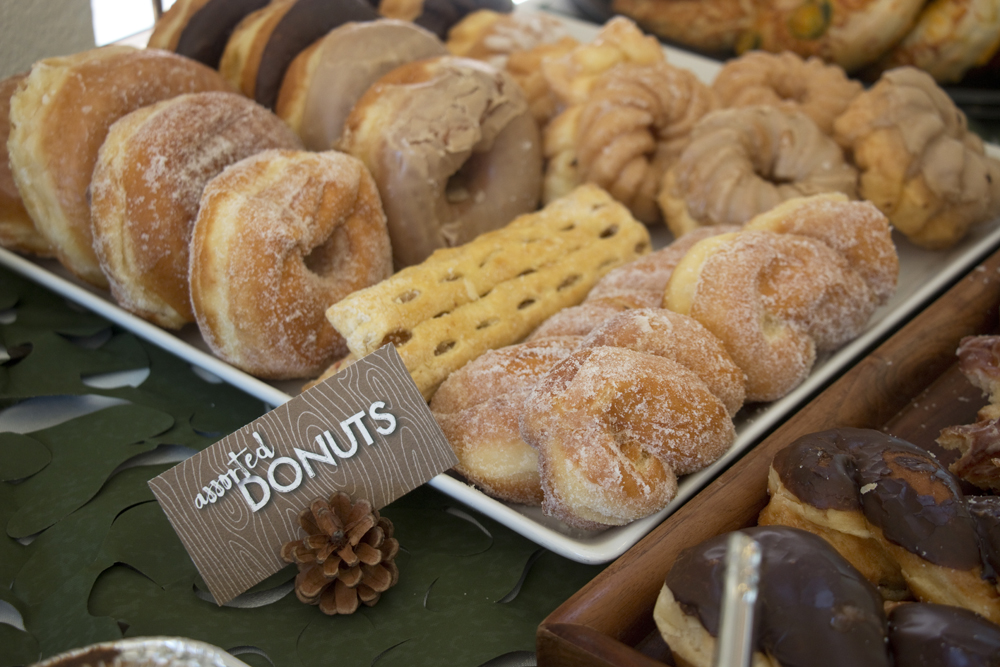
For the shower itself, my sister was adamant that it be a brunch because she loves breakfast food. So we had donuts, bagels, fruit salad, and an egg/sausage/hashbrown/cheese concoction that our mom has been making for years that she calls "Mountain Woman Breakfast." I made food signs for all of these, including the mimosa bar.


We also had a big basket full of "s'mores mix" which is a mixture of chocolate chips, mini marshmallows, and Golden Grahams cereal. I don't know why I forgot to take a photo of it!

For table decor, the city my parents live in cleared away some fallen trees and left the wood slices out, free firewood for residents. Score!! We already had a few old lanterns and then we found these little plastic canteens on Oriental Trading. I created a new sticker for them by printing onto full sheet sticker paper. Voile!!

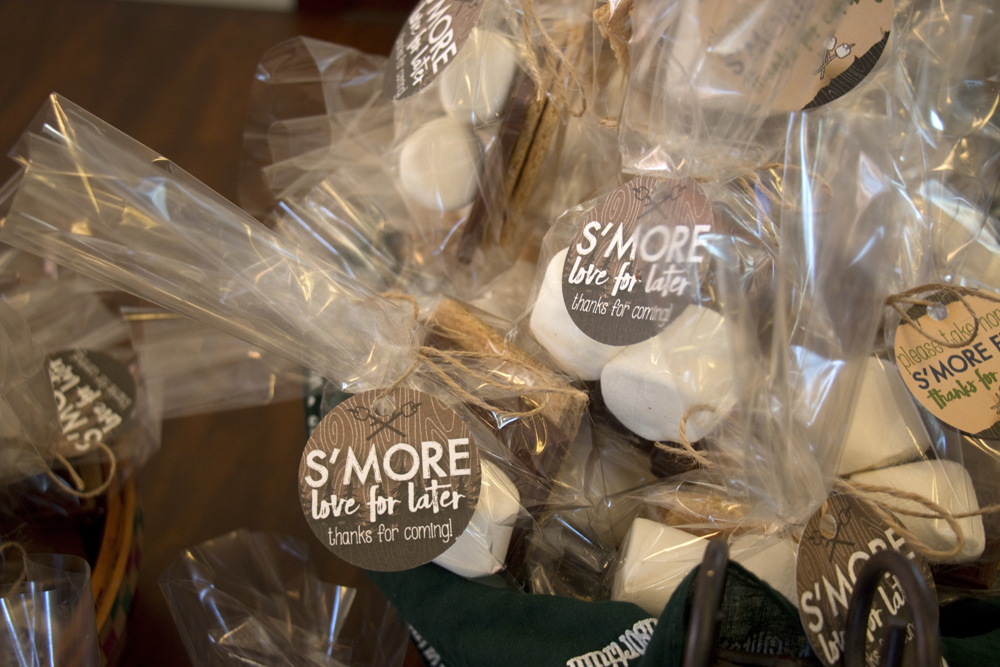
For a favor, we packed up some fixins for s'mores for everyone to take home. I couldn't decide between the two favor tag designs, so I printed some of each. Cello bags and twine came from Amazon.

We also had a station for folks to build their own trail mix. We called it G.O.R.P. when I was a kid, which stands for "good ole raisins and peanuts." Metal buckets and scoops are from Amazon.

To add a "tactical" element to the party, we had the materials and instructions set up so guests could make their own paracord keychain.

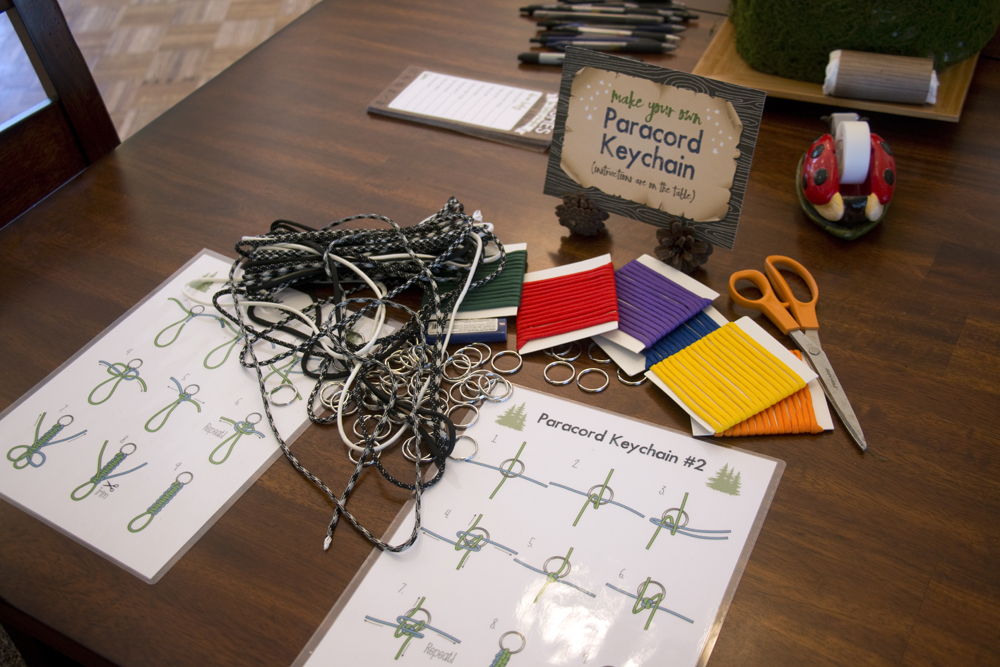
It was only $1.49 to get each page of instructions laminated at Office Depot. Well worth it!

I created some fun signs for a few spots throughout the party venue. This one is my favorite:

Notice the pregnant mama in a few of these?

Bathrooms too!

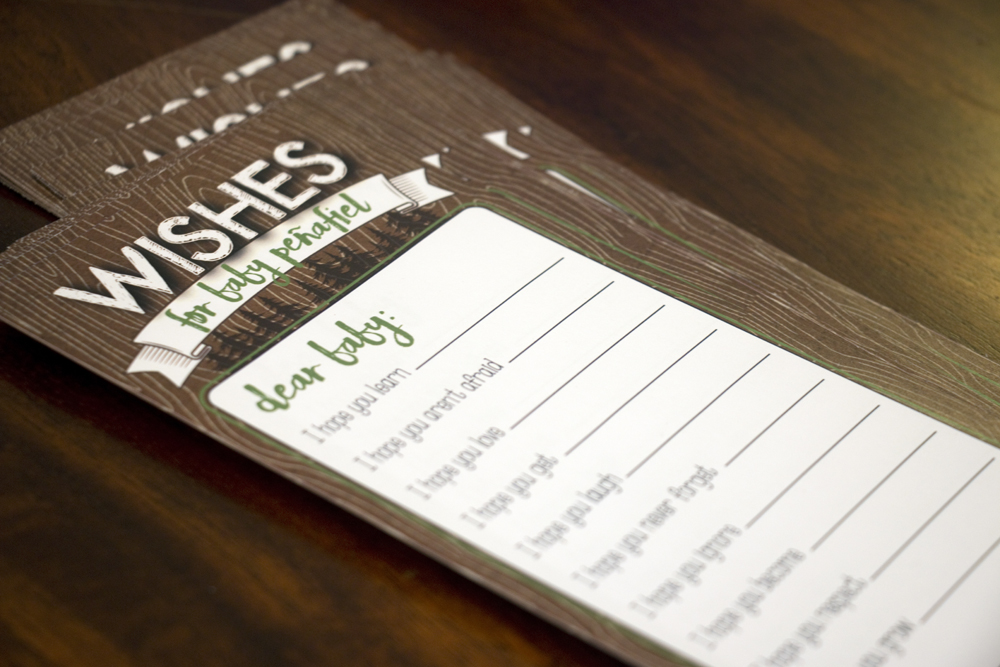
Wishes for Baby. I love making these for baby showers and first birthdays! I can only imagine that the parents love to read them a year, five years, or more down the road.
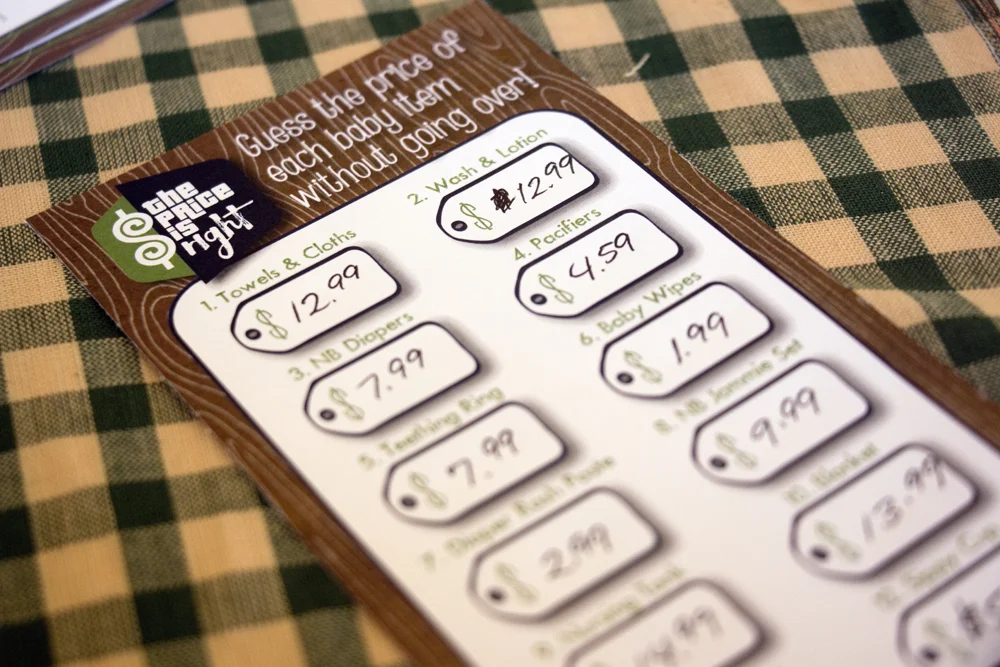
We played a rousing round of The Price is Right and guessed the pricing on a bunch of baby items. Considering how much of these things I've bought in recent years, I kind of hoped I'd do better on this!
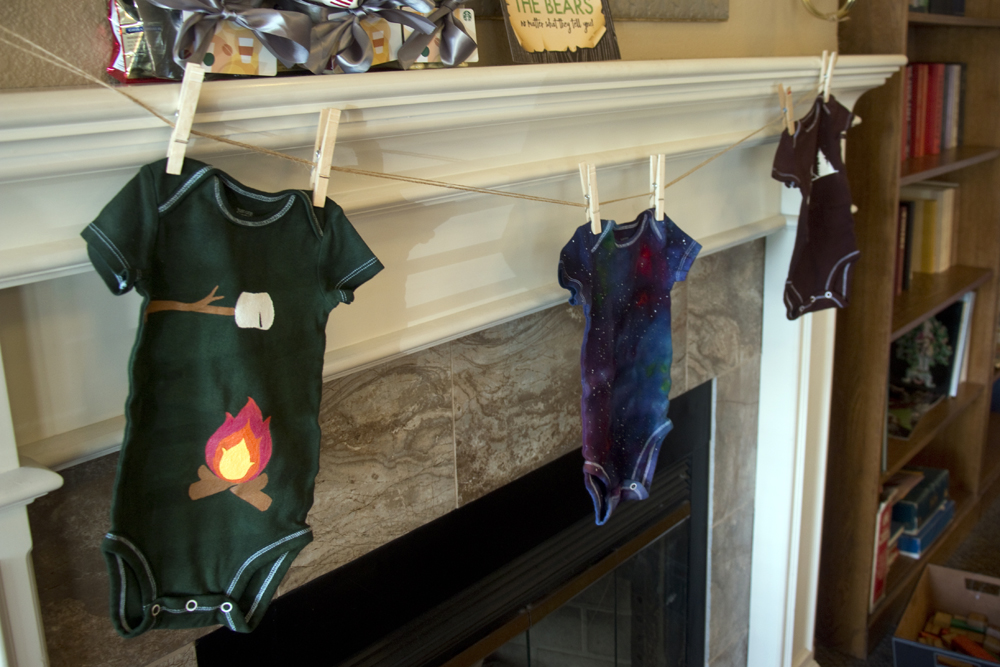
I'm really proud of how this trio of onesies turned out. I had created three camping-themed designs and I wanted to screen print them onto a few onesies. I wanted navy blue, dark green, and charcoal gray and I wanted them to all be heathered in texture. Apparently that's really not easy to find and definitely not very affordable. Getting them screen printed with my custom design was going to cost between $20 and $27 each. It was simply more than I was willing to spend. One of these days I'll be able to buy a Silhouette Cameo and do it myself, but not today.
I already had these three onesies in plain white. Since I've been dabbling in fabric dyeing, I blended some colors together to get these three. The green and brown onesies were dyed solid and then I added the designs with fabric paint. The space onesie was done with a method called ice dyeing. I wrote up the details on how I did it here.

We also had a fun obstacle course that involved walking through Legos, changing a diaper, and assembling a breast pump; all for time!

It turned out to be a really relaxed and fun baby shower and I hope my sister and brother-in-law had as much fun as I had. Love you guys!