watercolor ground

4-Day Galaxy Skies Challenge

As part of my effort to light a fire under my butt to paint more often, I decided to participate in a 4-day galaxy skies painting challenge that I saw on SkillShare with artist Swathi Ganesha. Click here if you’d like to try a month of SkillShare for free.

Day 1: Monochrome

Day One was a monochrome painting, so just one color. I chose Phthalo Blue from Daniel Smith Watercolor and went to town making a basic diagonal edge to the Milky Way. There was something very freeing about doing all I could with just one color. Click here to watch a time lapse of this painting. A couple of tiny mountains at the bottom added some depth to this one.

I painted the stars using white gouache paint and a splatter method where I tap two brushes together. This is a method I used a lot when I was doing galaxy-dyed shoes and baby carriers a few years ago. I would use acrylic paint and it gave the most awesome and varied sizes of stars, but I had very little control over where they landed, and sometimes I’d end up with an odd-shaped glob of paint that wasn’t round. Also, paint ended up everywhere! Those reasons are why I originally used masking fluid and white pens to make stars for my watercolor paintings, but after using this splatter method again, and with gouache this time, I think it’s going to help me level-up on my galaxy stars.

I have an awesome set of gouache paints from Himi that my sister gave me for Christmas.

Day 2: Duo Chrome

Day Two was Duo Chrome, so two colors. I opted for Phthalo Blue again and added Quinacridone Rose. I haven’t been using very high quality paper for these; just a 4x6 pad that I got from Michael’s. Today the paper bowed down the middle when it was saturated and the paint was pooling along the bottom. I managed to dab the puddle with a tissue in an attempt to salvage it, but I almost tore it up and threw it away. Once I added stars, the painting redeemed itself.

I added a few happy trees and I was happy with how it ended up. Click here to watch the time lapse of this one.

Day 3: Three-Color Seascape

Day three; a three-color seascape, proved to be the most challenging. I have a palette of watercolor from Culture Hustle that I tried to use for all three colors. The lavender and turquoise just weren’t pigmented enough. So attempt one went into the trash. With attempt number two, I tried to use Phthalo Green straight for the aqua shade along the bottom, but it was way too green and I scrapped that one too.

For attempt number three, I premixed that aqua color using Phthalo Green and Cobalt Blue. Then I used Imperial Purple and the bright pink called Runaway from the Culture Hustle Watercolour Palette. I absolutely hated how the colors were coming together when they were wet. But once it dried and I added stars, it was worth saving. After adding some more definition in the ocean at the bottom, it avoided the recycling bin.

Click here to watch a time lapse of this painting.

Day 4: Dreamy Landscape

Day four was fun because I could use pretty much anything I wanted. I chose to limit myself to only four colors: Indigo, Moonglow (that purple shade), Phthalo Green, and Cobalt Blue. These colors are more muted than the ones I used before, but I still love how they turned out. This time the paper was cooperative and I was happy with how the paint behaved. I tried to be more patient and waited longer after applying paint to see how it spread and I think it paid off.

I opted for a few more happy trees and I love how it turned out. Click here to watch the time lapse of this one being painted.

I had such a fun time with this challenge, maybe I’ll do it again next week but with all different colors. Maybe if I can paint enough of these little paintings, I can have them for sale.

Hand Painted Wood Ornaments

A while back I bought a box of little wood slices with the intention of painting them all with little landscapes and giving them as gifts. If I could get enough of them painted before Black Friday, I was considering selling them to hopefully make a few bucks before Christmas. It was mid November before I painted any, so yeah, I think I’ll have to buy another box and try again for next year.

Instead of stressing over getting a bunch of ornaments painted and shipped before Black Friday, I prepped all of them with Watercolor Ground and had the kids who joined us for Thanksgiving paint them. Ages ranged from 4 to 18 and they went to town making some really awesome ornaments. I brought Tombow markers, some inexpensive acrylic paint, and a set of iridescent watercolor that was on sale. I was so proud that they all had fun and spent a good amount of time painting their ornaments on Thanksgiving. It was a great activity for them to all do together that wasn’t a video game.

Watercolor Ground is a painting medium that can be painted onto porous surfaces to allow them to be painted with watercolor or gouache paint. I applied two coats to each of the wood slices and it allowed the wood to behave a little like watercolor paper. It’s not nearly as absorbant and you do get some bleeding or weirdness from the grain of the wood, but it’s overall a much easier surface to paint on than if I’d just painted on raw wood.

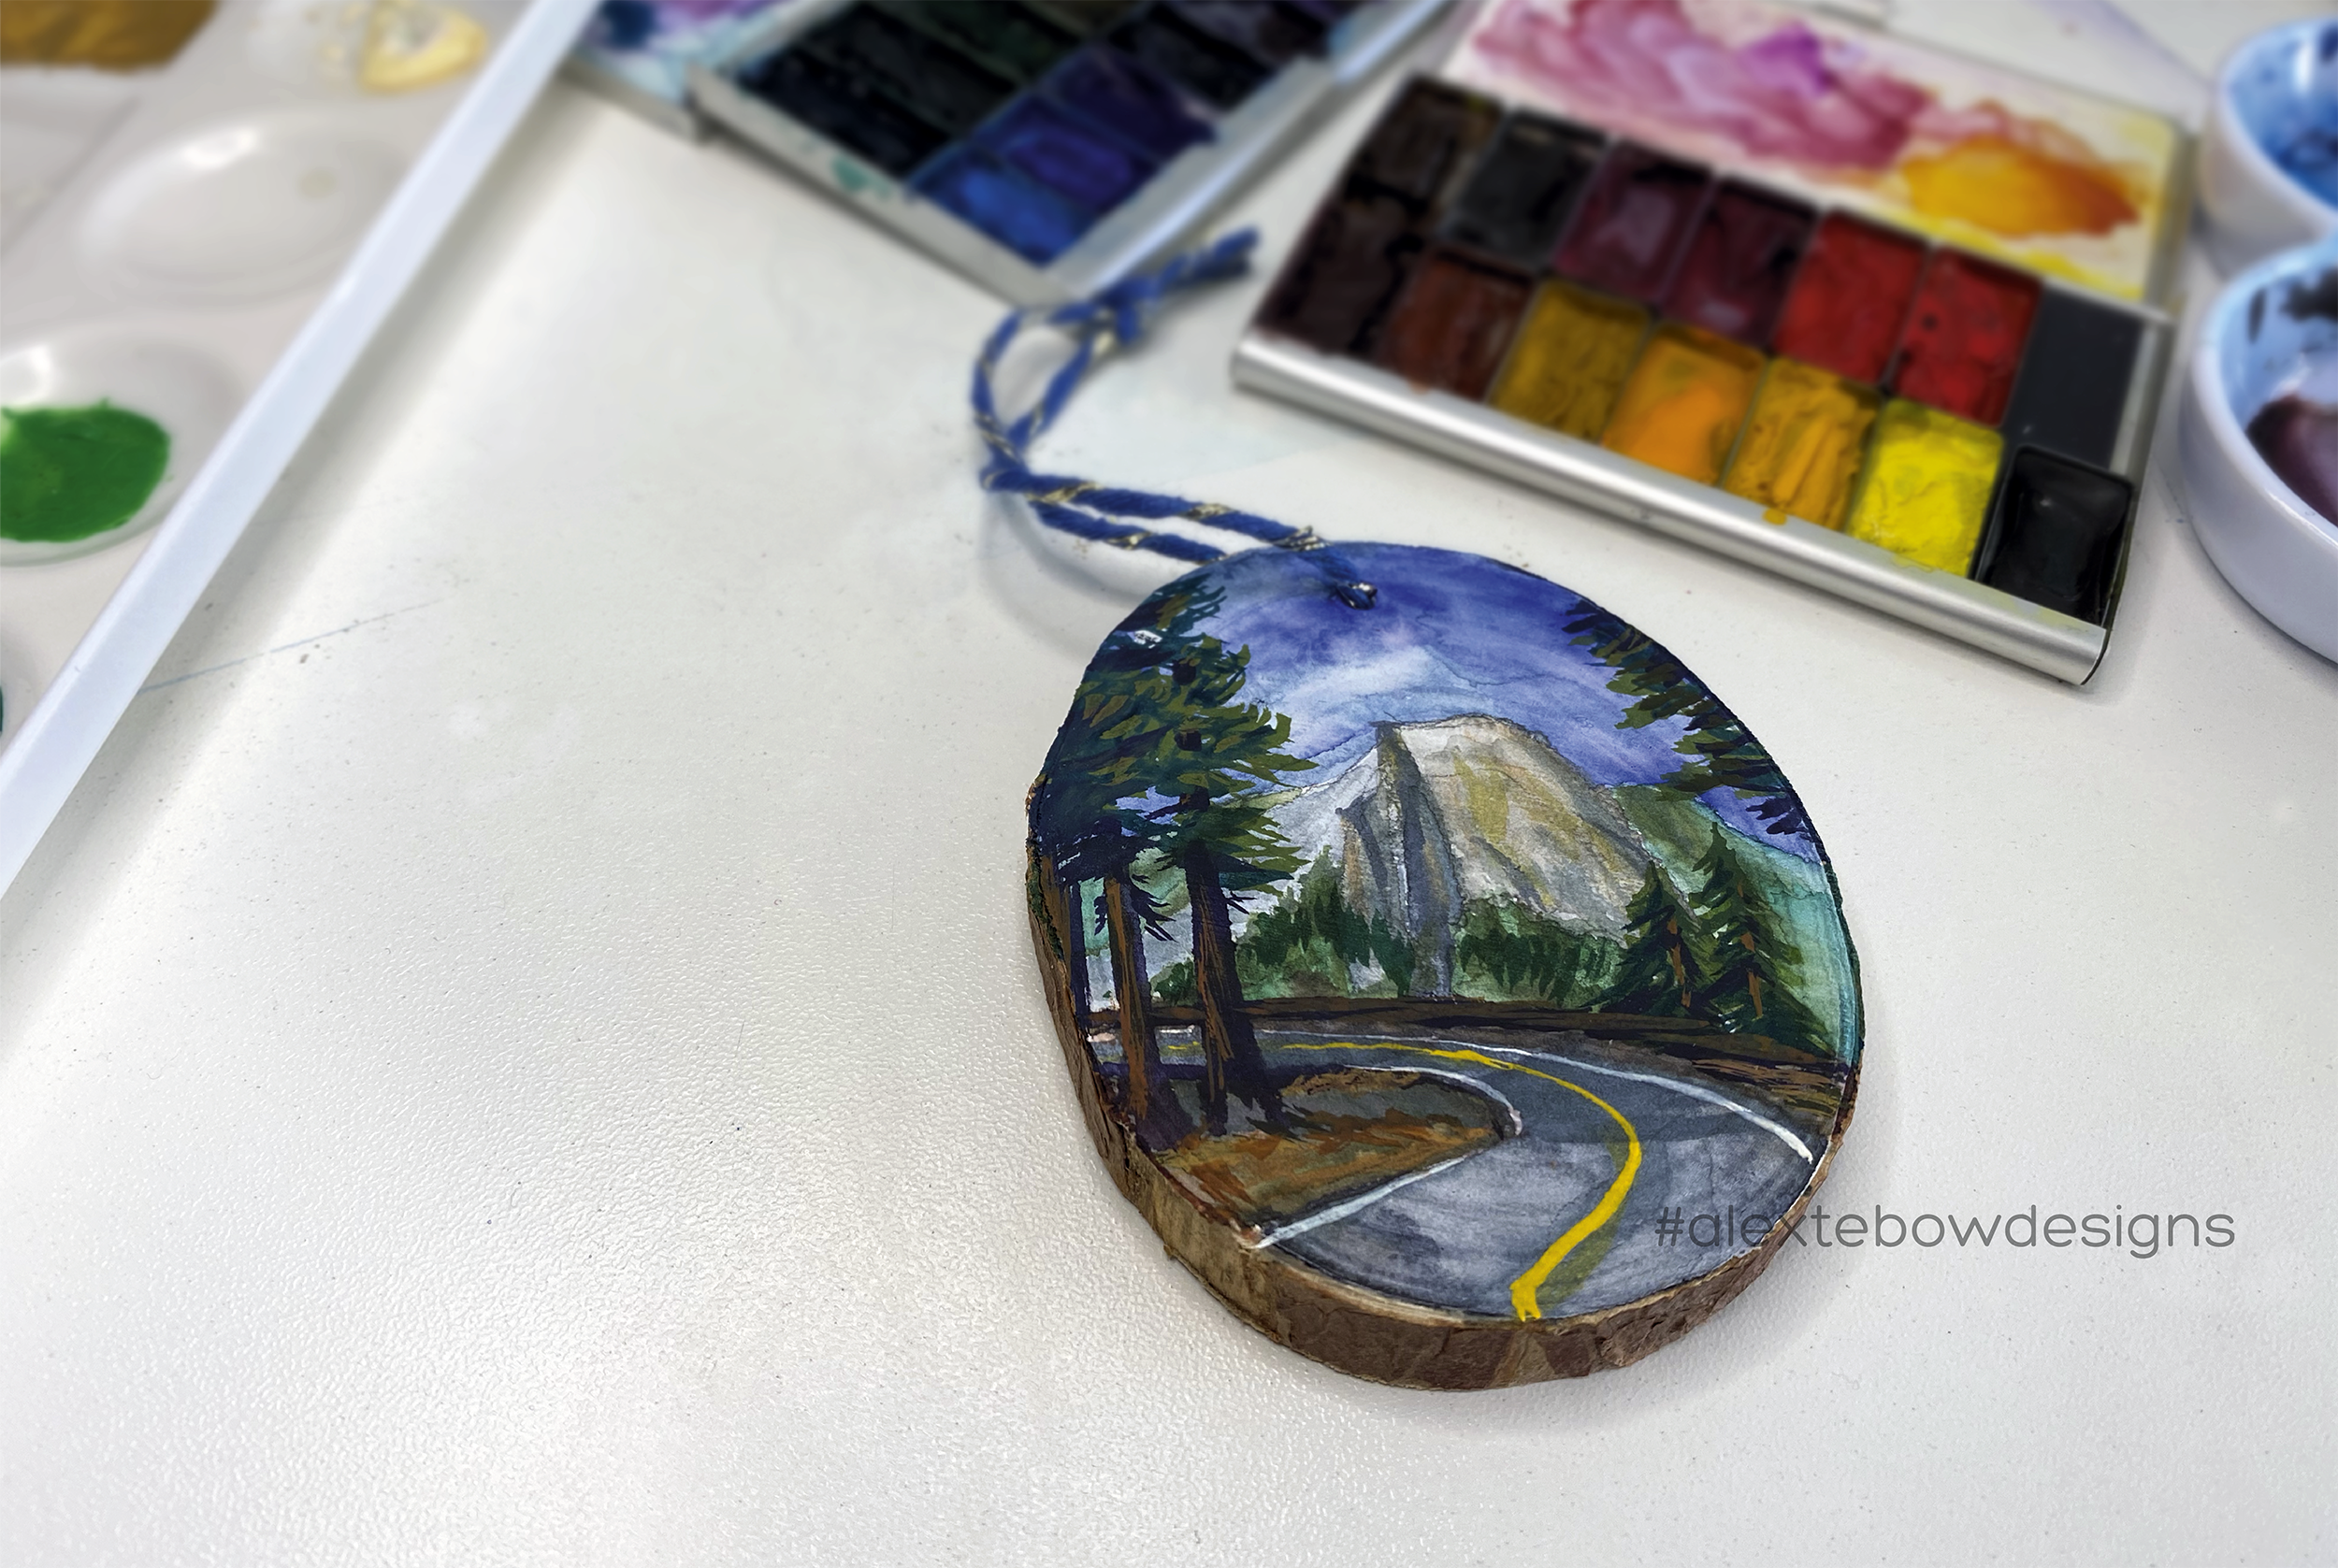
Of course I had to paint one wood piece to see how it would turn out and made this little painting of Half Dome from Yosemite National Park. I LOVED how it turned out. The medium doesn’t behave exactly like watercolor paper, but it’s close enough to make for some fun little paintings. On this one I used a combination of watercolor, gouache, and water-based brush pens. I made a TikTok video showing this process that you can see here.

Painted Wood Ornaments

I had so much fun with that first ornament that I had to make another one… or a couple more.

Joshua Tree Nat'l Park Painted Ornament

This time I tried for an epic sunset at Joshua Tree National Park. With the sunset I tried harder to get more of the look of a watercolor wash. The paint doesn’t blend quite as well as it does on paper, but I was happy with what I was able to achieve. Then I used gouache and brush pens for the trees and foreground. What a fun and unique park to explore! Here’s is the TikTok video I made of the process.

Hand-painted Ornament Green Parrots

The next one I did was a Christmas gift for my son’s 2nd grade teacher. She has two parrots and my son had the genius idea to paint her beautiful birds onto one of these ornaments. He sent her an email asking which breeds they are (Blue Fronted Amazon and Solomon Island Eclectus) and she sent him a few photos. I was more than happy to paint them onto the little piece of wood and he wrote his name on the back. You can view the TikTok video here.

Babylon Arch Painted Ornament

The next ornament I made for my sister of Babylon Arch. She and I hiked to this beautiful arch in southern Utah last year while we were both on a women’s retreat. It’s such a magical place with beautiful views of the Virgin River and gorgeous Navajo sandstone. For this ornament I used gouache for the whole thing. It’s been fun to re-remember how to use gouache, get the right consistency, and how to layer to get the affect I want. Here you can view the TikTok video.

Coyote Gulch Ornament

For the last ornament I made this year, I made this scene from Coyote Gulch for my friend Michelle. She and I, along with another rad woman, backpacked to Coyote Gulch this past spring. I wrote a long blog post about it earlier this year. The third night of our trip, we camped under this alcove and it was such an epic camping spot. Here’s the TikTok showing this ornament’s progress.

Making these ornaments has been such a joy this fall that I'm planning to order more wood slices and then spend the spring and summer next year painting a stock of them that I will sell online and locally. I am hoping to get into some local arts and crafts fairs and festivals next year selling prints and stickers, so maybe I can sell some of these ornaments there too.

What are some epic locations you’d like to see painted on an ornament?